
This DIY moulding accent wall is the perfect way to add character to a plain room. My bedroom needed a traditional accent wall. Yes NEEDED. I love wall molding. I’m not much of a person who loves art. I’d rather make a trim wall than hang art. Last year, the bedroom got so UGLY when my son Shaun continued to co-sleep and I had to get rid of the frame (just in case he rolled off!). I just had a mattress on the floor. We finally moved him to the bunk bed, and now it’s time to reclaim this space! My master bedroom is a smaller room, as I live in a townhome. But I knew I could make this space look much more luxurious without a lot of money.
Update: I loved this DIY moulding accent wall design so much that I replicated a similar design in my living room, only it’s MORE details. Check out my living room DIY moulding wall tutorial.

Recently, wood accent walls have become increasingly popular. They are an easy DIY project that most beginners can accomplish. There are so many options: shiplap, a herringbone pattern. I considered a board and batten accent wall in my master bedroom, but then I saw this style of wall from @inhonorofdesign. I was smitten. A perfect mix of classic and modern. There are not right angle cuts, but it’s pretty easy because the shapes all all repetitive. I also debated whether to paint dark walls (like a darker green color) or leave it white. Both are such stylish looks!
What you need
- Mitre saw
- Measuring tape
- Clamp
- Level (or use a level app)
- Picture frame molding. I used 10 boards of these (8ft long each)
- Ladder
- Nail gun and 1 1/4″ brad nails
- Caulk
- Dap Drywall filler
- Scrap cloth
- Sandpaper
- Paint
Step 1 – Plan Your DIY Moulding Accent Wall
It’s a good idea to draw out the trim work design on paper, especially this one as it has unusual geometric shapes. I did mine on paper, but if you’re unsure of spacing, use inexpensive painter’s tape to see the scale of the design. This is based on my wall: 145″ wall width and 9ft high. Please adjust based on your wall. All measurements are to the long edge of the cuts. You will need to do some high school math to figure out the size of all your cuts

Here’s the math
I’ve included the measurements of my trim pieces to help guide you:
What you need to know:
– the length of the room (145″)
– the height of the room (108″)
– the number of boxes you want to make (30)
– the spaces between the boxes (8″)
– the space between the ceiling and top of the box (6″)
– the space between the floor and the bottom of the box (6″)
– the length and height of the step design (6″)
1. Determine the height of the box
Height of the room – (space between ceiling and top box) – (space between the floor and bottom of the box) – (the height of the step x 2)= height of the box
108-6-6-(6×2) =84″
2. Determine the length of the horizontal pieces
The length of the room – (the spaces between the boxes x (the number of boxes you want to make + 1)) – ((the length of the step x (number of boxes x 2)) / the number of boxes= length of the horizontal pieces
145- ((8x (3+1)) – (6x3x2) / 3
145 – (8×4)-(6×6) / 3
77/3 = 25.6
I rounded to 25.5 because it’s a lot easier to cut
Cut list for this moulding accent wall
- A- 6 trapezoid pieces that were 84″ long with 45˚ angles
- B- 6 trapezoid pieces that were 25.5″ long with 45˚ angles
- C- 12 parallelogram pieces that were 6″ long with 45˚ angles
- D- 12 parallelogram pieces that were 6″ long with 45˚ angles (opposite angles from C)

Step 2 – Cut All the Decorative Trim Boards
Once you have your cut list, the first thing to do is to make all your cuts. I cannot stress enough how important it is to make sure that each set is the exact same size. Don’t measure and cut. No!! They won’t be perfect. The best way to get the boards to the exact same is to use a stop block!
A stop block is a clamped off block that every since piece nudges up to to ensure they are all the same size. See the image below on how to set up your stop block. Make sure to label the back of the pieces so you don’t get confused when you take all the pieces back to your bedroom
Having a mitre saw that you can cut mitre angles on both sides is very helpful. A mitre cut is achieved when you set your saw to 45-degree angles. I didn’t have one, so I had to flip over the pieces when making the trapezoid shapes.
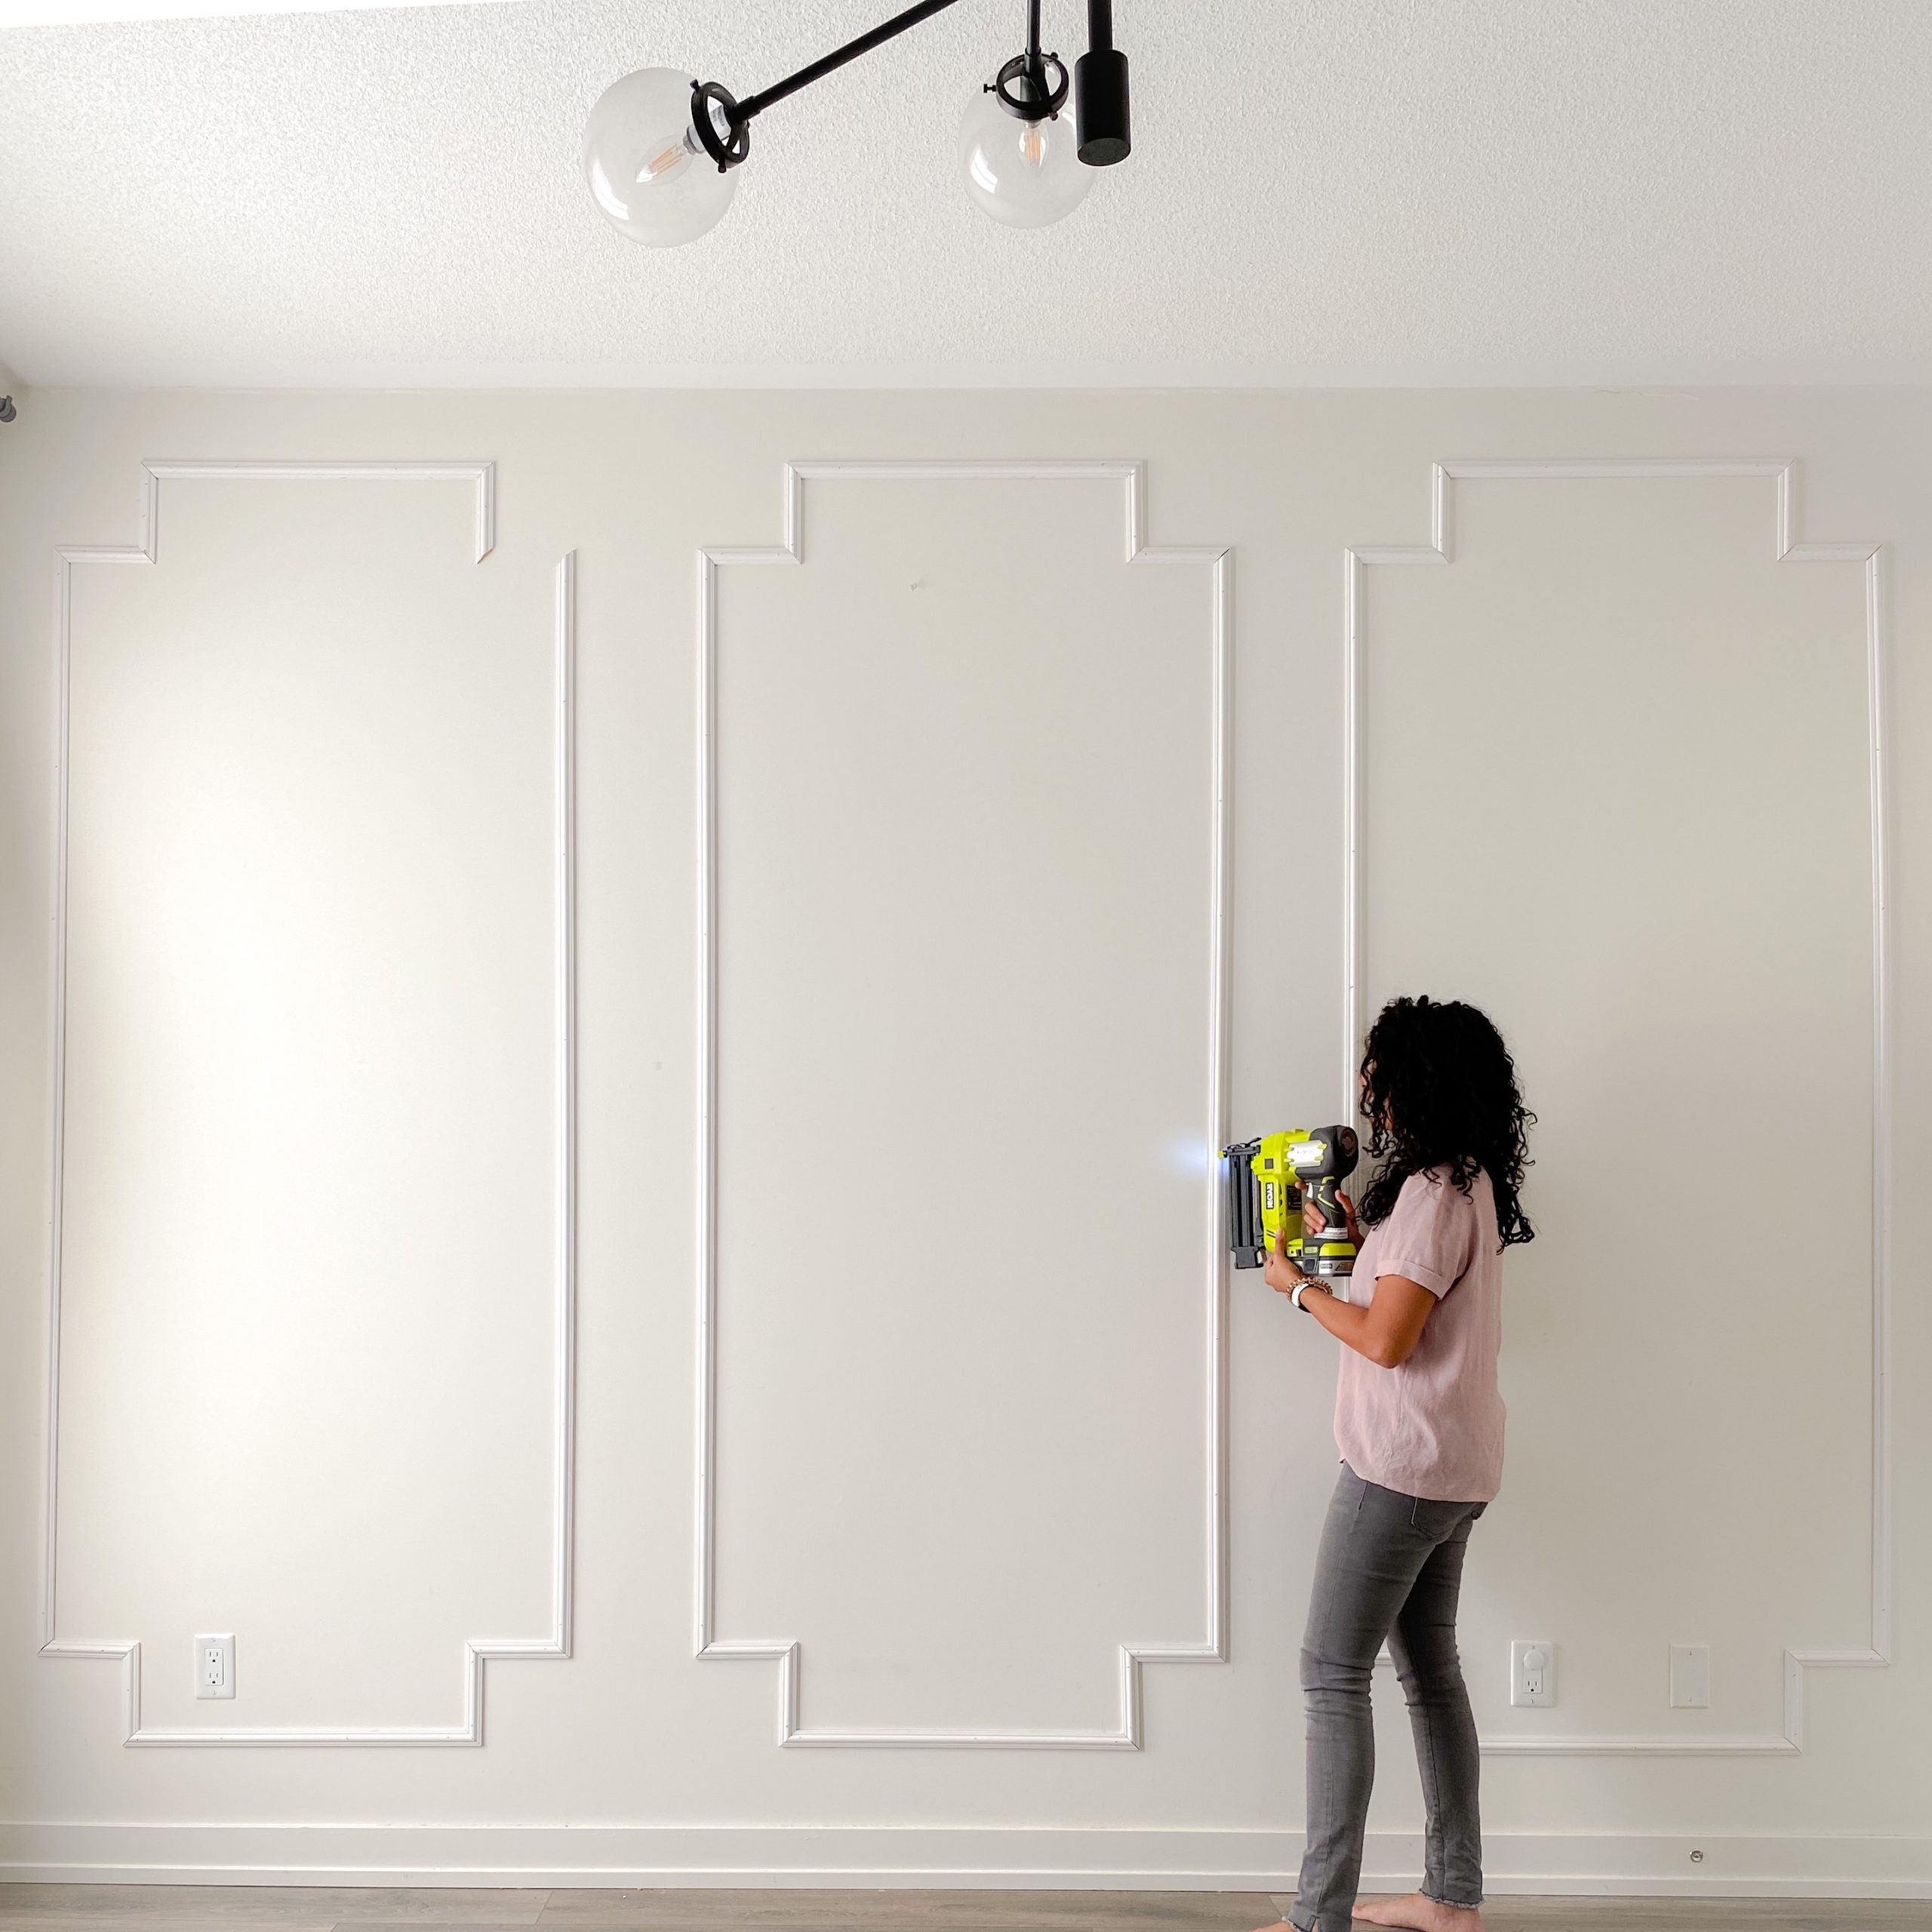
Step 3 – Start Building your Primary Bedroom Feature Wall
I drew the lines for the first few pieces of the feature wall, using a level and a light yellow pencil crayon so that the markings could be easily painted over. I used my tape measure to start my design 8″ from the inside edge of the wall. This is so that you could still see the trim with the curtains fluffed out. Use a level and place your first piece of trim in place. I used a cordless brad nailer because I don’t want to trip over an air compressor while I’m on a ladder. Set the nail gun so the nails will shoot below the surface of the MDF trim. I found the easiest way to build the box is as follows: start by nailing the bottom horizontal boards. Next, attach the smaller moulding trim pieces. Then, attach the vertical boards, then the top of the design.

Use a level on every single piece. I even used a level app to get into the small spaces. Nail in at each edge and middle of each piece of trim. I didn’t have a laser level, but if you’ve got one, it will be easier. What Not to Do: Contrary to popular opinion, I avoid the following 2 things to make my project much more professional 1 – I don’t use construction adhesive in case I change my mind and want to remove the molding. Then, all my drywall will come off the wall with the trim! Imagine having to re-drywall. It’s not a DIY I want to tackle in my future. 2 – I do not use a stud finder to find the studs. You trim pieces are so lightweight that they do not need to go into studs. Later, I added caulk and that acts as another way to adhere the trim to the wall.

Step 4 – Considerations for Spacing Out Your Moulding Boxes

I built the two outside panels first. Then I built the middle box. I built the 2 outsides boxes first to make sure it is in the right place- the centre of the wall. By building the centre box last, you can adjust the spaces between the boxes in case there were any errors in measuring
Tip: don’t nail the top edge of one of the long vertical trim moulding. You will need to squeeze it in to close any small gaps (I was 1/4 inch off but I was able to squeeze in the 7ft piece). Then I nailed it in place, making the perfect mitred seam. I don’t like to use liquid nails in case I want to change the design in the future. When taking down boards with liquid nails, the drywall would be damaged also peel up the wall.
Step 5 – Give Your Accent Wall a Professional Finish
The next step is all the finish work. The finishing touches are so important. This is where you go from amateur DIYer to professional contractor! If there are any nail holes sticking above the surface of the trim, use a nail punch and mallet to get the nail below the trim surface. You need to fill all the nail holes with wood filler filler. I use LESS filler and wipe off after a few min. That way I don’t have to sand. It’s really hard to sand, especially on rounded decorative trim.

Caulk the seams. Make sure the tip of your caulk is cut as small as possible. Run the caulk and then wipe off excess with a damp finger. You will close up the gaps between the wall and trim an get a smooth finish along the edges of the trim. Use a baby wipe to wipe off any excess caulk
Step 6 – Paint the trim of your DIY Moulding Accent Wall
I used the same paint color as the wall paint. It’s the color from our home builder, so I don’t know the exact shade, but it’s in a satin finish. Although the trim was primed, going the extra step to paint it, really makes it pop. I painted 2 coats, with a 2″ paint brush.
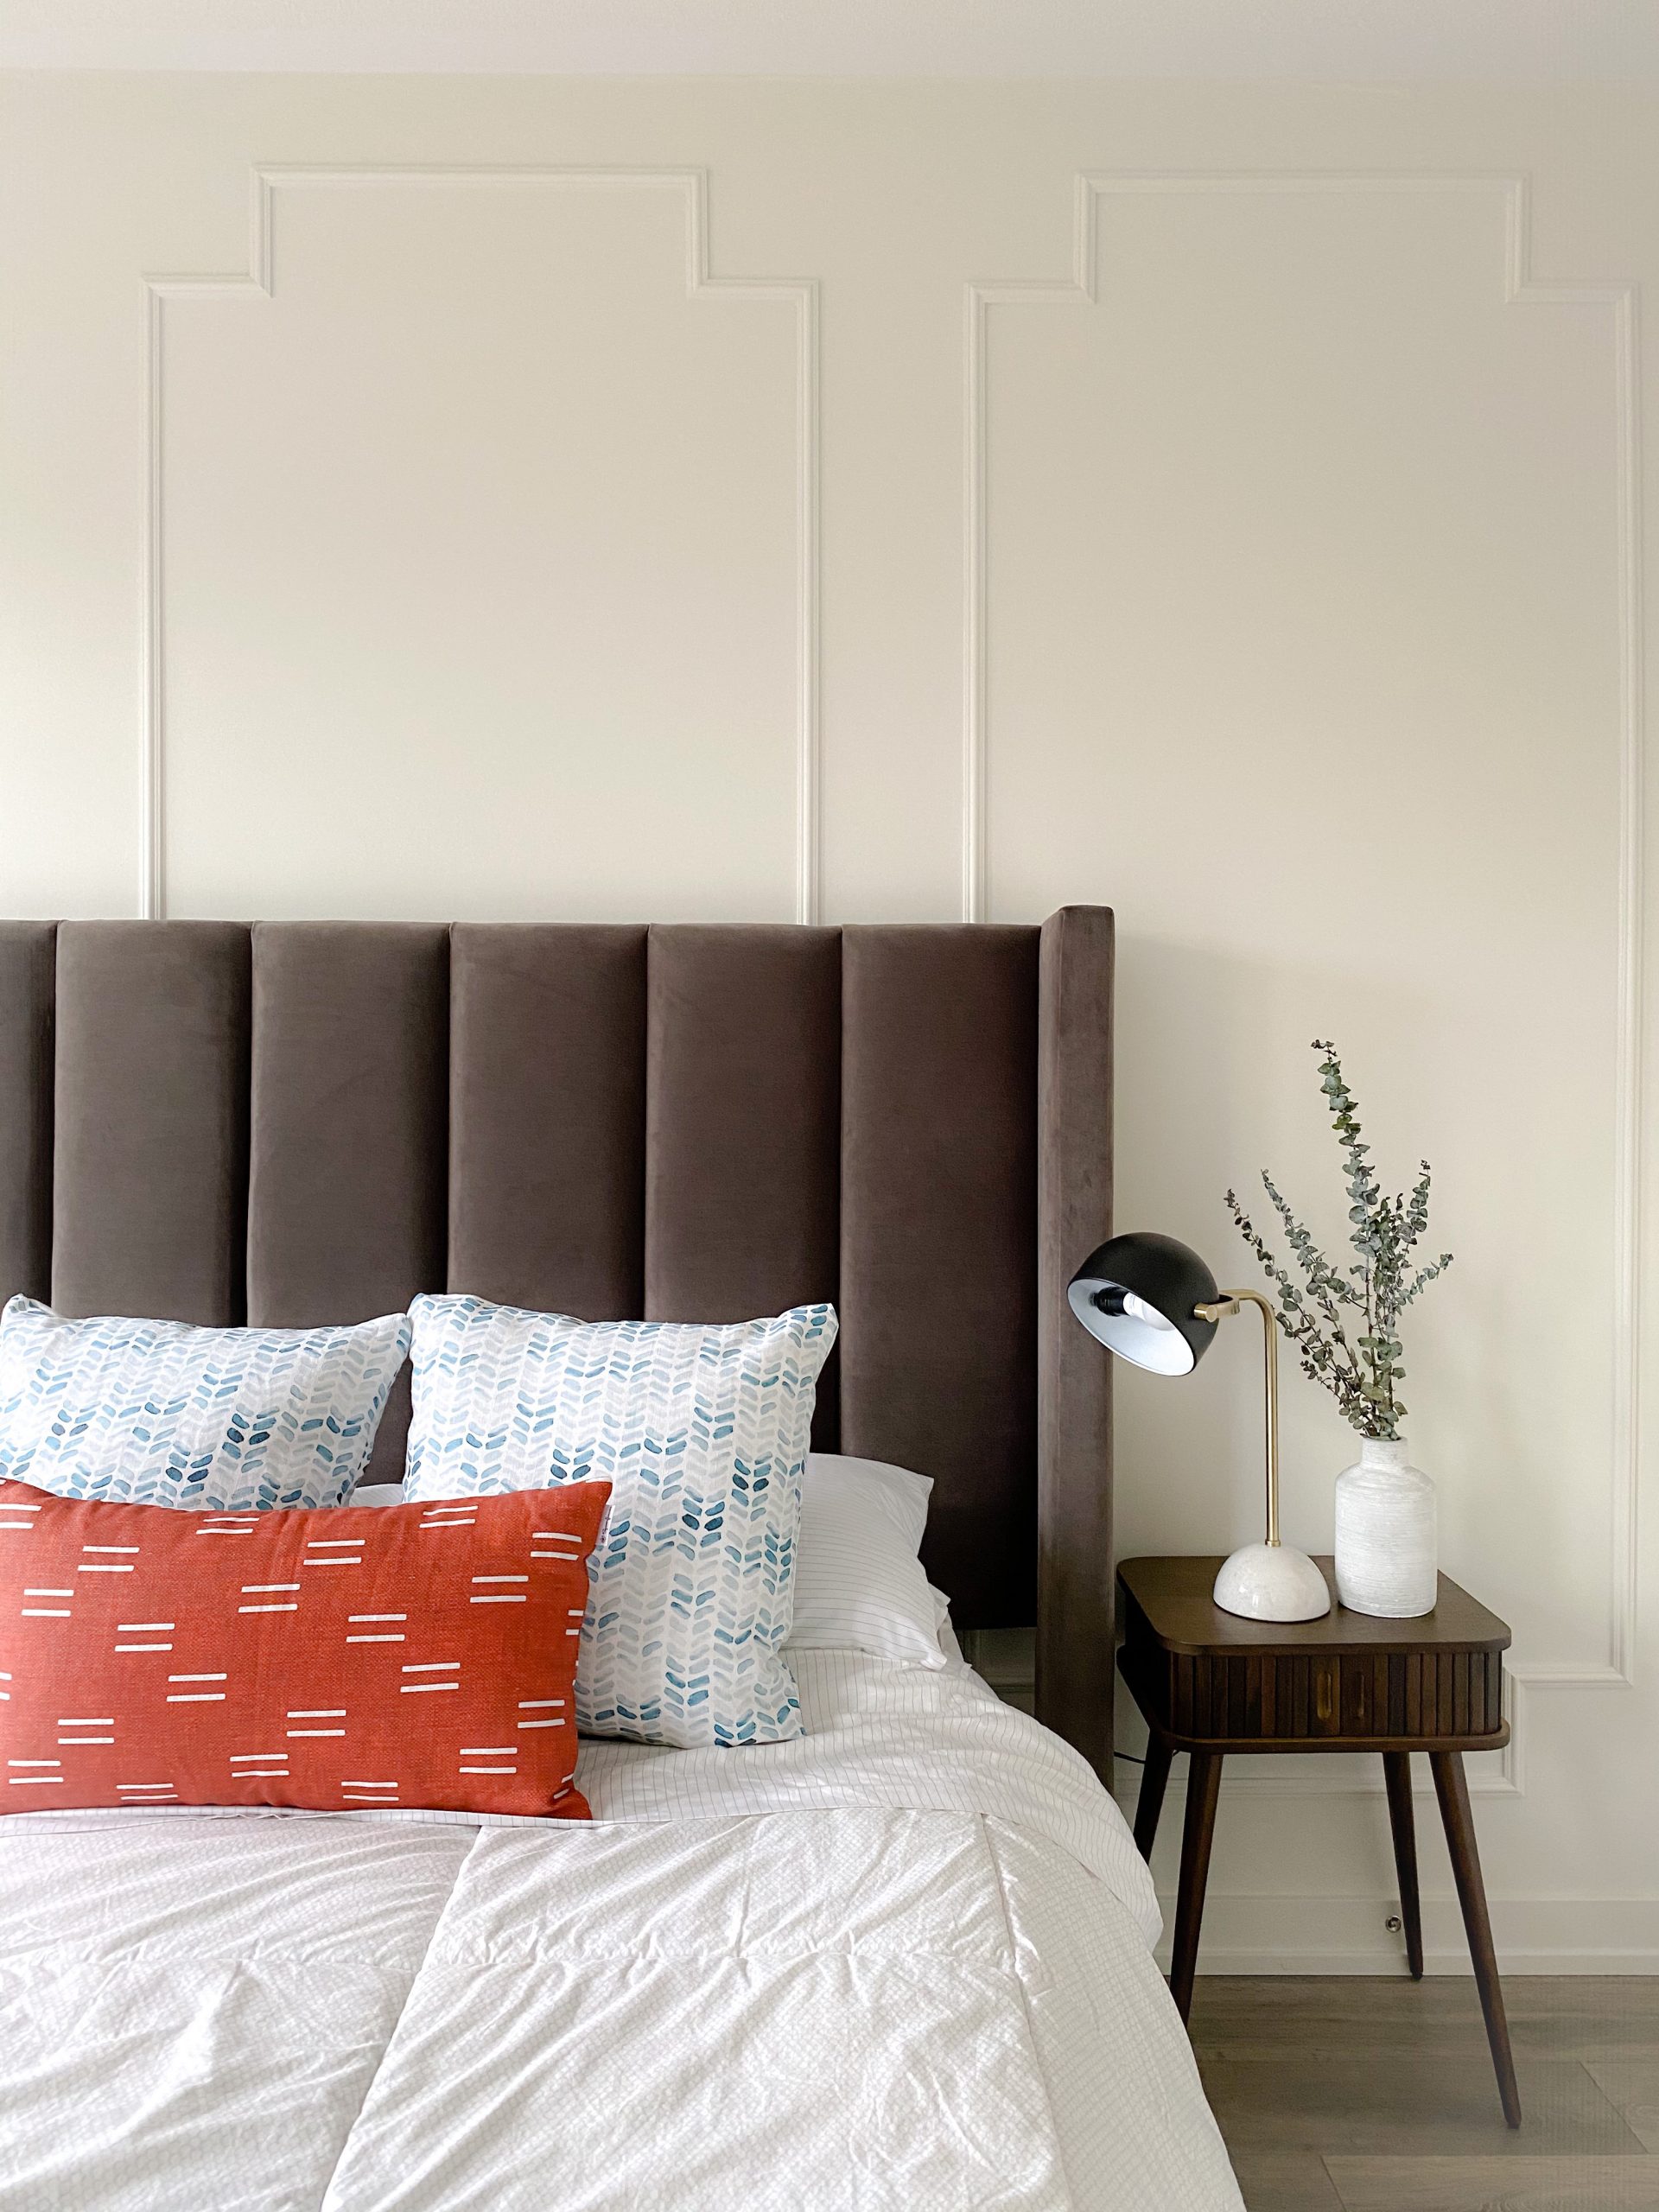
The Reveal: Started From the Bottom, Now we are HERE
Remember this used to be a blank wall! The best part is that I created this for about $120 in trim. It’s a budget-friendly way to update your bedroom interior design. Plus, it’s a great way to become familiar with using a saw and brad nailer. The entire process took me 5 hours to complete. I did a very similar design on my long family room wall, with an added detail of a simple box around the design. You could also take this design around the entire room, in a family room, or dining room. A DIY Moulding Accent wall is one of my favourite ways to create a focal point of the room. Some of my IG community members suggested that I add artwork or a gallery wall, but for me, this feature wall idea is perfect.
If you try this project, I would LOVE to see it! You can connect with me daily on instagram!

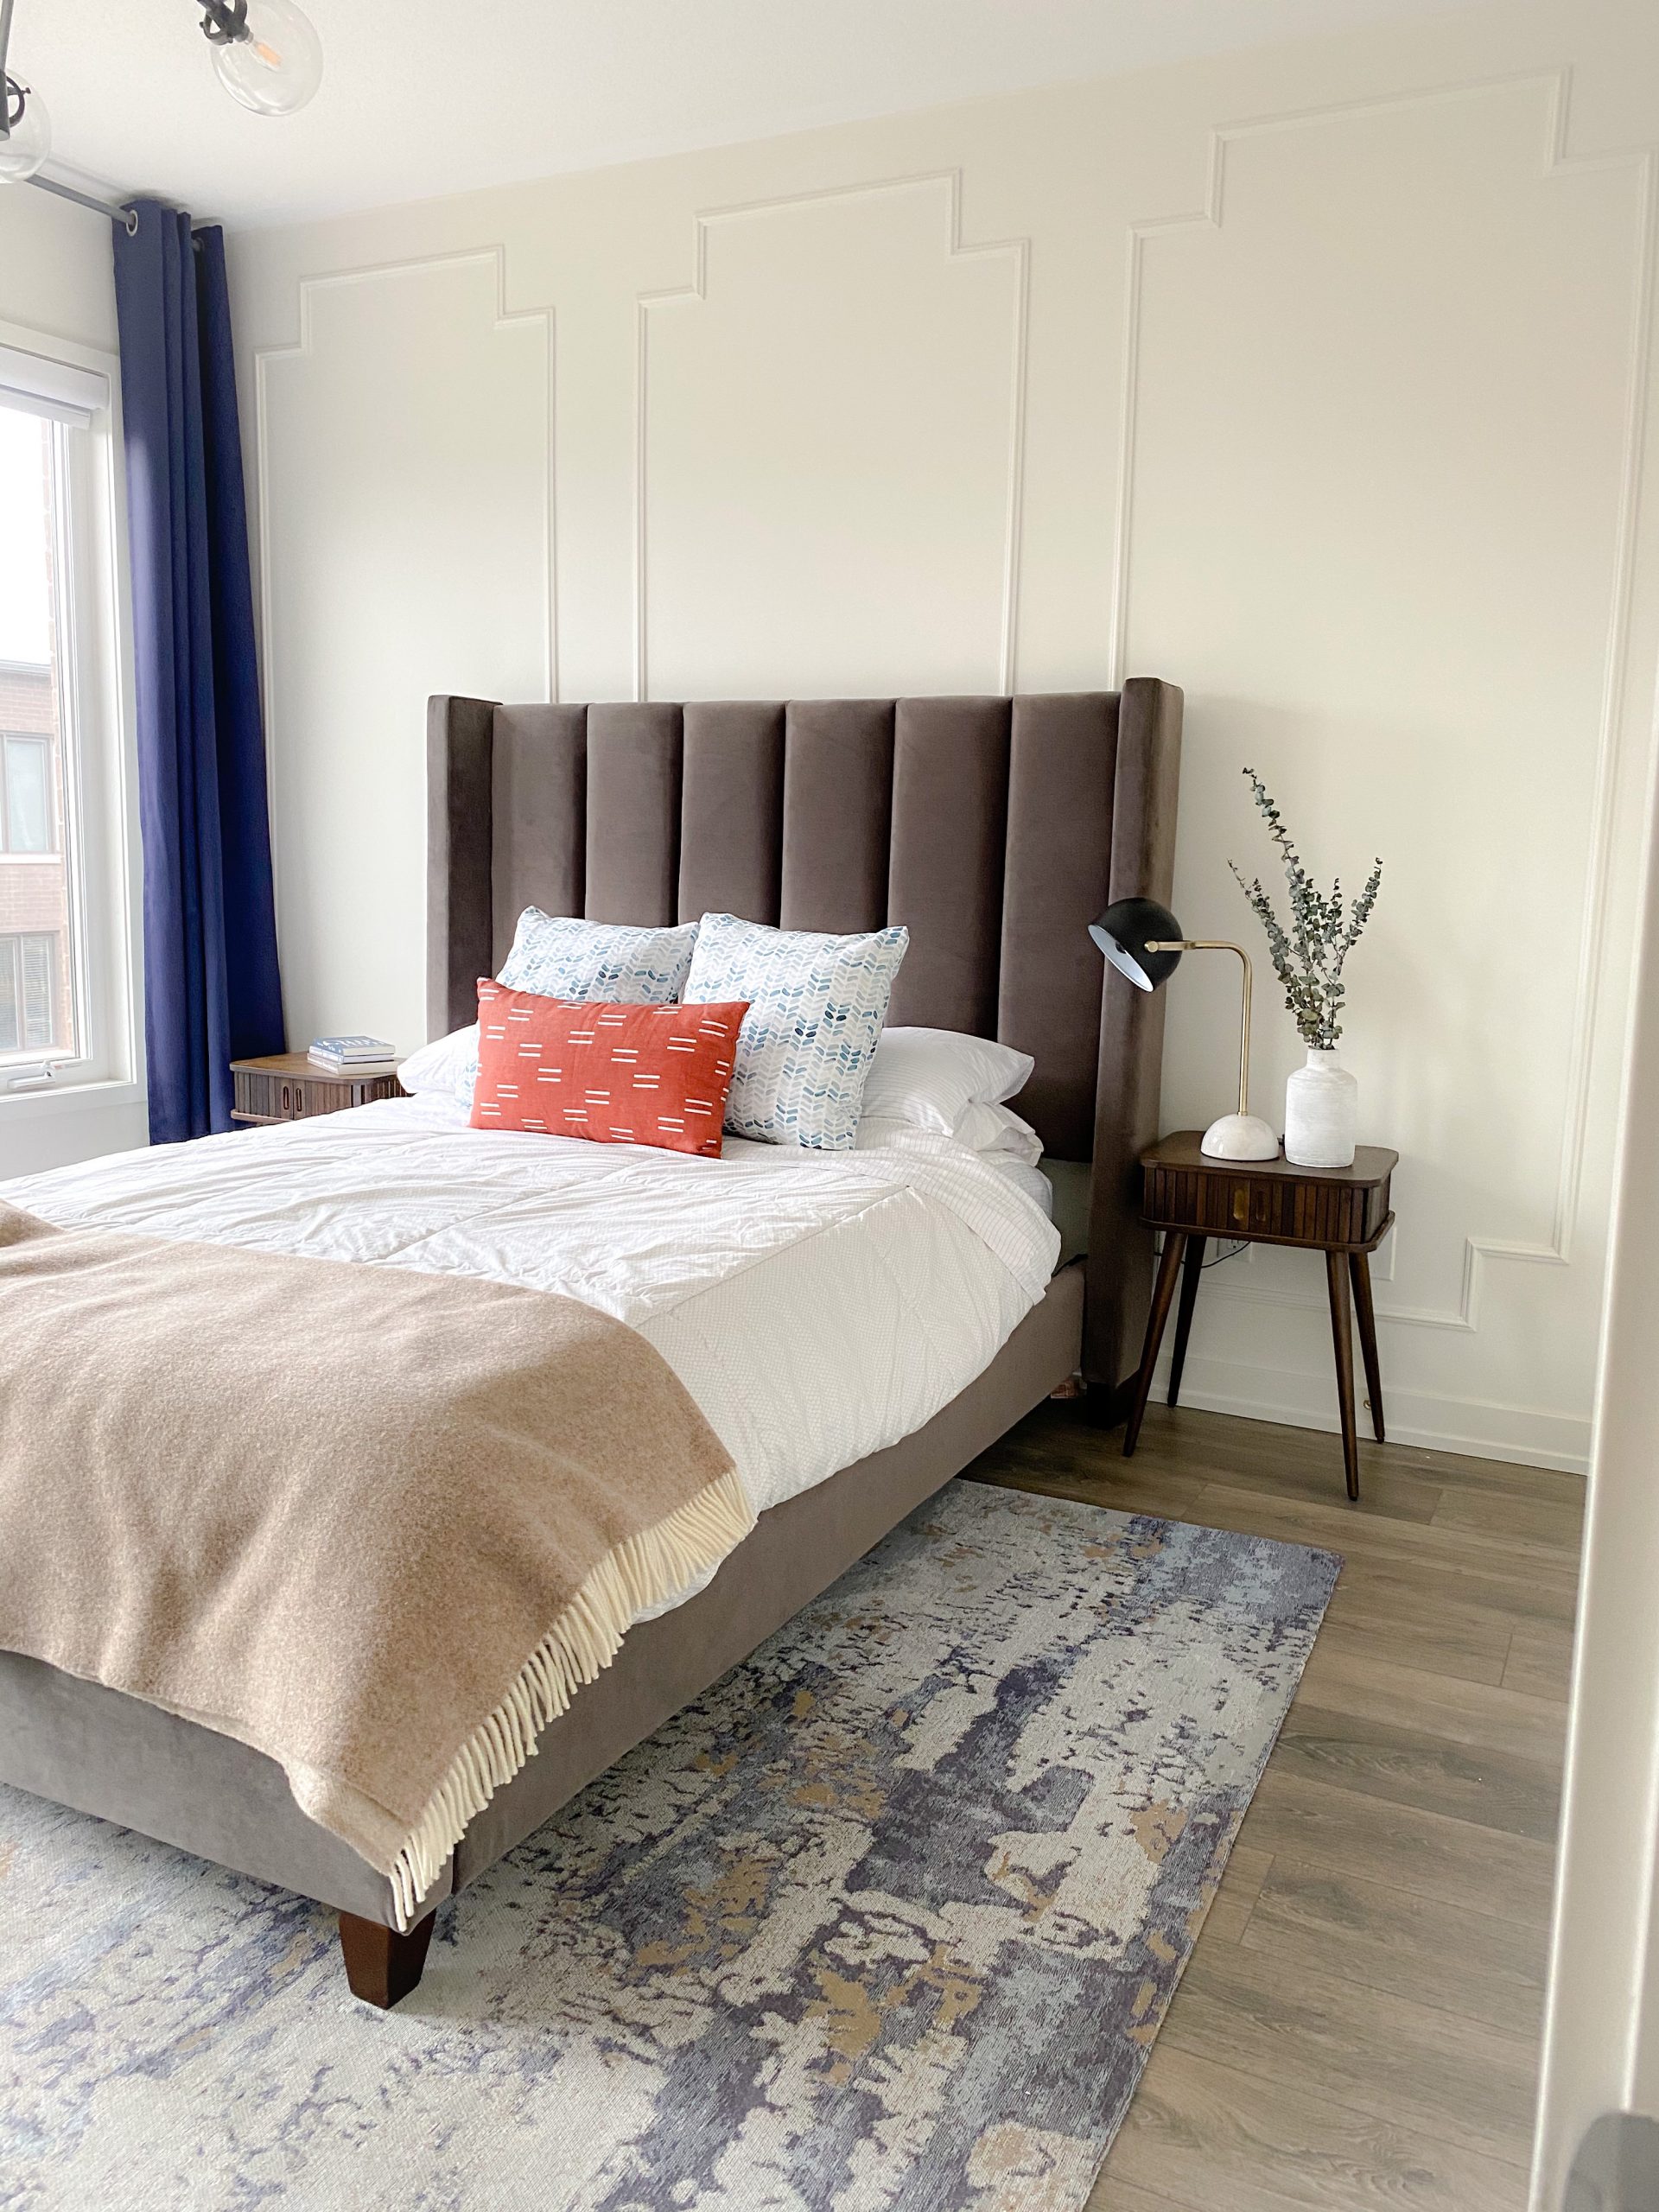
Update: How my bedroom has evolved
Dec 2022: Over the last few years, I’ve really transformed this space. Here’s a walk down through this space came together.


My bedroom ready for the holidays!


I recently swapped the rug, and added these DIY nightstands. I think the space is much more like ME, although it took 2 years to get here!

Pingback: How to create an accent wall that wows - Hana's Happy Home
Pingback: Elevated Hallway Board and Batten Makeover - Hana's Happy Home
Pingback: DIY picture frame wainscoting accent wall - Hana's Happy Home
Pingback: Entryway DIY Board and Batten Wall - Hana's Happy Home