
This is a DIY faux fireplace tutorial with an electrical fireplace insert. I’m going to break it down step by step for you. If I did this while 9 months pregnant, any beginner can build an electric fireplace frame!
When I was a kid I loved my parents fireplace. I would spend hours sitting in front of fireplace talking to my parents, doing homework, reading, you name it! I recently gave their fireplace an update with peel and stick tiles.
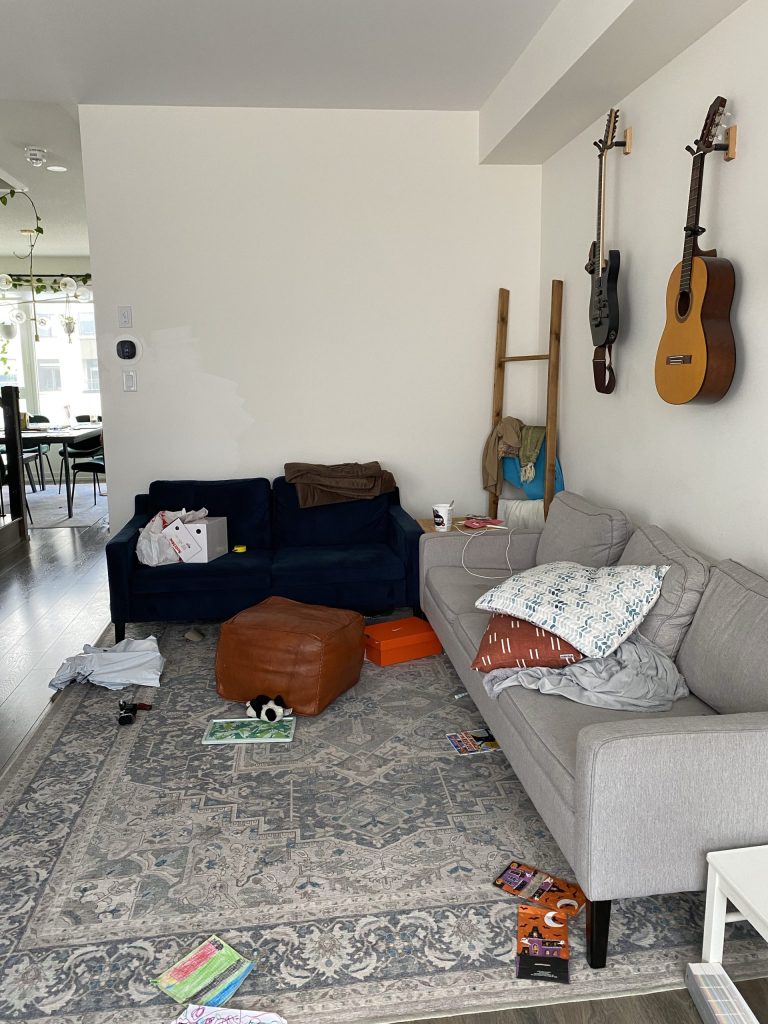
Our small home did not have a fireplace but I really wanted to build one. Unfortunately this urge came to me when I was 9 months pregnant. I just imagined my baby hanging out in the living room, in front of the fireplace all cozy and warm. I began by looking at some options on Facebook marketplace to re-purposed an old fireplace. A DIY fireplace makeover would be quick and easy and only requiring a fresh coat of paint but, because the fireplace wall was so small (8ft across) I couldn’t find some thing that would be a good scale. My husband being a trooper that he is convinced me that we should build it ourselves.
This blog post will tell you everything you need to know to build a fireplace. However, if you’re looking for how to build a beautiful accent wall, I also have a two-part tutorial.
Table of contents
What type of fireplace should I buy?
There are so many different types of fireplaces. If your home does not have an existing fireplace, a good option is an electric fireplace. An electric fireplace is like a space heater. There are a few different types of fireplaces. If you want one that you can build a frame around you need to purchase one called a fireplace insert. A wall-mounted fireplace is not safe with a frame built around it.
The shape of fireplace
You also need to think about the look of your fireplace. There are modern fireplaces that are longer versus a more traditional fireplace.
The size of the fireplace
In my case, I knew that because my wall is small, I needed a smaller fireplace. You can get a bigger fireplace if you have more space and want a more grand effect. Mine is 33″ wide.
What’s inside your fireplace
The fireplace can come with stones, pebbles, ice rocks, or traditional logs. It can also change many different colours from green red blue and so on. I chose a more traditional looking fireplace that had logs and it only lights up in a traditional red-orange -yellow colour.
A fake fireplace
You can also DIY a fake fireplace. If you’re looking for a cozy look without the cost or heating element, there are lots of fake fireplace ideas to replace the fireplace insert such as: books, logs, candles, plants, etc.
If you love watching video tutorials, watch my YouTube Video below!
Materials to build my fireplace wall
Power tools
- Mitre saw
- Drill
- Impact driver and drill bits
- Table saw (or have the store cut the pieces)
- Jigsaw
- Multi-tool
- Brad nailer
- Stud finder
- Sander with the 220 grit sandpaper
Materials
- 2×4 lumber in 8ft length. Depending on the size of your fireplace he will need several. I used 8 pieces
- 2 1/2″ wood screws
- Screw bits
- Drill bits
- Faux brick
- Speed square
- A fireplace
- Drywall anchors
- Wood conditioner
- Wood Stain. I used early American
- Drywall compound
- Drywall knife
- Paint brushes
- Primer. I used Sherwin-Williams wood and wall primer
- Paint. I used Sherwin-Williams tricorn black and urban bronze in the emerald line in a satin finish
- Foam rollers
- White caulk
- Black caulk
- Clamps
- Utility knife
- Prybar
- A plank of 2 x12” spruce wood
Step 1: Map out your electric fireplace frame
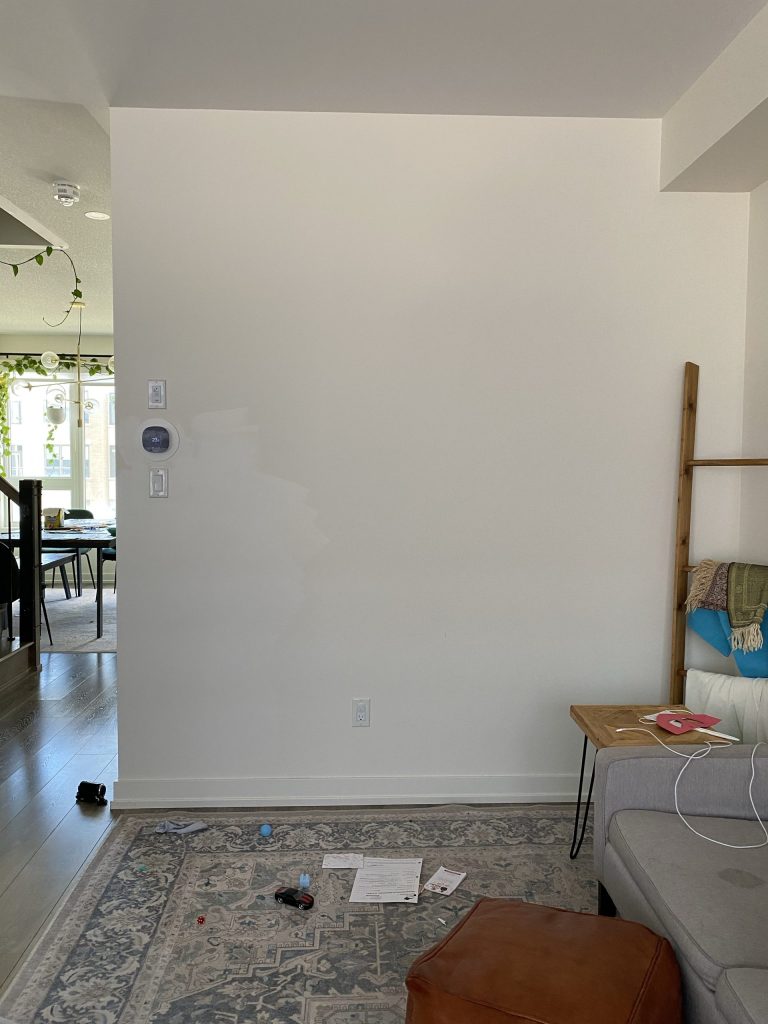
The first step is to map out how big you want your fireplace surround to be and how big you want your fireplace insert to be. My wall is quite small at 8 feet long.
I decided my fireplace would be 12″ deep based on the insert that I picked. With that in mind ensure you have a couple of inches of clearance behind the insert so it can fan out
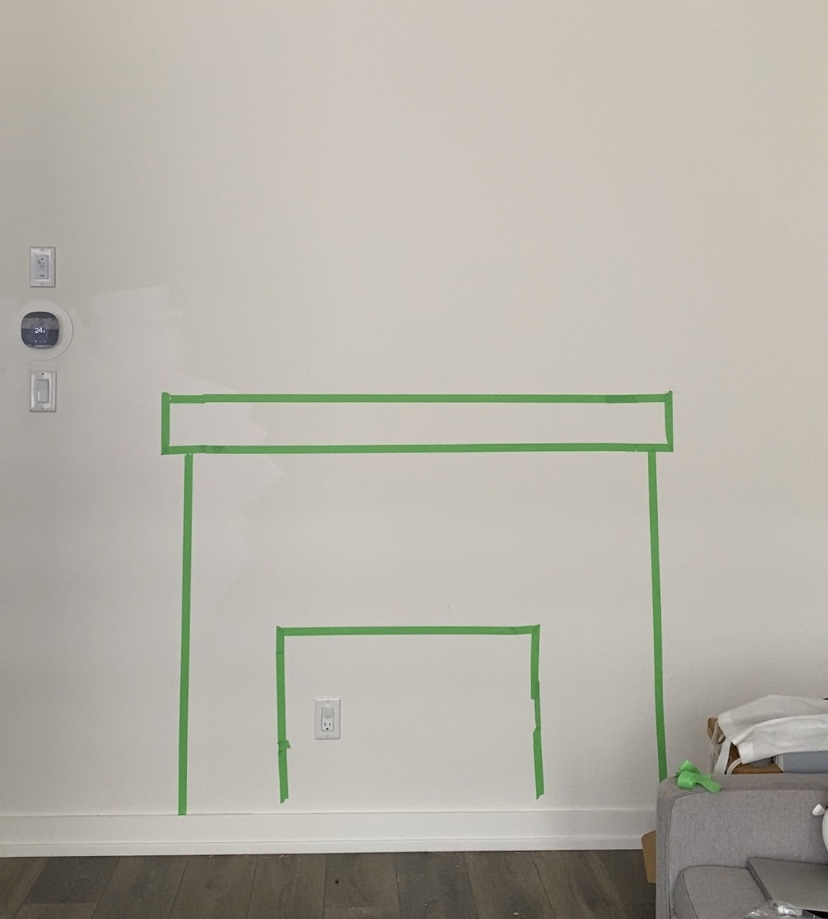
With visualizing in mind, I mapped out a few designs on the wall to figure out what scale would look good. I like using inexpensive painters tape to visualize my designs. I landed on this design.
Step 2: Building your fireplace frame
The frame is built out of three pieces. See below for the images and the dimensions I used.
1. I started out by attaching my shorter 8” pieces to my 44”. Place a speed square into the joint to ensure it’s square. Use a clamp to hold the pieces together, then drill pilot holes, and use the wood screws to join the pieces together. If you’re good with a kreg jig, now is a great time to use it.

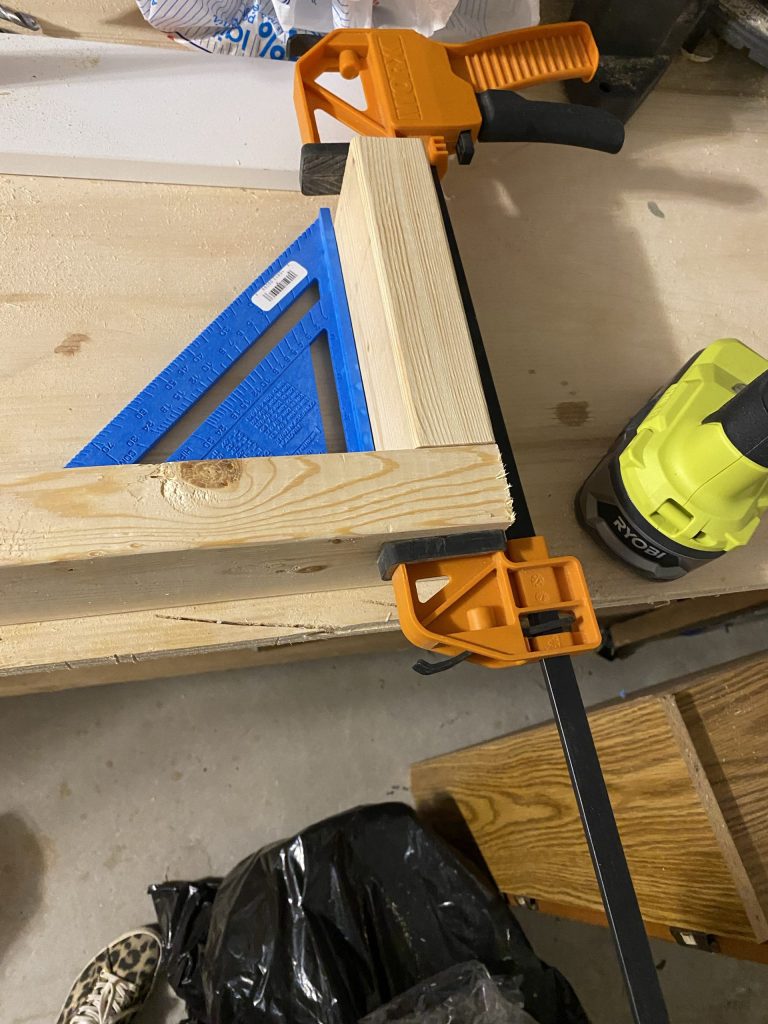
2. Then make an identical piece so you have 2 of them.
Constructing the front frame
3. Time to make the front frame. Before you screw all the pieces together, dry fit them on the floor and place your fireplace insert inside to make sure it fits, and once you’re confident the fit is correct, attach the pieces together.
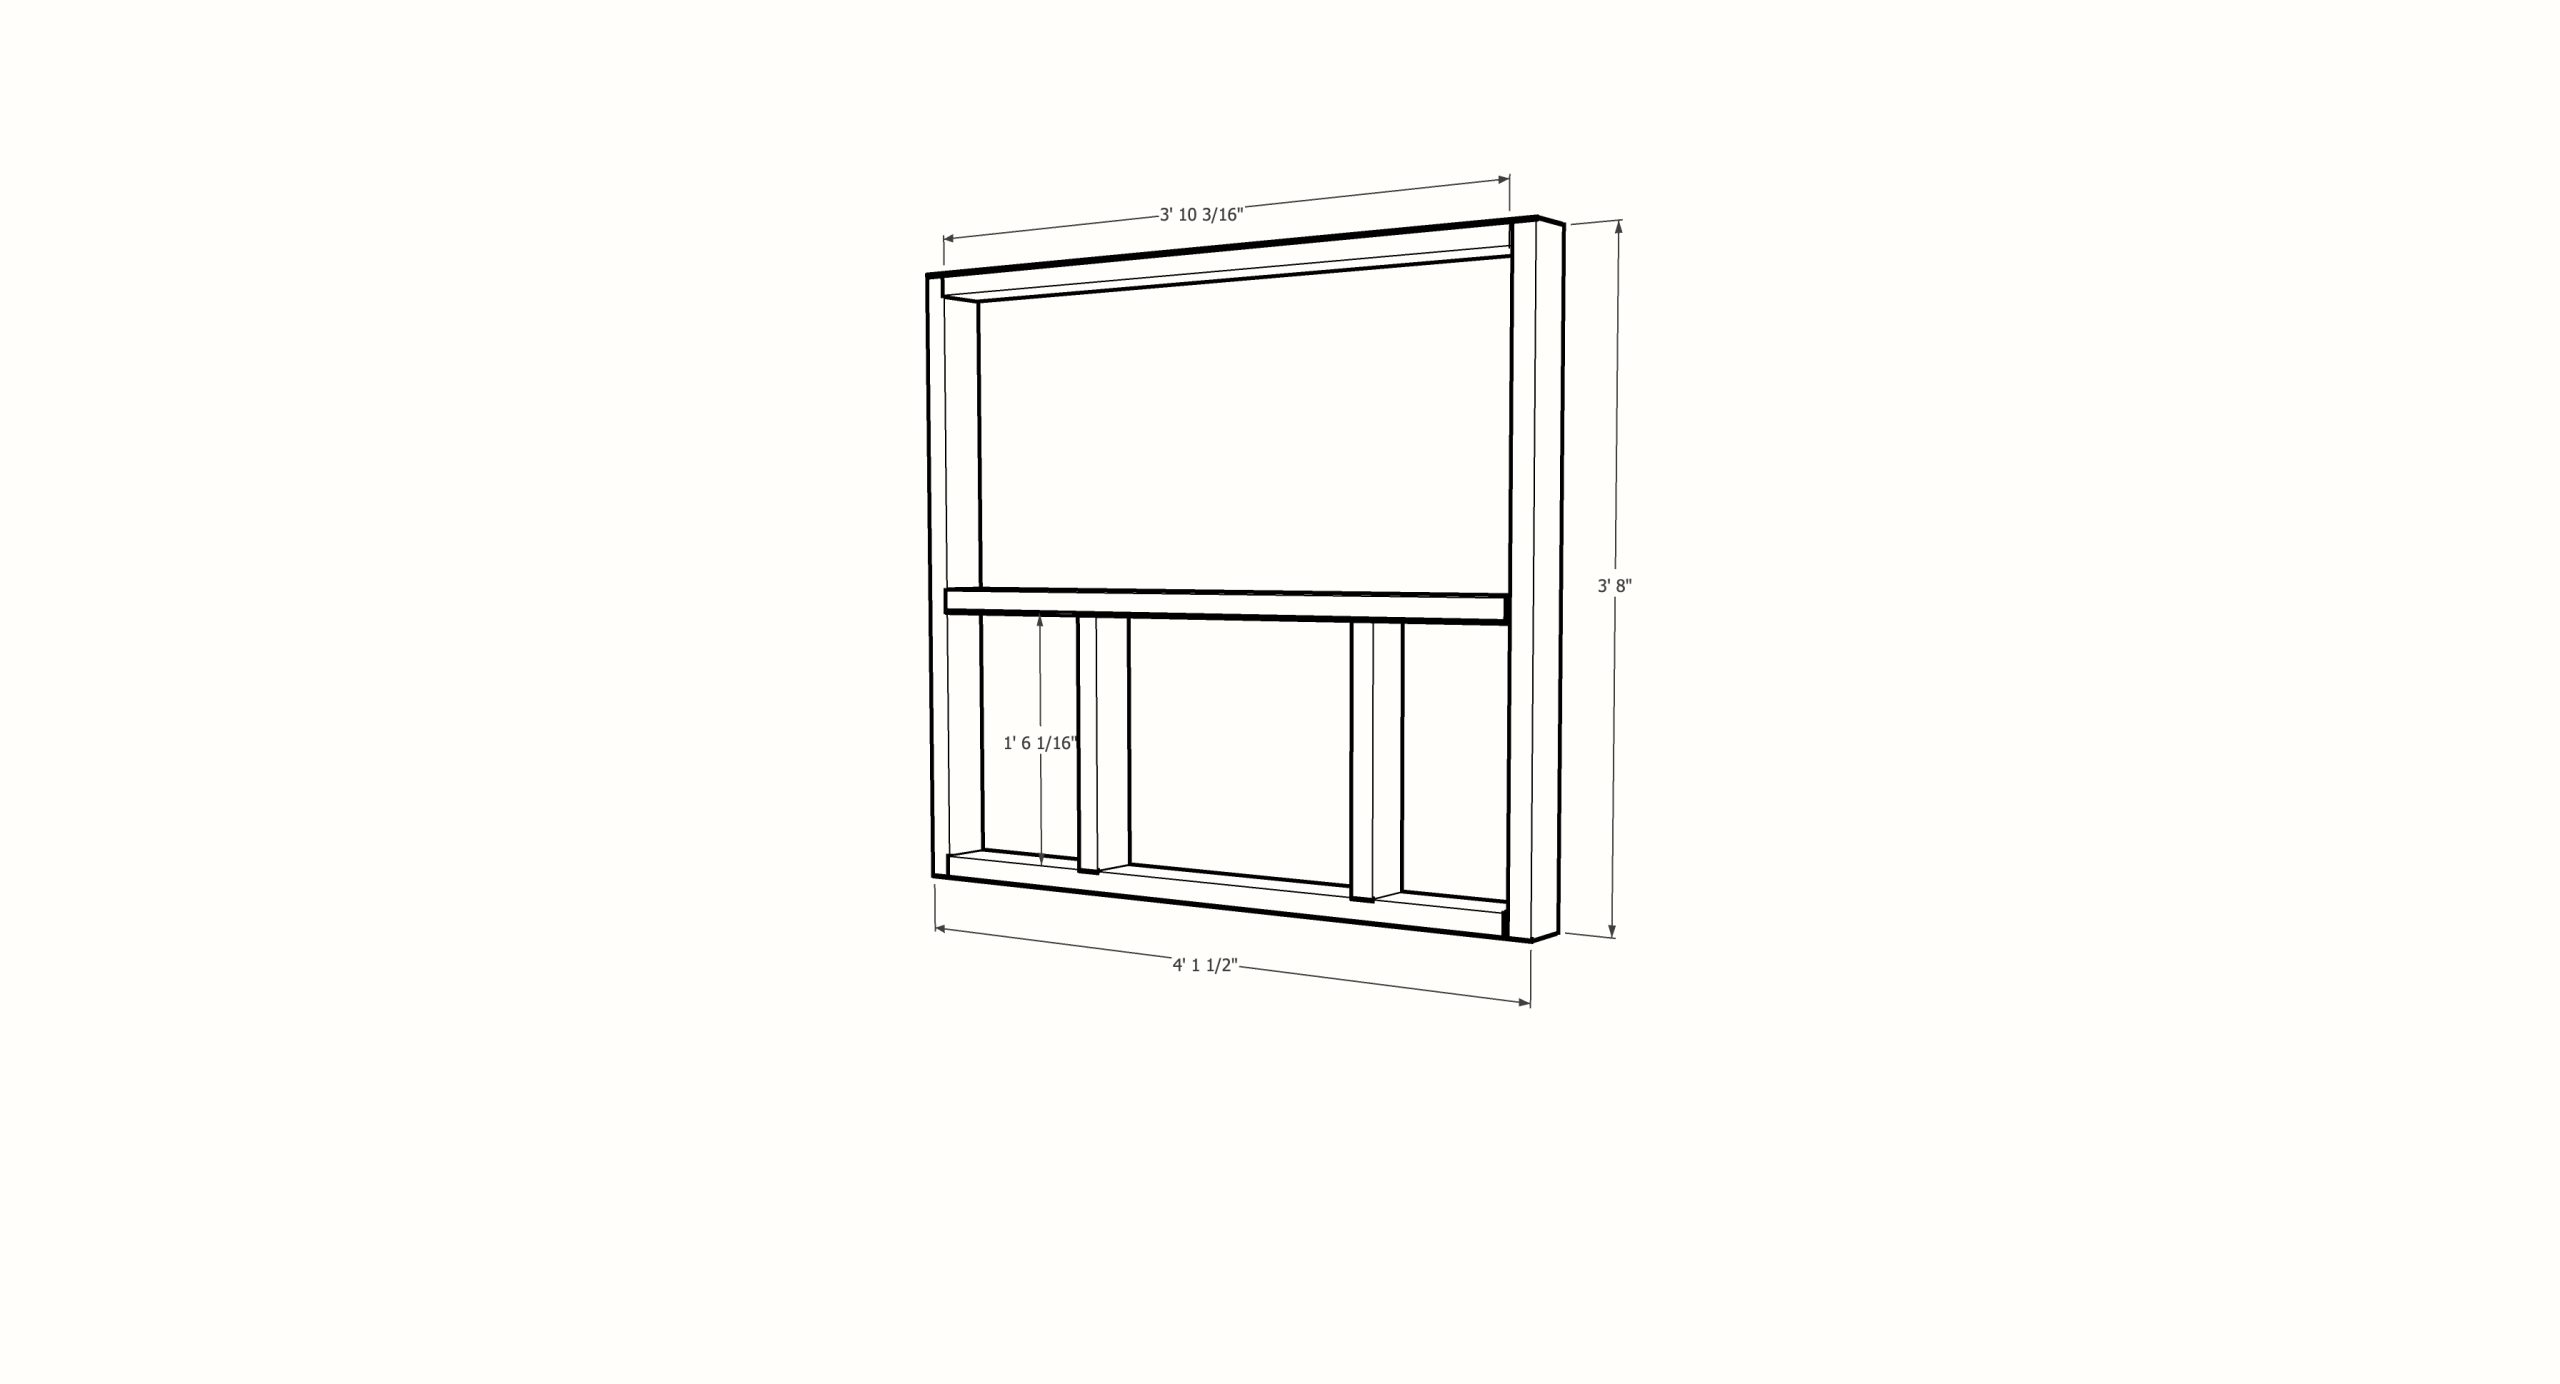
4. Attach the side pieces to the front frame (see below for image)
5. Add a horizontal piece across the top to provide extra support
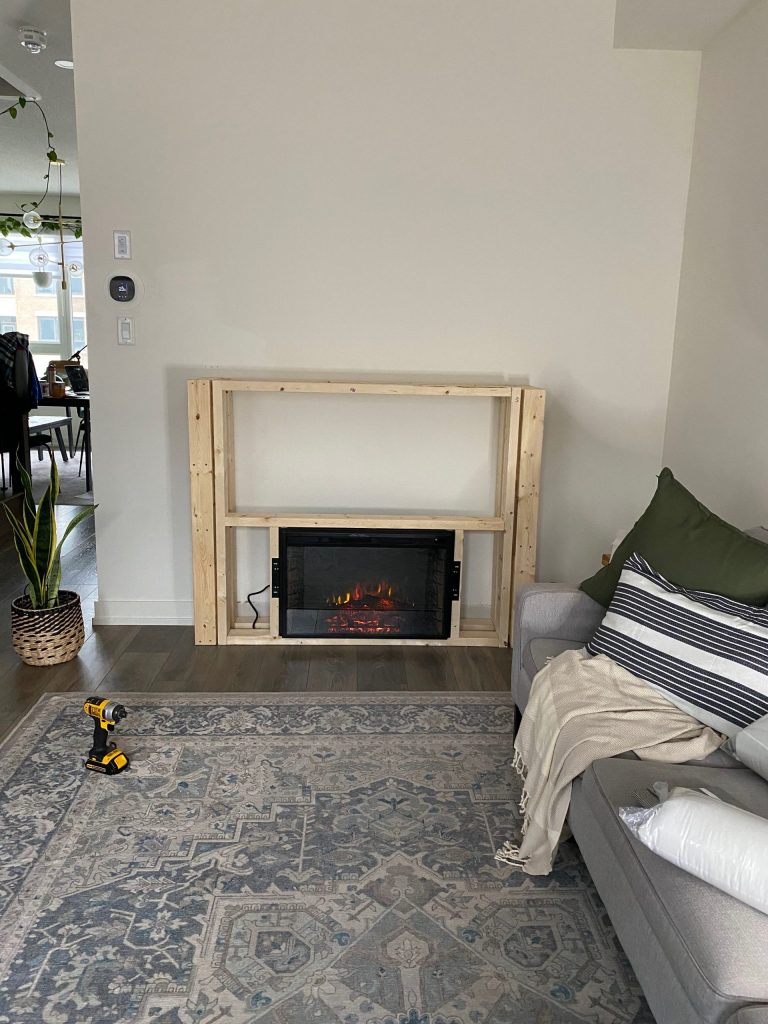
6. Read the instructions of your fireplace and attach your fireplace. Ours had brackets that had to be attached to the front frame.
7. To ensure the fireplace sits flat against the wall, you will need to remove the baseboard in that spot. Cut off the caulk with a utility knife. After that use a multi-tool to cut off the baseboard, pry them off using a pry bar. Careful as there will be many exposed nails on the baseboard.
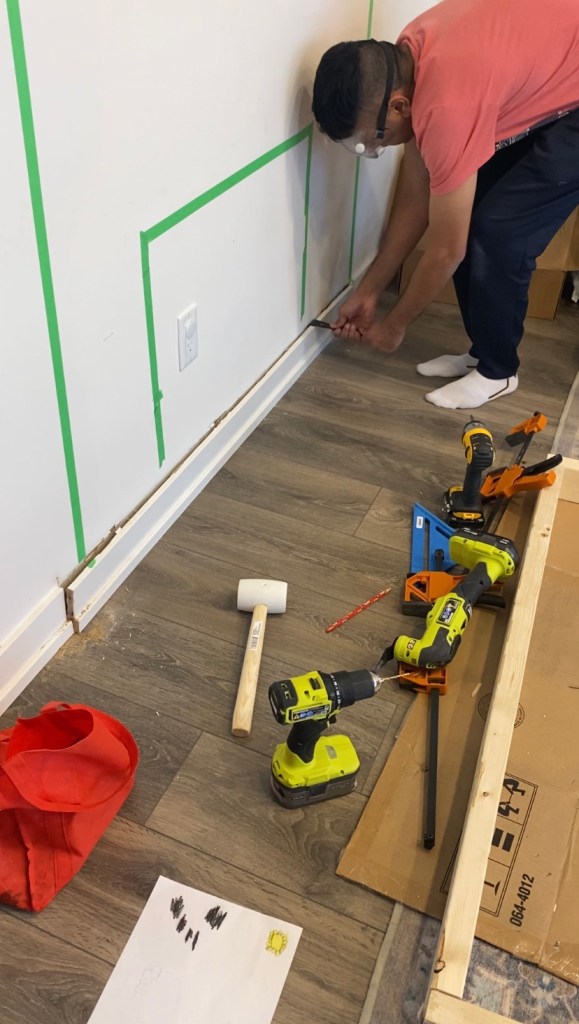
9. Use the stud finder to check to see if you have studs where the fireplace will be attached into the wall. If you’re lucky, you do. After that screw the fireplace studs by drilling a pilot hole, then use a wood screw and your impact driver to attach the frame through the sides of the fireplace. If you don’t have studs, use wall anchors to attach the frame.
10. We have finally gotten to installing the fireplace! This was a very exciting moment as it finally looked like a fireplace. Ours simply needed to be screwed into the frame. Check the instruction on yours.
Step 3: Beautify your DIY electric fireplace frame
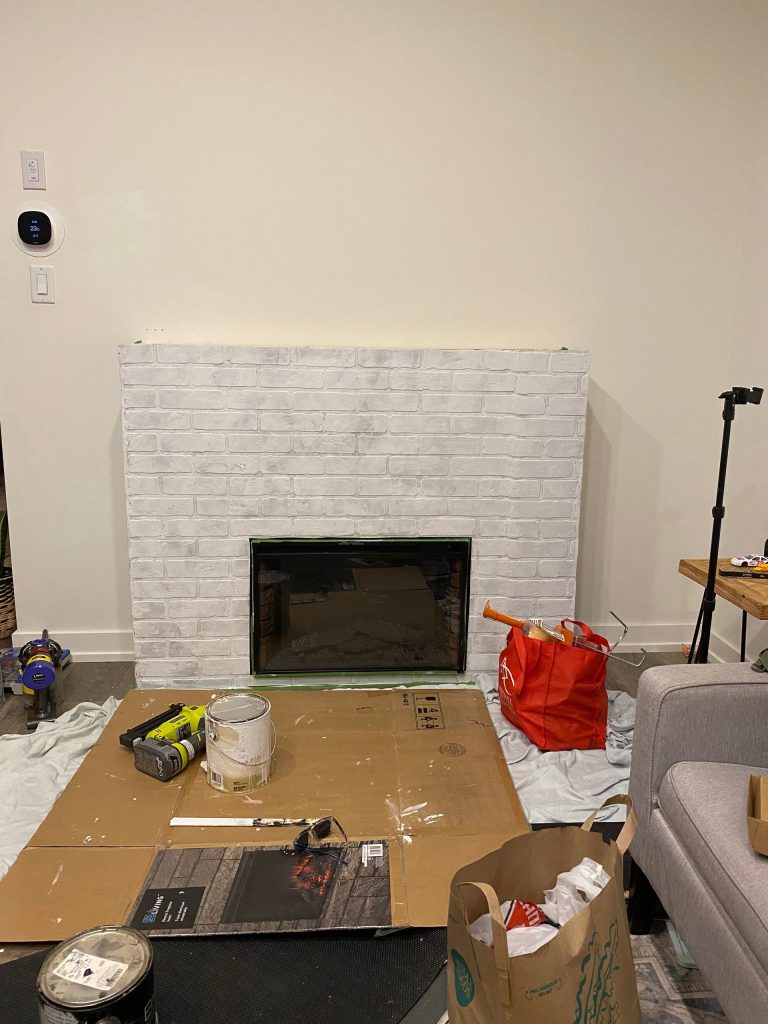
1. I chose to use faux brick because it’s inexpensive ($56 for a 4x8ft board), it’s less messy and much faster than bricking. I had it cut down to size at the hardware, however you can also cut it down at home if you have a table saw.
2. I brought it home and measured the gap of the fireplace insert. I transferred those measurements to the sheet of brick.
3. Use a jigsaw to cut out the space for the fireplace insert.
4. Use a brad nailer to attach it to the front of your frame
5. Cut out the pieces that will cover the sides of the fireplace frame. Take note of the pattern and make sure the brick pattern wraps around. If you don’t, the pattern will be wonky and not match. I made a mistake and didn’t line up the pattern. I had to cut new pieces to ensure the bricks looked uniform
6. Apply drywall filler on the corner seams. Lightly sand using p220 grit, I let some of the texture shine through.
Applying the faux brick
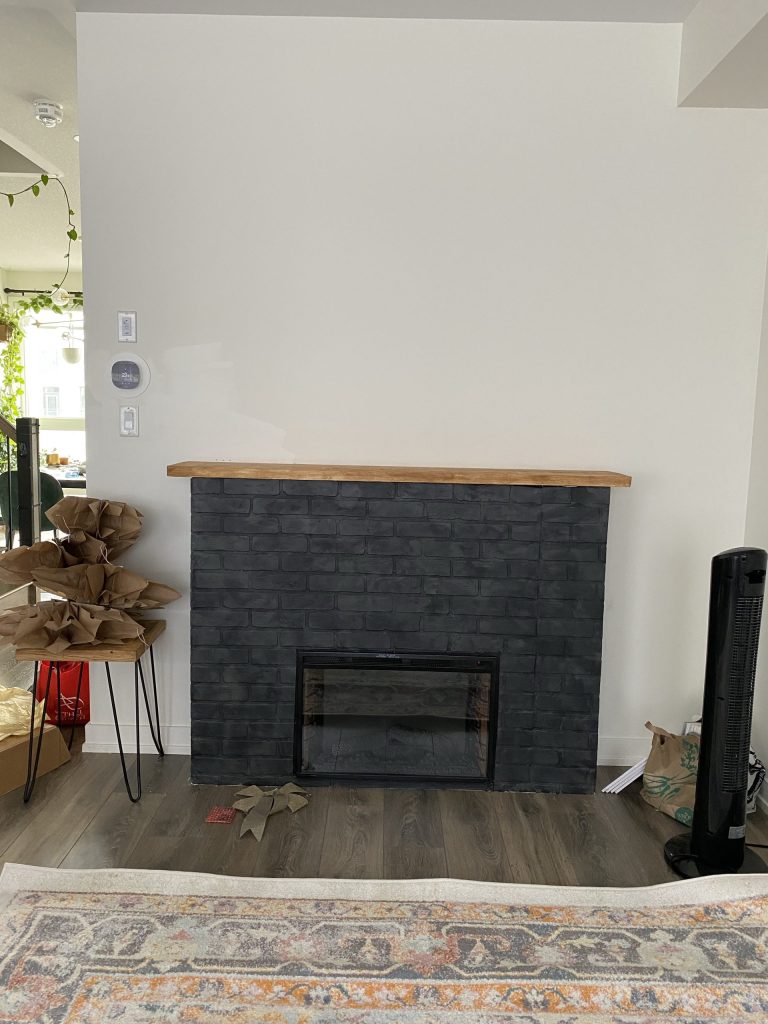
7. Prime the faux brick for your DIY fireplace
8. The first thing I did was apply 2 coats of SW Tricorn Black using a foam roller, using a matte finish paint mimics the look of brick because bricks are usually flat. A foam roller ensures a smooth finish.

9. I wanted this to look like a real brick fireplace. The Tricorn Black did not have any dimension. My solution was to add Urbane Bronze SW to look like stone. To begin with I used a brush to randomly dapped sections, then immediately rolled over the sections with a clean roller so it blended in.
Step 4: Create a wood fireplace mantle
1. I used a piece of 2 x 12″ wide spruce for the faux fireplace mantel. I added 3″ overhang on the width and 1″ overhang on the front.
2. I lightly sanded my piece of wood using a sander and p220 grit sand paper
3. I applied a coat of wood conditioner using a rag. Wood conditioner allows the stain to be applied and absorbed more evenly in the wood.
4. I applied a coat of Early American stain. This is my favourite go-to stain colour. To begin with I dipped an old rag in the stain then rubbed the stain in. Always start with less stain as you can build the color up slowly. Wear a pair of gloves to avoid discolouration of your hands.

5. Once it was dry for 48 hours, we brought it into the house. I used two 3.5″ wood screws towards the back of the mantle to secure it into the frame.
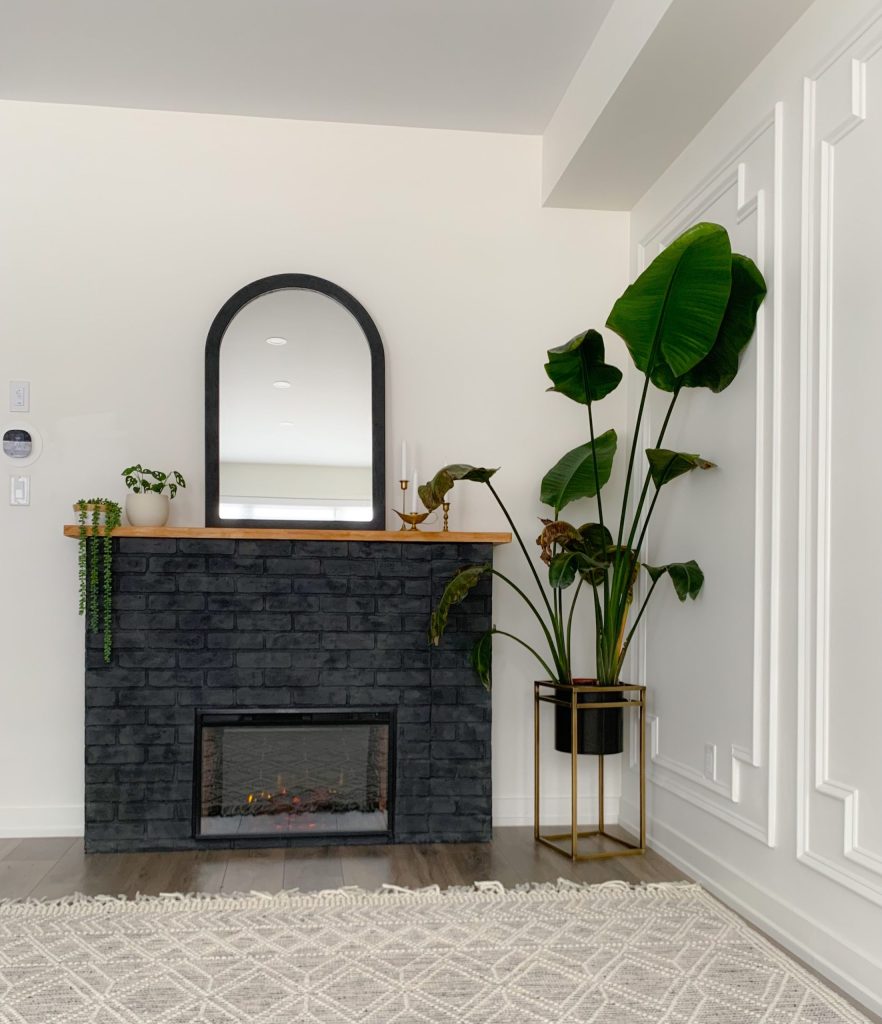
DIY electric fireplace reveal!
I am so happy with how this fireplace!! Now it’s time to decorate the fireplace how you like. I used an old arch mirror that I upcycled, as well as brass candle sticks that I thrifted and some plants.
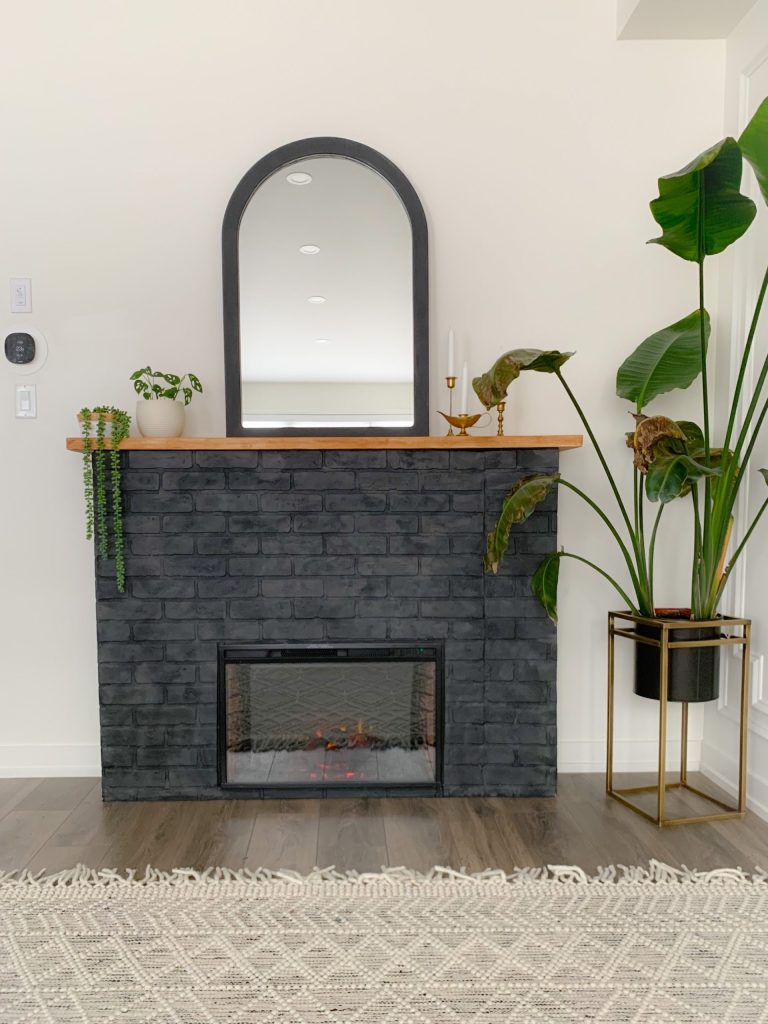

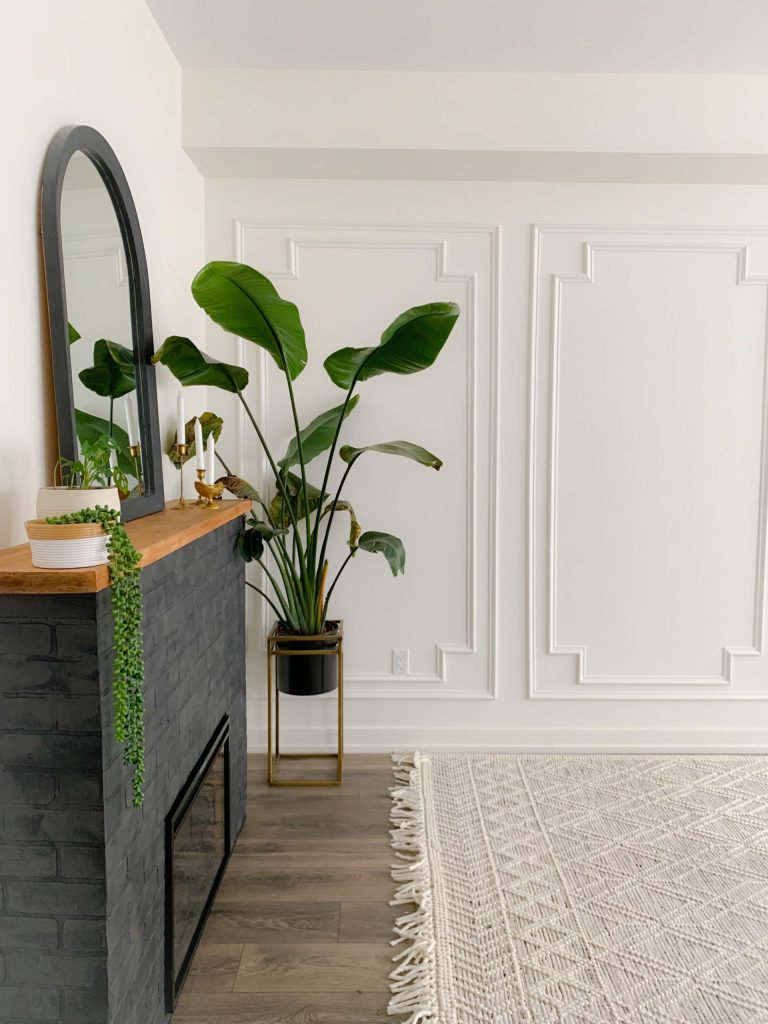


Update: I got a beautiful arch mirror with a gold frame. I liked how much lighter it looked vs the thicker framed mirror.
I would love to see you build this fireplace wall! If you do, be sure to share with me. Follow me @hanashappyhome for more budget projects.
Pingback: Long living room ideas for a town house - Hana's Happy Home