I’ve never understood the aesthetic of a popcorn ceiling. It looks dated, and collects dust. I decided to tackle this very messy project. If you’re ready to roll up your sleeves and do some hard work, I’ll show you all the tips and tricks on how to remove your popcorn ceiling. A flat ceiling looks so much more modern without the popcorn texture.
Before I dive into what I learned in the process, here are some FAQs from my instagram community.
Should I tackle this project myself or hire a professional for the removal process?

Removing popcorn ceiling can be messy, time-consuming, and if you’re unlucky, dangerous. Some popcorn ceilings contain asbestos. If your home was built in the 1980’s or earlier, there’s a good chance there is asbestos in your popcorn ceiling. Asbestos is a mineral that can lead to many health problems if inhaled or ingested. Removing popcorn ceiling is a dusty project and should not be conducted by a homeowner if you have asbestos. It’s a good idea to test the popcorn ceiling texture with an asbestos test kit from your hardware store, or local lab to check its safety before tackling this project.
If your home is safe to remove the popcorn ceiling, be warned, this project is a physically involved one. You will be using all the muscles in your neck, back and shoulders. If you have any of these issues, hire a professional. Otherwise, this is one of the easiest DIY projects. There’s no fancy cuts with a power saw or measuring required.
What are the popcorn ceiling removal costs?
Even though my home is newer (built in 2005), I still wasn’t sure if I should tackle this project. I got a quote to remove my main level popcorn ceilings by a professional contractor which was about $3600 for about 700 square feet. The kitchen, powder room and dining room already have smooth ceilings. The rates will vary by location.
I decided I would try tackling this project on my own in a small 8×15 ft entryway. I thought to myself “If this goes well, I can consider the rest DIY popcorn removal in the rest of my home!”
How hard is it to remove my popcorn ceilings?

The biggest factor that determine the ease of removing popcorn ceilings is whether your ceiling in painted. You can check very easily. Standing on a ladder, touch a small corner of the ceiling. If it’s chalky and immediately starts to crumble, this popcorn ceiling will be relatively easy to remove. If it’s hard, and doesn’t scrape off with simply your fingers, it is likely painted.
Oddly, none of the popcorn ceilings are painted except for my living room, which I will definitely hire out.
Can I lay new drywall on top of the popcorn ceiling?
One of my friends recommended I lay 1/4″ drywall on top of the ceiling so there is no mess. This could be a good alternative if my ceiling was painted since it is so much harder to remove. But I thought it would be even harder to get a perfectly smooth finish on the seams between drywall than scraping the ceiling.
Materials for DIY popcorn ceiling removal
- Safety goggles with a seal
- Respirator Mask
- Plastic Drop Cloths
- 12” drywall knife
- Lawn and garden pump
- Ladder
- Roller
- Extension handle
- Primer (I used BIN 123 Primer)
- Paint (I used Benjamin Moore Regal line – White Dove in Matte finish)
- Option: Drywall Sander
Step 1 – Prepare your Home for a BIG MESS
Get a ton of plastic sheeting because you’re going to want to cover every single surface in your room. Even better if you can remove all the furniture and curtains from the room because this is a dusty process.
Lay down tarps on all your floors. If your walls have a fresh coat of paint, attach plastic cloths to the top edging of your walls with painter’s tape. I’m going to be painting the walls after I remove the popcorn ceiling, so I skipped this step.
Tarp off the room using plastic wrap so that doesn’t travel to other rooms in your house. Trust me, the dust is so fine and can travel FAR! Take the proper safety precautions.
You definitely need goggles with a safety seal and a respirator dust mask. Make sure to wear long sleeve shirt, pants and cover your hair because the drywall from the popcorn gets everywhere.
If you have any pot lights, ceiling fans, or light fixtures, it’s best to remove them. My pot lights are so snug into the hole that I couldn’t remove them which made removing the popcorn ceiling so much more difficult. I had to scrape and paint around them.
I removed my popcorn ceiling over several days because for me, this was hard work. It was a neck, shoulder and back workout. I prefer to spread this out then to get cramps in my muscles.
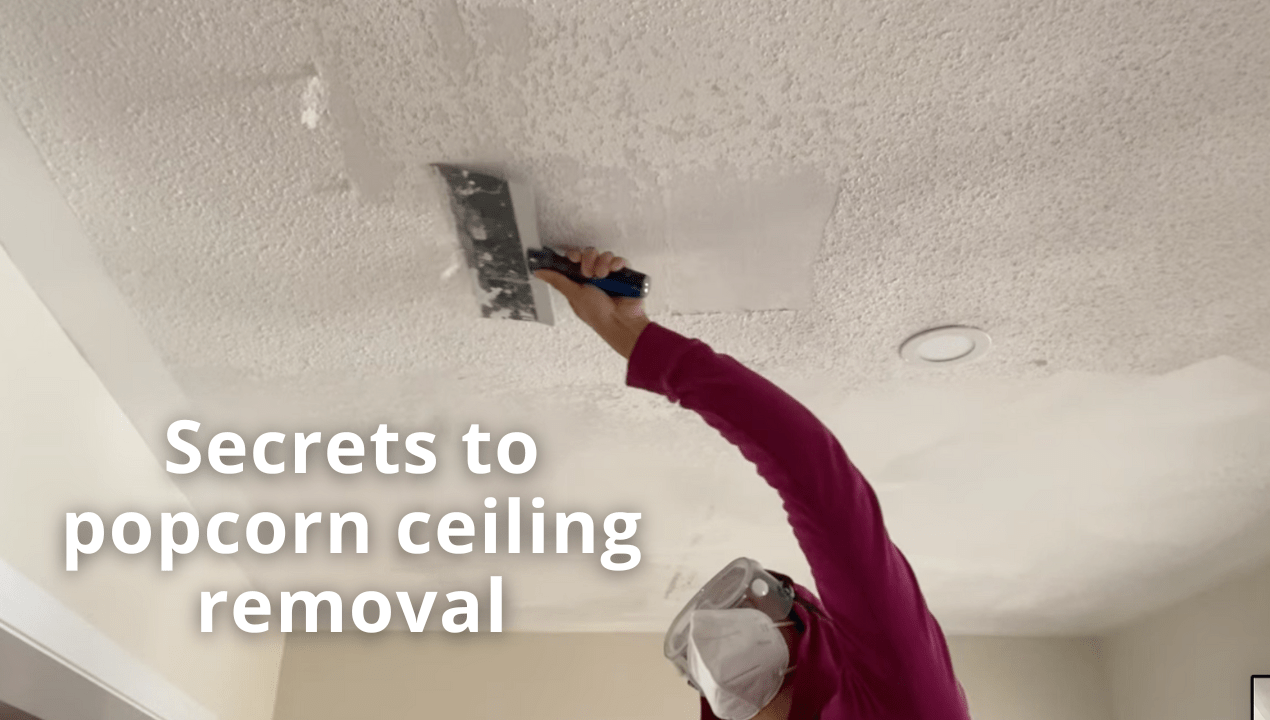
Step 2 – Wet your ceiling and scape!
The first step was the easiest, surprisingly. This is where you want to remove the bulk of the popcorn
Popcorn needs to be wet so that it can come off easily. It should be wet enough that the popcorn can scrape off easily, but not dripping wet.
I started off by filling a spray bottle with warm water. I sprayed the ceiling and waited 10 minutes. I used a 12” scraper to scrape the ceiling. This worked, but using the spray bottle was very time consuming. It also gave my fingers cramps because you have to get the ceiling really wet. You’re better off using something with more force because your finger will get tired by pulling the trigger.

I needed to expedite the spraying process. I didn’t have a garden lawn sprayer but I do have a paint sprayer so I opted to use that. In the future, I would definitely try using the garden and lawn sprayer. It would be a lot easier since the paint sprayer has a very small water container.
After you wet a s small section (about 4 x 4) of the ceiling, let the water saturate for about 10 minutes. You want to make sure that the ceiling is wet but if it’s dripping, then it’s too wet. You can risk damaging the drywall underneath if it’s too wet.
To remove the popcorn ceiling, use a large 12 inch drywall knife and with some medium pressure scrape the ceiling. Scrape at a 45 degree angle. They should fall off in big chunks. Try and keep the drywall knife as flat as possible to avoid any gouges in the ceiling. These can be repaired later, but it’s a bit of a pain.

If the popcorn is not falling off in big chunks, there’s two problems:
- Your ceiling is painted. If your ceiling is painted, this is going to be an uphill battle, and I suggest abandoning now
- You didn’t use enough water. Saturate with more water and wait.
Step 3 – Clean up the popcorn ceiling
At this point, you’ll have a mess on your floors, ladder and on yourself! I rolled up my floor tarps and put them in a garbage bag. You can leave it, but the next few steps don’t make too much mess, it’s mostly dust.

Because you’re moving the ladder so much, some of the tarps will crinkle and the popcorn may spill on to the floor. This is a good time to get your broom out first to clean up big chunks. Then vacuum with your shop vac.

Step 4 – Sand and repair the ceiling
I found there’s a bit of a texture left behind after removing the popcorn. It was not possible to scrape it off. It felt and looked like a knockdown texture. It’s really difficult to remove it, but it might happen to you.


I tried using my orbital sander, but it was not able to come off.

I decided to invest in a drywall sander. These sanders are really not meant for petite 5 ft 2 women. In retrospect, I thought I could really handle it but it weighs 10 pounds and all the videos I saw of people using them were all physically large men.
Anyways, I hooked up the drywall sander to my shop vac and got to work. I started with a P120 grit, and that was helpful to get some of the texture off. I did try more grit, but the drywall surface peeled almost immediately.

The benefit of this machine is that it sucks up all the dust so even though you’re wearing your protective gear, there’s very little residue from the sanding procedure. There’s adjustable speeds. Start with a low speed and work your way to a faster speed.
You can also work really quickly to sand the entire ceiling. Be sure to lay the head flat onto the ceiling. If you don’t, you will get some gouges in the ceiling that will need to be repaired.
Just note that because the sander head is so big, you can’t get close to the edges of where the ceiling meets the wall. In my case, the border of the ceiling was already flat. But if yours isn’t you’ll need to use a power orbital sander.
To do the small area took quite a bit of physical exertion from me. My arm and shoulders were fatigued! In retrospect, I don’t think that I would use the orbital sander again.
Step 5 – Patch any large gouges and plaster the ceiling

There were a few spots where the gouches were a bit deep from the scaper, or the drywall peeled off. I got out my 12” putty knife and joint compound. Standing on a ladder drywalling the ceiling upside down is a bit more difficult than drywalling the wall.
I wish I had practiced skim coat before I got on the ladder. I don’t really have much experience. I knew I needed to get a good finish with the drywall mud, otherwise the ceiling would look very DIY. I want all my videos to look professional.
I watched a bunch of YouTube videos. The small gouches were easy, but the large areas were quite a bit of a challenge for me. Expect that you might have to apply plaster, sand and apply a second coat of mud on some of those deep gouges.
Between us, the whole ceiling didn’t look perfect. But, I was confident that no one would really be able to tell too much after primer and paint. Plus, I have high ceilings. So people won’t be able to examine the smooth surface up close.
Step 6 – Prime the ceiling
Once I was content with the ceiling, i had to remove all the dust. I used a swiffer duster to get a good clean. Then, I got BIN 123 primer and primed the entire ceiling. BIN 123 primer is fantastic because it blocks stains as well. I used 2 coats of primer with an extension pole.
Don’t skimp on the extension pole. It will save your neck and back and make the project so much easier. I didn’t overload the roller because then you get a lot of splattering on your face, the wall and floor!
Step 7 – Paint your ceiling

We’re almost to the finish line and once I put on the primer, the ceiling really start to look good!!
Instead of using a flat ceiling paint, I went with Benjamin Moore’s Regal line in their most matte finish. I want my walls and the ceiling to match and be one color (I am using White Dove OC-17). This only cost $20 more than the ceiling paint. But the finish is so much nicer and the paint rolls on SO nicely!
After two coats of paint, I stepped back and looked at my ceiling, and it actually looked really good. There are few imperfections which you can only see at certain times of the day depending on the light but overall I’m really happy with the project.
Will I remove the popcorn ceiling in my entire house ?

I would most definitely try this project again with a few modifications:
1- To wet the ceiling, instead of using the paint sprayer I had on hand, I would get a $15 garden sprayer. It has a much larger water container and it’s more lightweight, which makes it easier for you to spray the ceiling.
2- Instead of only laying tarp on the floor, I would also tape a box to the top of the ladder. The top of my ladder had a lot of texture that had fallen into it. In retrospect, a box would have helped to contain the mess.
3- I would do my best to scrape as much of the ceiling as possible and avoid using the ceiling orbital sander. The Orbital sander was too big and heavy for me. If I had my husband helping me, I think it would’ve been a lot more reasonable for him to use the orbital sander.
I hope this article was helpful if you’re planning on removing your popcorn ceiling. It’s not the easiest project, but it is doable! Work in small sections and you’ll be able to remove this textured ceiling. I think a smooth ceiling is a subtle touch that increases the value of your home. Be sure to book a massage at the end of it, it’s a labor-intensive process. Your shoulders and neck will need it! Let me know if you have any questions below.
Leave a Reply