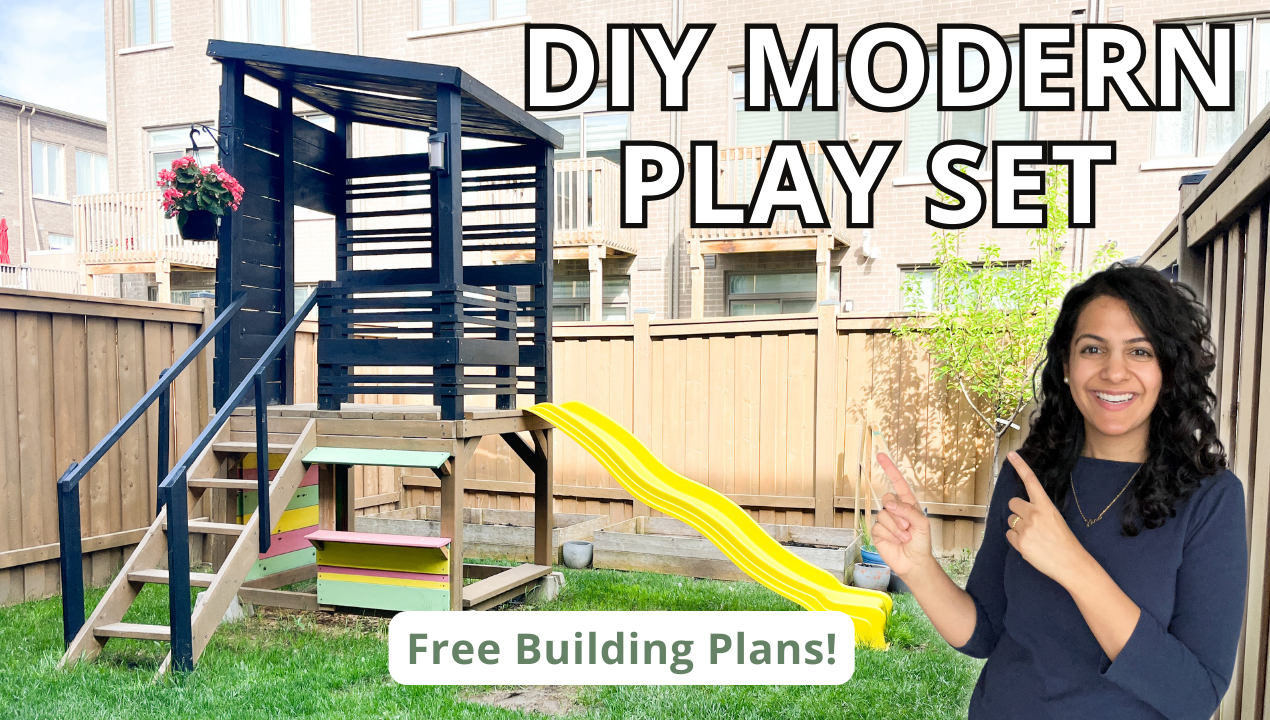
If you’re looking to keep your kids outside during the summer, off screens and enjoying outdoor play, build them a backyard playground! This playset plans has the complete cut list and assembly instructions.
I put a modern twist on a typical playset with a slide and rock climbing wall. They have enjoyed playing with this for the last 5 years, in all different seasons (Yes- EVEN WINTER!)
This guide will make it easy for you to build this DIY playset. If you have some basic skills, a saw and a drill, you can do this! Neither myself or my husband are formally trained. We just learned everything on the go. And the best part is there’s no complicated cuts, or pocket holes in this project.

It was THE project that I did that gave me the confidence in my building skills. Just took that leap and went for it. So if you’re sitting there thinking if you can’t do this, you definitely can. And that’s why I’ve written this tutorial on how to build modern play structure. You can even print these building plans to make it easier to follow.
I have the entire play structure save to my highlights on my Instagram
I’ve outlined some considerations if you’re going to modify my plans. But, if you’re ready to build a replica, jump down to Build this Modern Play Structure.
Consideration 1: Determining the size of the play structure
After I drew my picture, I brought my lumber to the backyard. I laid it out on the ground to figure out how big I wanted it to be. I eyeballed it until it felt right. You also need to figure out the right height of the deck. This allows us to have enough space in my backyard for the slide and also a rock climbing wall. I really wanted to add a swing but I didn’t see how that would be feasible given the size of the backyard.
Consideration 2: How will the play structure sit on the ground?
Figuring out whether the play structure should be dug into the ground or sit above the ground almost prevented us from doing this project all together. Many of the other blogs I read advised us to dig a hole 6 foot deep, fill it with concrete to stabilize the legs of the play structure. We live in a townhouse. Our backyard has a fence with no door access (except to the house). It would be near impossible without breaking down the fence to get a machine to dig hole to come to our backyard. And there’s no way we could dig a 6 foot deep hole on our own manually.
My cousin came to my rescue. She lives in London had a play structure her entire childhood in her backyard which sat in concrete blocks. I did some research and found these blocks. Instead of spinning on this I just went for it. I am proud to say that this has worked in the Canadian winters for 4 years now.
Note: Based on the living/ weather conditions of your living area it may be necessary to anchor the posts into the ground.
Now that we have a figure out let’s start building or play structure now
Materials to build the deck
- Pressure treated lumber. I have outlined the cuts in each section
- Deck blocks
- Wood Screws (2”, 2 ½ “, 3”)
- 2 ½“ Timberlock screws
- 5” Fasten Master Screws
- Tape Measurer
- Rock Holds for Rock Climbing Wall
- Slide
- Hex bolts
Tools to build the deck
- Mitre saw. This is a great beginner mitre saw
- Drill
- Impact Driver
- Drill bits
- Speed Square
Note: Every single joint is formed by first drilling a pilot hole, and then securing the screw with an impact driver. The pilot prevents the wood from splitting.
Step 1 – Build the base of the Playset

- Cut the 2x4s and 4×4 posts to size
- 2x4s: 2 at 54” and 2 at 42”
- 4x4s: 116” and 107” both cut at 9 degrees at the top edge for the sloped ceiling
- Put the deck blocks in position. Fit the 4×4 posts and 2x4s inside the deck blocks. Use a speed square to ensure the joints are square. This is one step I wish I had taken the extra time and care to do. It will save you a lot of headache down the line if all the joints are square.
- Use the 5” Fasten Master Screws to attach them together. Drive through the 4×4 post into the 2x4s. You need to offset the screws so they don’t hit each when driving in both directions
Step 2 – Build the Base of the Platform

- Cut the 2x4s to make the base:
- 3 at 56”
- 2 at 48”
- 1 at 54” (as the middle support brace)
- Screw them into the base at 48” high using 2 ½” timberlock screws. The front side (which will have the stairs) has an extra 2×4 to attach the stairs

Step 3 – Build the Play Set Platform

- Cut 2×8’s to build the platform
- 7 pieces of 48” long
- 2 pieces of 42” long (to sit between the posts)
- Attach them to the base using 3” wood screws. Screw 2 on each board around the perimeter and on the middle support brace too. Make the screws in as straight of a line as possible
Step 4 – Add Stabilizing Braces
We found that our structure wiggled when we gave it a good shake. To add more stability and give us some peace of mind, we used diagonal supports.

- Cut 2x4s in the shape of a trapezoid at 45 degrees on each end
- Drive them on an angle into the 4×4 post and the deck supports
Step 5 – Attach the Slide

Wow this is really starting to look like a play structure. We decided to have the slide on the side of the play structure.
You won’t even believe it when I tell you that a kind lady from my Instagram gave this to me (and drove it to my house from an hour ago). Her kids had used it when they were younger, and she no longer needed it. It was sitting on her property for 10 years unused. This slide was really special. This is the slide we used.
- Attach the slide using hex bolts to your play structure deck
- Attach 2 stakes to the bottom inside of the slide so it doesn’t shift in bad weather or when the kids play on it. Cut these to have a point and hammer the stakes into the ground first. Then screw the stakes into the plastic of the slide from the inside. These were the specific instructions of this slide, but may differ for other slides

Step 6 – Create the Railing for Safety

I needed to add a railing to prevent the kids from falling off the play structure. I painted all these pieces with outdoor paint before securing them to the structure so that I didn’t risk dripping paint on the deck which I wanted to keep a natural wood.
- Cut 4×4 posts. You need 2 pieces that are 27” tall
- Attach these to the under side of the deck, 33” away from the post. I used 4 screws that are 3 ½“ on each post to really secure it.

- I created this design using 1x1s and 1x6s, but you can use any design.
Step 7 – Build Stairs for the Play Structure

The stairs were one of the challenging parts of building this. I had to do some trial and error, but luckily for you, I’ve solved that.
- Cut 2 pieces of 2×8” to 54” long in the shape of a trapezoid. Be mindful that the short edge should be 54”
- Cut the stair rungs. You need 5 stair rungs made of 2×8” at 20” wide
- Starting at the bottom, attach these using 3” screws. There is a 9” gap between stair rungs. Drill from the sides into the stair rugs. Use a spacer and a level to make sure each step is straight
Step 8 – Add a Stair Railing

At first we used the play structure without the stair railings. But I was always nervous my toddler would fall off the side. So we added the railing
- Cut 2 pieces of 2×4 for the bottom posts. They should be a parallelogram cut at 45 degrees to 34 ½ “ long. Attach them to the bottom of the stairs
- Cut 2×2 posts for the vertical support. They should be a parallelogram cut at 45 degrees to 34 ½ “ long. Attach them to the middle of the stairs
- Cut 2×2 posts for the stair railing to 59″ long. Attach them to the bottom post and 4×4 of the play structure railing.
Step 9 – Create an EPIC Rock Climbing Wall!

My older son wanted a rock climbing wall much more than the slide. Over the years, the rock climbing wall has remained popular as my kids have gotten taller. I was initially only going to build the bottom section of the wall, but my son wanted to go higher (these are his words!), so I added the top section as well.
- Cut 11 pieces of 1×6 boards to 48”. Some lumber stores carry this length, but unfortunately mine didn’t. Install them into the posts with 2” wood screws. 7 should go at the bottom. Hold on to the other 4.
- We have to add a frame for the doorway. Not visible in the image above, but cut 2×4 to xx . Attach it 28” from the slide. Screw from the bottom of the deck, upwards. You’ll also attach it to the roof once it’s installed.
- Cut 9 pieces of 1×6 boards to 28”. Install them to the door frame and the end post
- Add the 4 pieces of wood that you cut, above the door frame
- Attach the rocks and handles. I tried to figure out what would be good placement of these so that my younger and older child found this rock climbing wall fun!

Step 10 – Build the Roof

Adding the roof made it feel like a tree house. Building the roof was one of the hardest parts of the play structure. This was because I didn’t use a speed square, and none of the corners were square. I cannot stress enough how important it is to make the structure square. If you’re structure is square, you can simply cut the 1×6 planks as above and screw them into 2x4s to make the roof.
However, if you tried your best to make the structure square and it still isn’t, don’t beat yourself up! You can still make a roof! Instead, you first attach the 2x4s to the structure. Then attach each slat to the 2×4 roof frame. This is a bit harder, but it’s still doable by standing on the platform of the play structure.
Step 11 – Complete Framing the Roof

Mostly for aesthetic, I framed out the roof to make it look more complete.

Step 12 – Add a Restaurant for More Pretend Play!

A couple years after I made this play structure, I added a restaurant. My kids really started to enjoy pretend play.

- Cut a 1×6 to 46” to vertically frame out the restaurant. Attach it to the bottom and top brace
- Create the supports for the canopy and the counter. Cut 4 pieces of 2×2 lumber to 6”, at a 45 degree mitre each side. Each shape should look like a trapezoid.
- From the back of the post, drive these smaller pieces into the posts
- Cut 2 pieces of 1×6 lumber to 32” long. Attach 1 for the canopy and the other for the counter into the angled support pieces.
- Attach a few more 1x1s and 1x6s to make the restaurant wall. Paint it a fun color!
Backyard DIY Play Set Reveal!
Before letting my kids play on it, I sanded some of the cut edges with p220 grit sandpaper (like the stairs railing, etc). Be sure to give your play set a coat of paint. I used Sherwin Williams Emerald Rain Refresh Paint, and I haven’t needed to repaint it in 5 years. I also stained the wood parts with decking stain.
I absolutely love how it came together! Isn’t it the cutest?


Why I love this Backyard Playground
This play structure is absolutely the best thing I have ever built. Not only was it challenging, but it was so fun! It cost about $400 in lumber and I used only 2 basic tools. And the best part is that I have had it for years and it’s held up beautifully. Make sure to use pressure treated lumber and give it a coat of paint with outdoor paint!
You can also customize it by adding a swing or monkey bars if you have the space in your backyard. A DIY swing would make this a lot more versatile for younger kids who love to swing!
I made this play structure while working full-time in the evenings. The whole family would go to the backyard. My husband I would build while the two boys would run around. I really love this project because it allowed me to be outdoors with my kids DIYing. Mom guilt is always there isn’t it
I hope this has inspired you to tackle your own modern play ground. If you love this project, pin it!
Leave a Reply