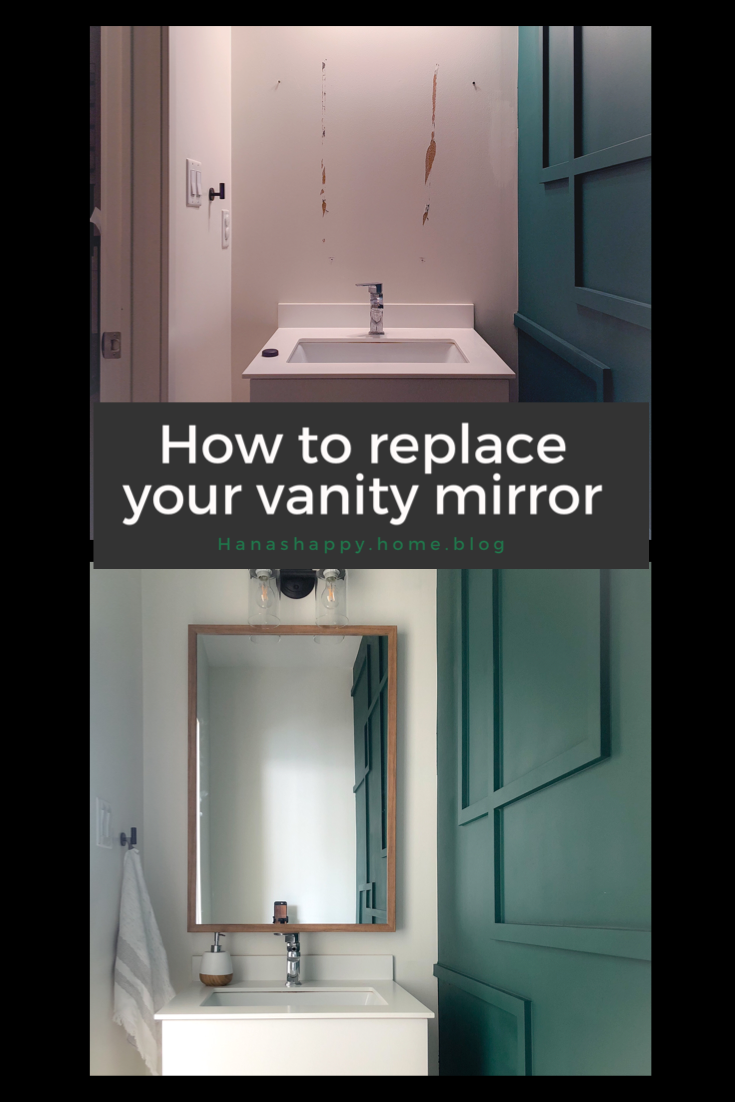
Ever since we moved into our new house I have hated our builder grade mirrors. But 2 things have prevented me from changing them
- I am terrified that the mirror will break while removing it
- I’m scared of what might be behind the mirror. Will I rip up the drywall?
[wordads]
Time to get over these fears
What you need
- Shims
- Strong leather gloves, goggles and boots
- Painters tape or duct tape
- Hammer
-  crowbar
- Screwdrivers
-  chisel
- A blanket
- All your courage

[wordads]
let’s get building
- Safety first. Make sure you have leather gloves, goggles, and you’re wearing boots or shoes in case the mirror breaks.
- Place the blanket across the vanity. If your mirror breaks it will be a lot easier to clean up if all the pieces fall into the blanket
- Tape your mirror at all different angles. The tighter you tape it the less chance of it breaking
- Start to insert the shims all around the mirror

- If your mirror has clips like mine, you can pop them off using a flat head screwdriver or chisel. Simply push the top clips up,and the bottom clips down. If they are stubborn, use a hammer at the end of the screwdriver to add some pressure
- Use some muscles to wiggle the mirror loose.

- If your mirror is the same size, no patching is required. Patch the wall if needed

- On your new mirror frame, apply painters tape across the brackets. Make a mark where the brackets are
-  place it on the wall where the mirror will go. Make sure it is centred by measuring the distance on each side of the hole and level
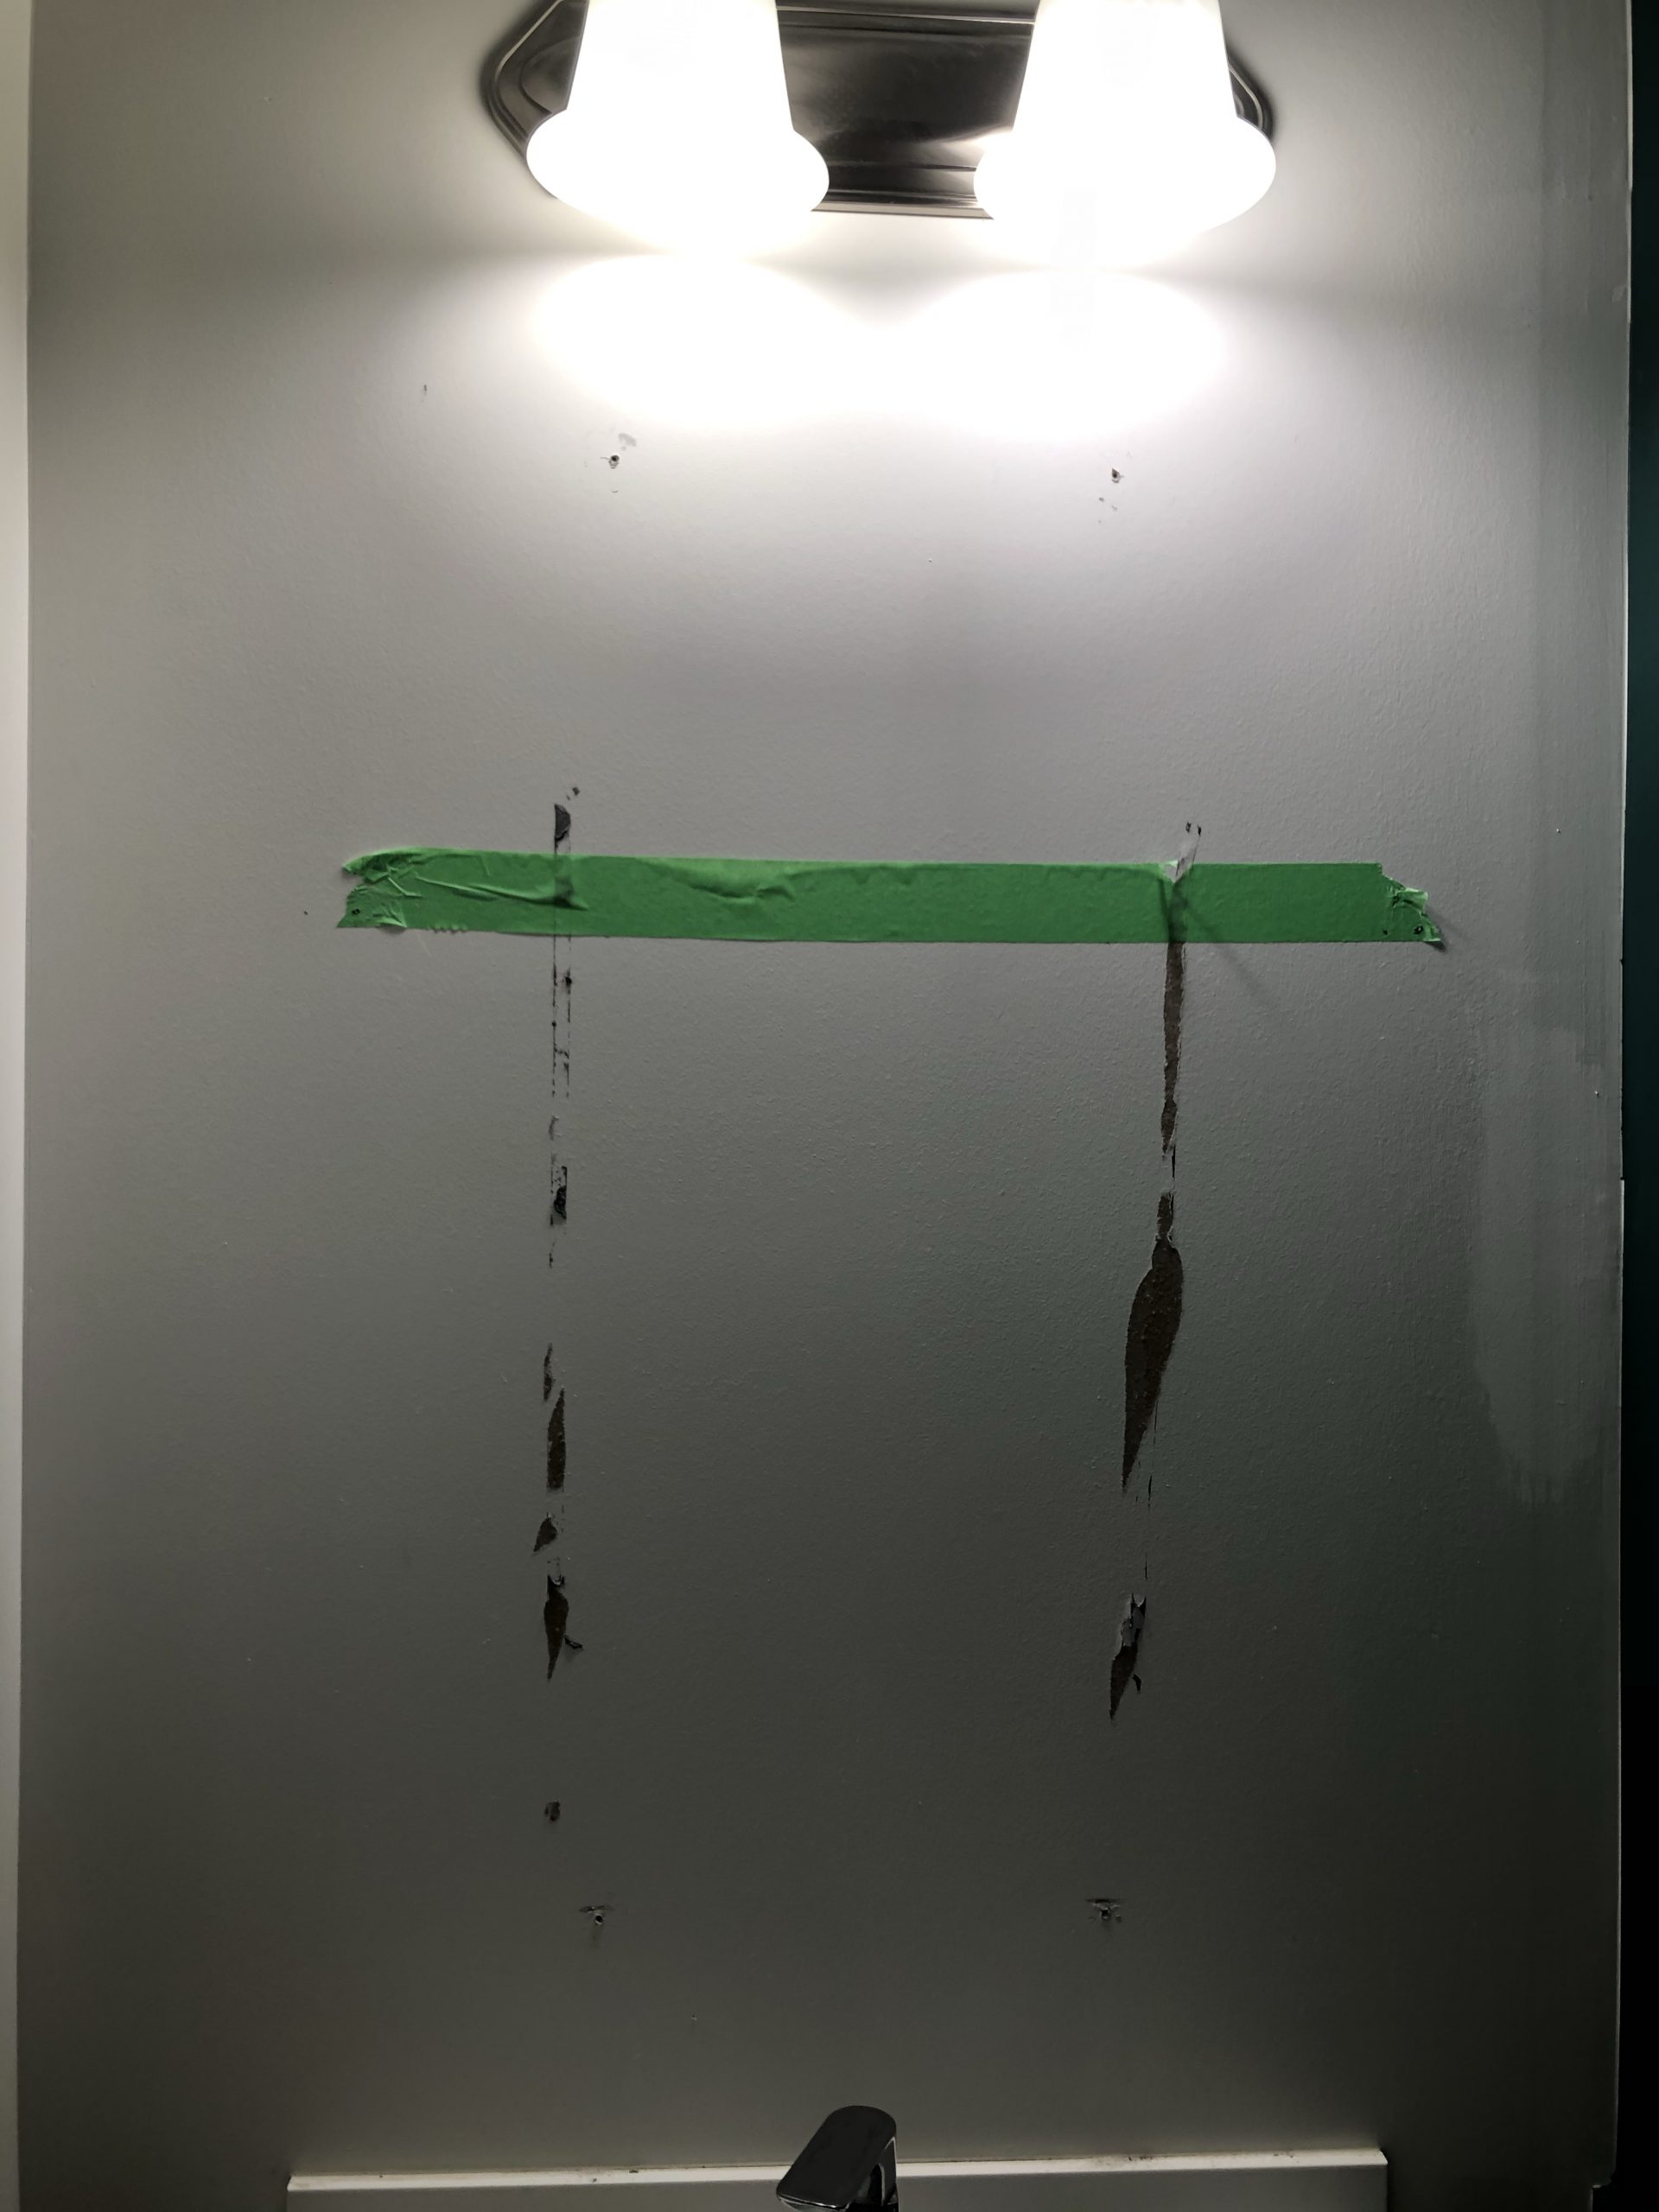

- Drill your holes. Use anchors if there’s no stud. leave the screws out of the wall about a quarter inch. You can hang your brackets on them
 
 - hang your mirror and enjoy looking at yourself in the mirror every day

Such a simple two hour project that can make such a big difference. If you’re interested in how to create the accent wall check out my blog post
And be sure to tag me on Instagram at @Hanashappyhome if you try my projects