Thank you Sherwin-Williams® for sponsoring this project. Read more about my disclosure policy.
When I stay over at my parents house, I use this Jack and Jill bathroom. I decided it was time for me to beautify this bathroom. There’s nothing wrong with it, but it lacks unity. With a bit of paint and elbow grease, I know I can transform this space. I’ve really been wanting to create a modern, minimal bathroom, and know you can never underestimate the power of paint. It’s the easiest way to transform a space. You don’t need fancy and expensive tools, just a good quality paint, paint roller and the confidence that you picked the right color, which I’ll go into details about in this post.
This will be a budget project, which I love! It’s a challenge for me to stretch my money with creative solutions. This bathroom has a light brown floor and shower tiles and a basic stained brown vanity. My parents upgraded the counter to granite, so replacing the vanity altogether was not in question. The walls were also beige. Can you tell my parents home was built in the early 2000’s when beige was all the rage?


The staples all had to stay – tiles, toilet, shower, vanity. However, there is still a lot we can do to update this bathroom, especially with paint! My moodboard shows my vision for this space. My goal is to complete this space as close to $500 as possible.
My vision for this budget bathroom makeover

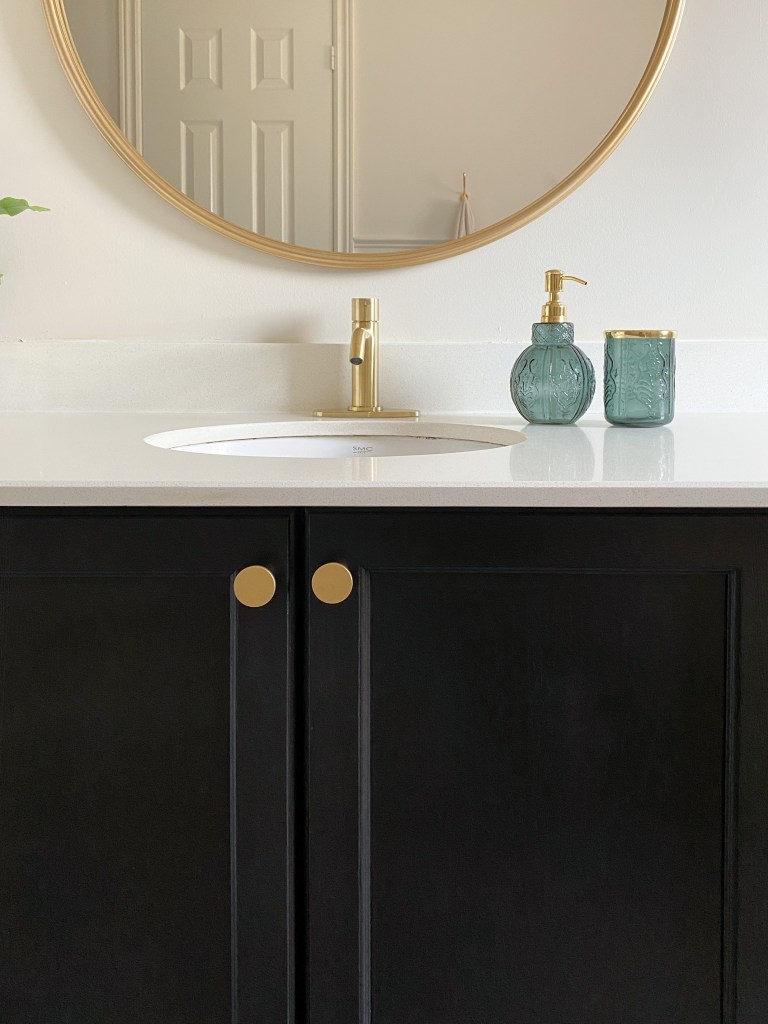
- Modernize the vanity with paint: Painting the vanity is similar to painting laundry cupboards, kitchen cabinets or any piece of furniture. I’ve done this many times with lots of success – all I need to do is find the right black color. Bonus: the doors already have a modern shaker kind of look so I don’t need to replace the door
- Brighten up the walls with paint: One of the easiest things that we can do to a space is brighten up the walls. This Jack and Jill bathroom only has one window, so I’ll need to find a light color for the walls.
- Add interest with a unique mirror: This builder grade mirror is boring. There is nothing interesting about it. You’ll find itin every suburban bathroom. By removing this mirror and adding a gold mirror with an interesting shape, we will add a lot of visual interest to the bathroom.
- Swap out the light fixture: An easy way to update a bathroom is to swap out the builder grade light fixture. Vanity lights are one of the easiest light fixtures that you can change because they’re lightweight. I’m using this black and gold modern fixture with a clear glass bulb. I like this because it has clean simple lines. Because the mirror is more whimsical, I went with a simpler light fixture to balance out the design elements.
- Unify the hardware: This bathroom has different metals for the faucet, the hand towel bar, the toilet paper rolls etc. My goal is to try and use only black and gold for the metals in the space.
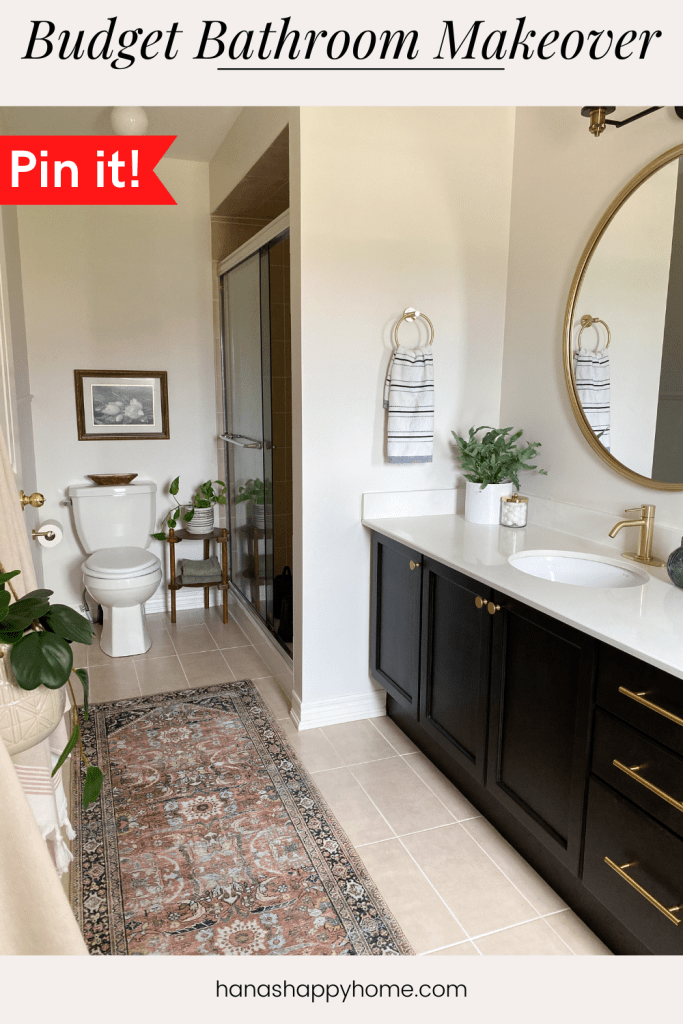
- Cozy the bathroom with a runner: An easy way to add sophistication to a bathroom is to use a long runner. Those small bath mats are a thing of the past. Trust me, invest in a beautiful vintage rug for the floors.
How to transform this bathroom on a budget
Step 1 – Pick the Right Paint Color
There are two things to paint in this bathroom – the walls and the vanity.
Picking a black for the vanity: I was nervous when painting the vanity because my parents are not big fans of dark paint colors. Their style is more traditional. So I wanted to use a color in the black family, but it needed to be a little bit softer and more traditional. I really had to think long and hard about the color I used so I could reflect their style.
To help me decide, I grabbed a bunch of different black color chips from Sherwin-Williams and put them side by side on the primed cabinet. I wanted to see how these colors looked in my space because I needed to make sure that they flow well with the floor tiles and the lighting in that room. In the end, I chose Caviar SW 6990 because it has a bit of a brown undertone which flows nicely with the floor tiles.
Picking the perfect shade of white: If you thought choosing a black paint color was hard, look at all the shades of white available to choose from at my Sherwin-Williams store!!! Here are my best tips for using their color chips to choose the right color, especially whites, for any space in your home:

- Choose at least 4 to 5 color chips and grab three of each of those. Yes, this is a lot of color chips but trust me you’ll be using all of them.
- Tape them together and place them on your wall side by side. Come look at the color chips several times throughout the day to see which one speaks to you. There is no “right’ paint color. However you can eliminate paint colors based on the undertones when you view them in your space. Some paints may look too yellow or too blue or gray.
- Grab another set of color chips and put them on your floor. You will also see how they change color based on your flooring as well. This may help you eliminate other shades of paint.
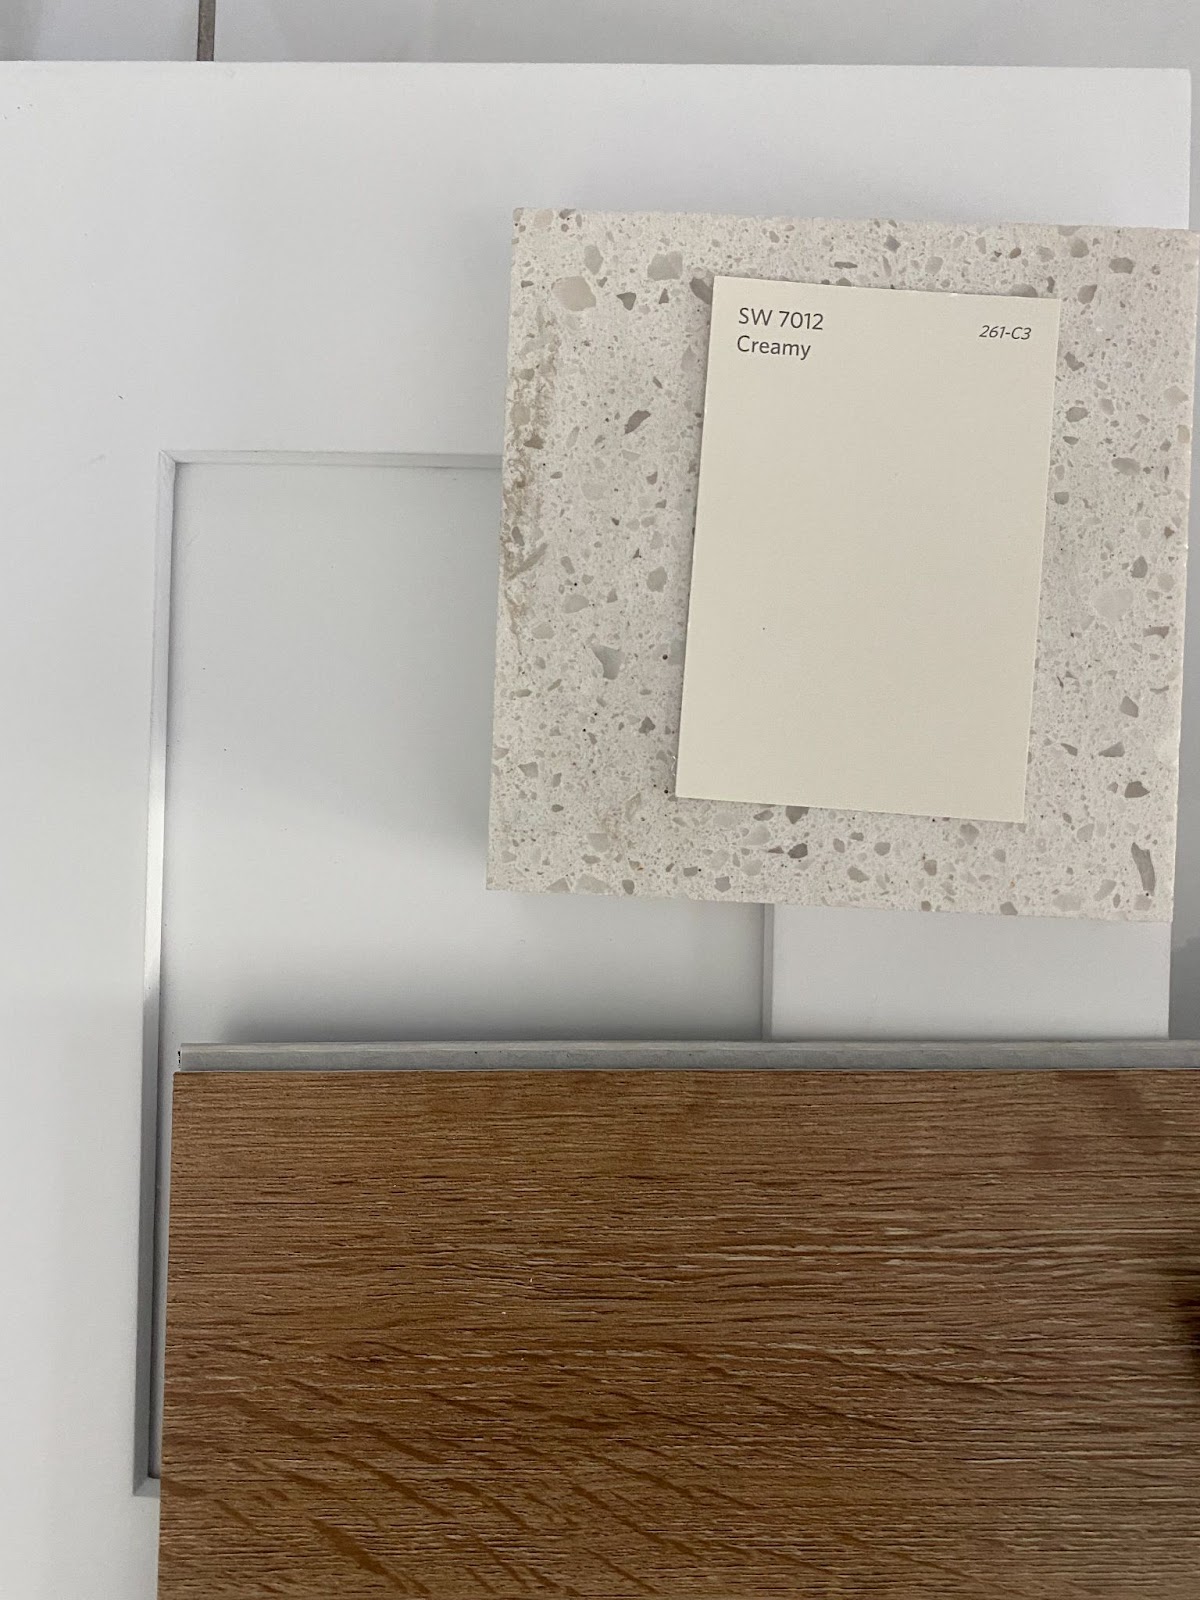
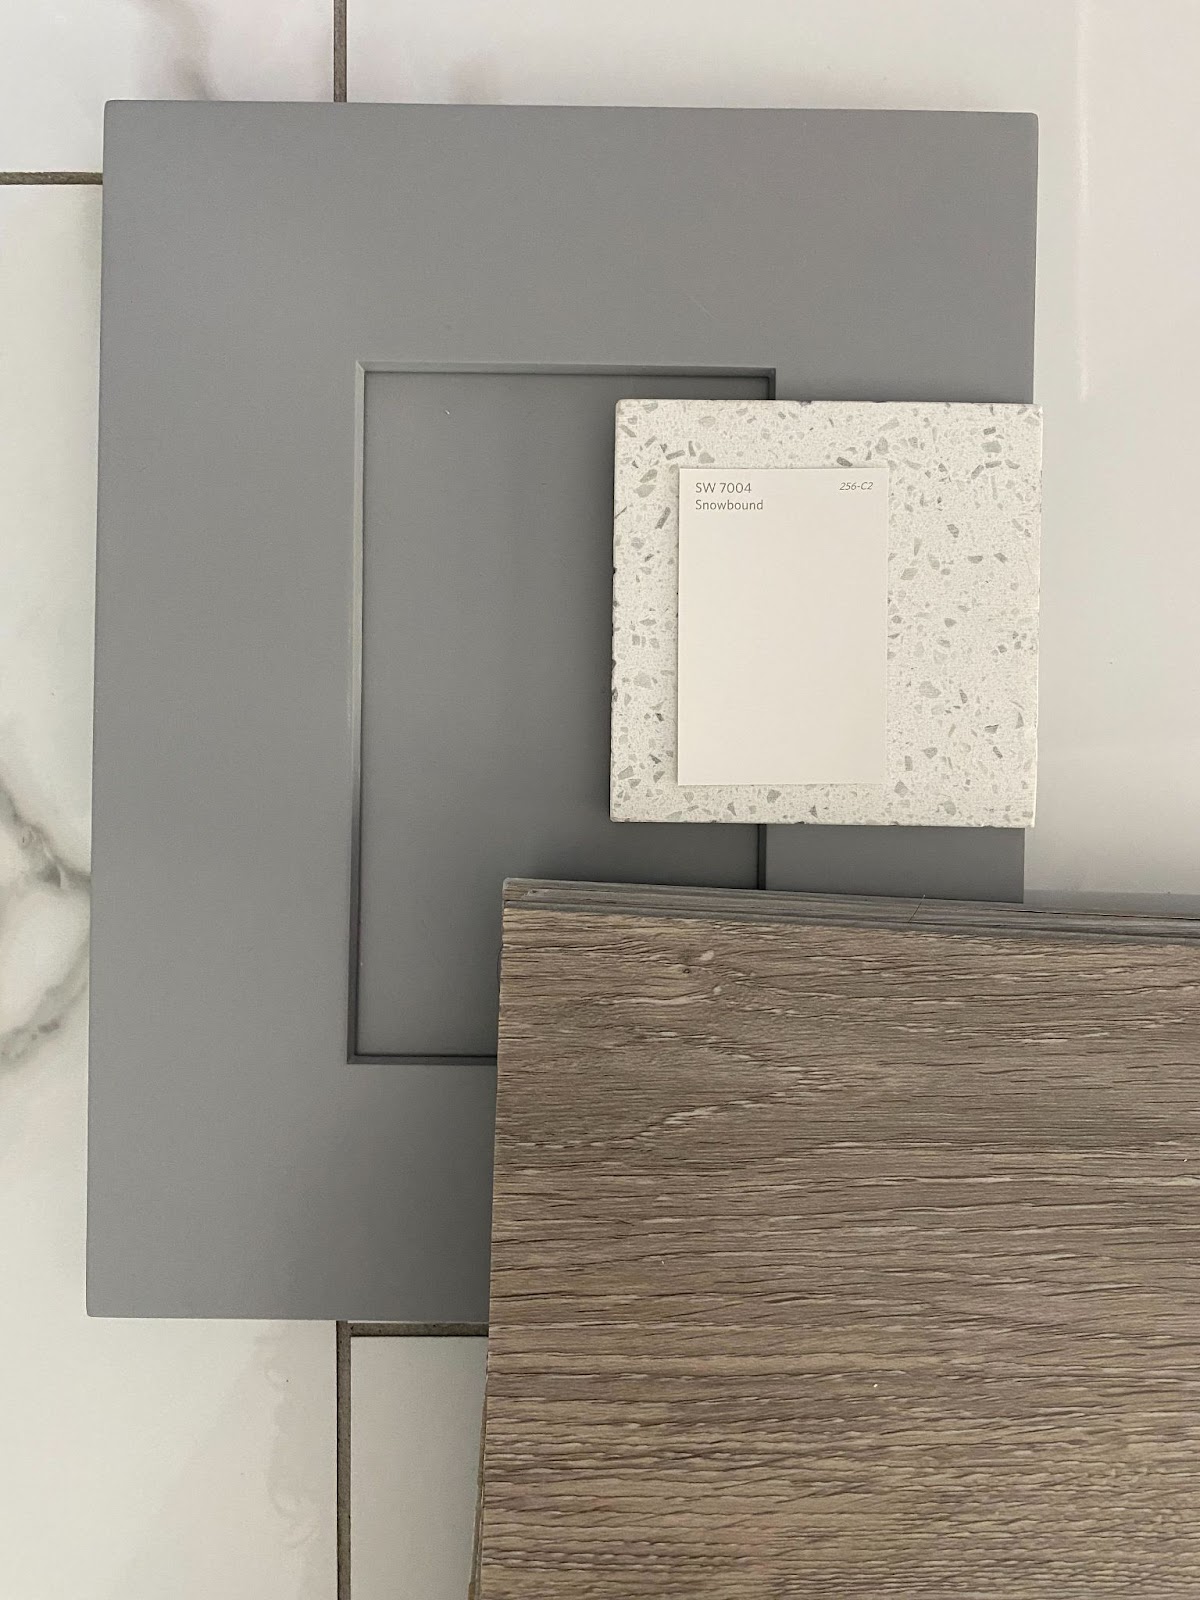
- Put the color chips next to other elements in the room – the cabinets, counter, carpet, hardware, etc. Cool colors like grays and wood with gray undertones will look better with cool whites. Warm colors like beige, and warm woods with yellow undertones will look better with warm whites. See the images below as an example.

- Consider the amount of sunlight in a space. If you have a room with lots of sunlight but you use a white paint color that has yellow undertones, the sun will make the space look even MORE yellow. On the other hand, a room with low sunlight will look even more drab and gray if you use a white paint with gray undertones.
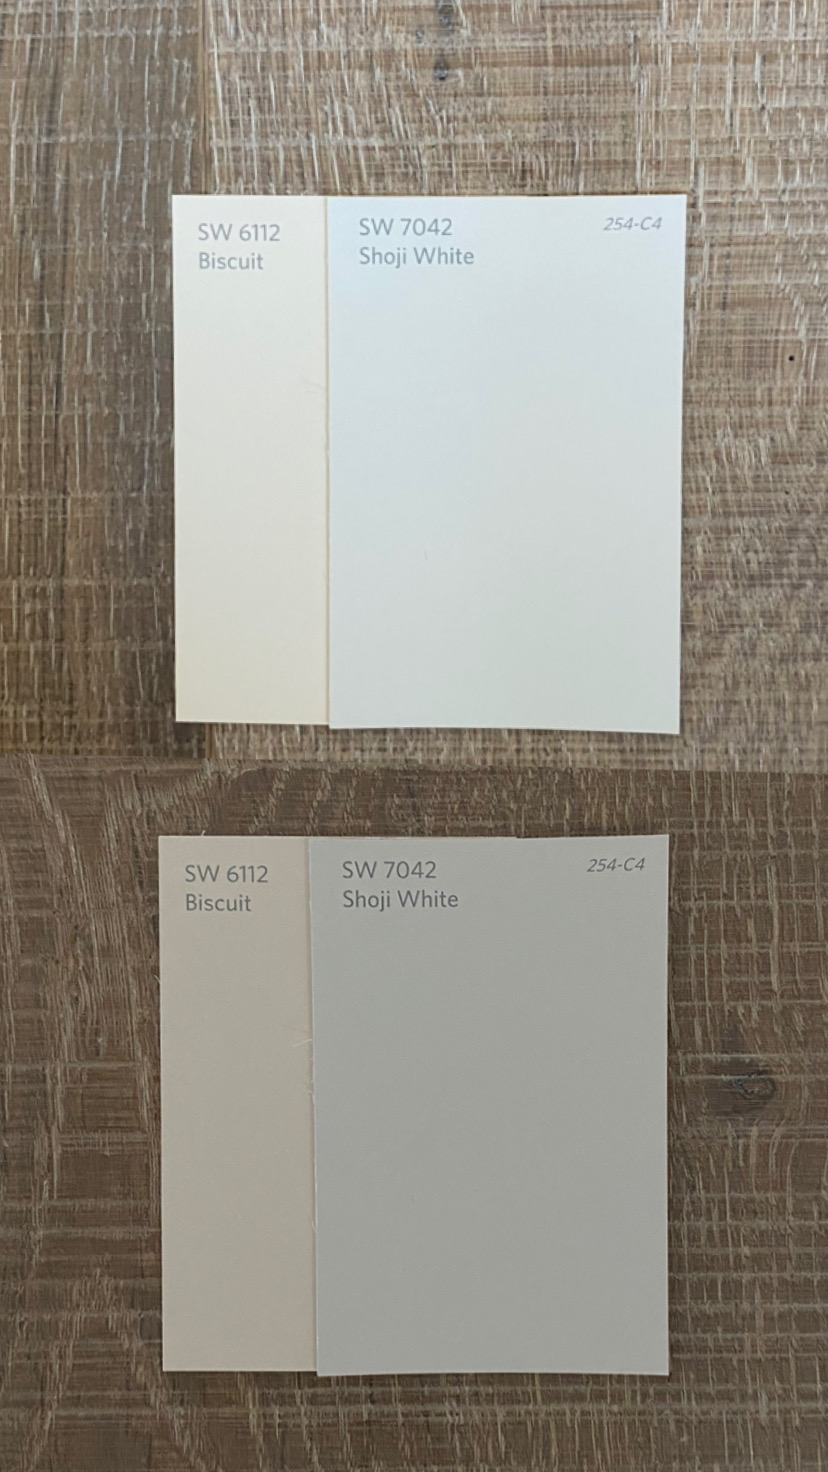
The top photo is in a bright sunny room. The bottom is in a darker lit room. Both colors are the same at the same time of day, but look different depending on the lighting.
After this process, I felt confident going with the color Shoji White SW 7042 in a satin finish. This is my preferred sheen on all my projects.
If you need expert color guidance, Sherwin-Williams offers free Virtual Color Consultations. You can book an appointment to chat with a color expert over text, email or video chat, and show them your existing space or a mood board of what you’re looking for. They’ll give you one-on-one guidance so you can confidently find the right color for your space.
Once you narrow down to one paint color, grab a roller and start painting. Remember paint is one of the easiest and most inexpensive ways to change a space, and don’t judge the color as soon as you start rolling it. Wait until your second coat has fully dried (at least 24 hours) to determine whether you really love it. There have been many times where I start painting a room, and the first coat throws me off. I keep going because I know the first coat is NOT how it’s going to look. You can only judge the final result after the second coat has cured and dried.
Step 2 – Prep work
There was a lot of prep involved in the bathroom. The very first thing I did was empty out the entire bathroom contents. My parents had accumulated a lot of stuff. So we start out by sorting what would stay, and what had expired and was no longer useful. 90% of the contents had to go
Next, I removed all the towel bars and the toilet paper holder. Then, I repaired, sanded and patched all the walls. I’m not an expert in patching walls but I really tried my best to make the walls as seamless as possible. In some cases this means that you will have to sand and spackle more than once. Trust me, the effort is well worth it.
Step 3 – Change the vanity light and remove the builder grade mirror
I used to be so intimidated by changing light fixtures. But after you’ve done it a few times, you realize how easy it is. Most light fixtures come with instructions on how to wire the new light fixture, which I followed for this step.
Removing the builder grade mirror is a little bit intimidating because you imagine the mirror shattering into thousands of pieces as you pull it off the wall. This was my third mirror. That has yet to happen to me. But to be cautious, I taped up the mirror, used safety gloves, and wore sneakers just in case the mirror broke. I used shims along the edges to pull the mirror off. Since this mirror is so large, it is definitely a two person job.

Once the mirror was removed, I was so relieved that the walls were not too damaged. I taped off the placement of the new mirror to make sure that I like the scale of the new mirror. It’s a little bit jarring to see a small mirror after you’ve had such a large one, but remember you’re adding a lot more character and elevating the space with a more stylish new mirror.


I added this ornate mirror but I could not stop thinking that something was off. The scale did not work for the size of the vanity. So I swapped the mirror for a 36″ round mirror and changed the orientation of the light, and VOILA – it all came together!

Step 4 – Painting the Vanity

I used the color Caviar SW 6990 in Sherwin-Williams Emerald® Urethane Trim Enamel paint. I also used this to paint the floral dresser for my daughter’s room. You only need a little bit of paint for any piece of furniture so a quart is often enough paint! Plus, it’s much more budget friendly when compared to the alternative of replacing the vanity. I love this paint because it’s made especially for furniture and cabinets. It is durable, adheres really well (but don’t forget to sand and prime!) and easy to clean.

Step 5 – Adding interest to a long wall
I wanted to add some visual interest to this long wall. At first, I thought about adding traditional panelling, but I really wanted to keep the theme of this bathroom as minimal and clean as possible. So I added a simple chair rail. I found these vintage brass hooks my dad used to hang his belts and added them to this wall. It felt like a nice way to remember him in this space.

Step 6 – Hardware and finishing touches
I used warm brass in the hardware of the cabinet, toilet paper holder, hooks, etc. I wanted that color to flow through from the mirror frame. I even changed the faucet. I hadn’t planned on it, but my mom requested it. It was my first time with any sort of plumbing, but I think I did pretty good!

The rug also helps tie the space together with the vintage printed blacks and the brown. I didn’t want the tile to look like a misfit, so I wanted to bring some brown tones into the rug as well since replacing the tiles was not budget friendly.


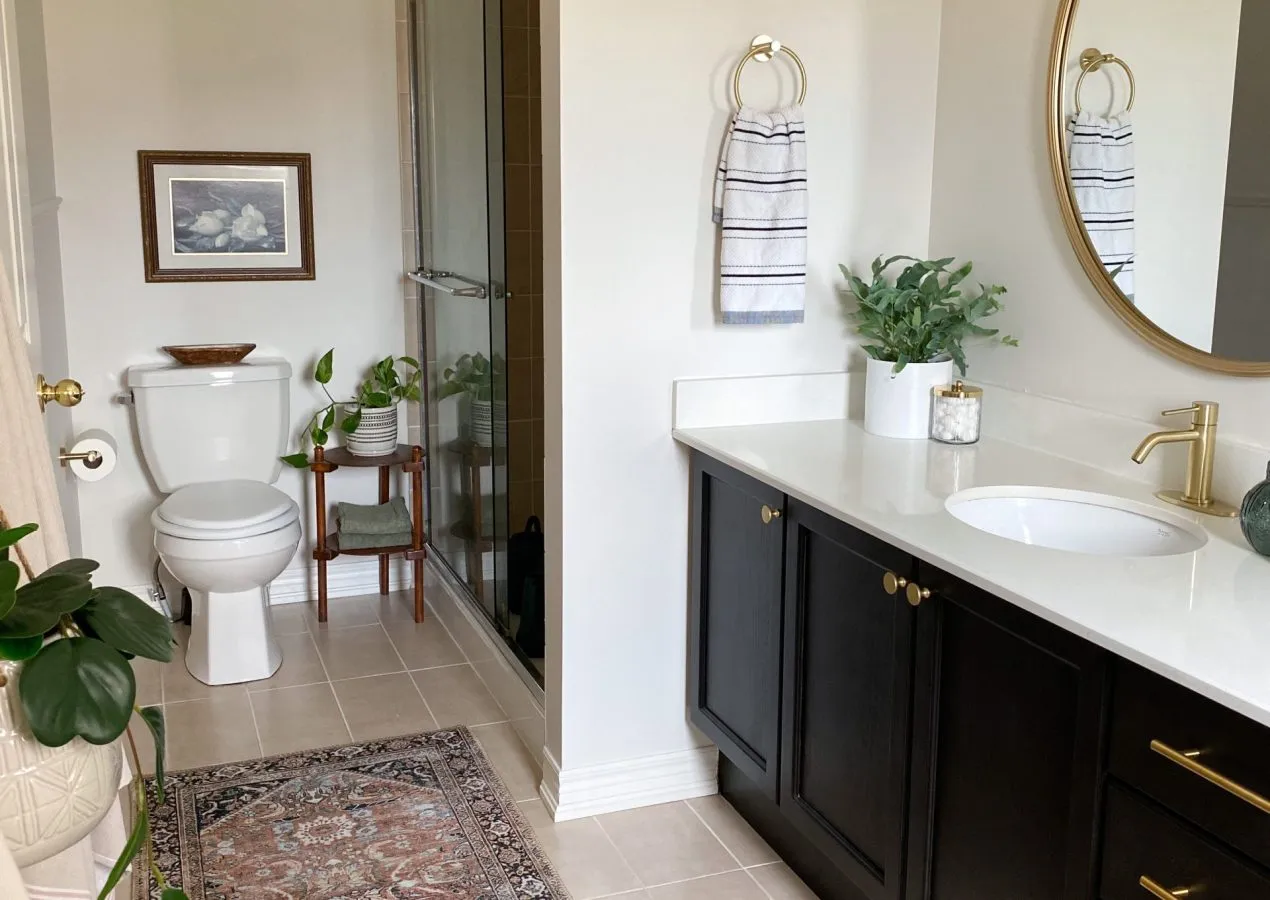
Modern Minimal Bathroom Reveal
Here’s how the small bathroom budget redesign turned out, all for $650! The bathroom before and after pictures have me shocked – it’s stunning. I am so glad I took the time and used the resources Sherwin-Williams offers to find the very best colors to make this transformation come to life! The dark painted cabinet in Caviar SW 6990 is perfect to anchor this space with a fresh coat of wall paint in Shoji White SW 7042.


If you’re looking for budget bathroom makeover ideas, I also gave our powder room a facelift with a bathroom accent wall. If you love this bathroom and try these tips, be sure to share with me! I love to see your projects.
Follow me on Instagram for more budget projects. If you love it, Pin it!
How to Paint Your Bathroom Vanity - Hana's Happy Home
[…] your bathroom, a painted vanity cabinet is a quick and affordable way to upgrade the space. When I designed my mom and dad’s bathroom on a budget, one of the ways I kept the budget down was by repainting the existing vanity. Not only […]
Professional Painters
Amazing. I appreciate you sharing such a great blog.
Judy
Beautiful room! Can you provide the link to the bathroom runner?