There’s something undeniably heartwarming about watching your child grow up, and what better way to capture those precious moments than with a “Grow with My Graduation Shirt.” This creative project allows you to preserve memories from each school year, making it a delightful keepsake to cherish for years to come. As your child progresses through their academic journey, this shirt becomes a living record of their growth and achievements. Let’s dive into the step-by-step guide on how to create this memorable shirt.
Materials You’ll Need:
- A plain white shirt in size Medium or Large Adult
- Fabric paint in your chosen colors
- A cardboard box
- Templates for graduation years (download them here or create your own)
- A fabric marker
- Acrylic paint for handprints
- Fine paint Brushes
Step 1: Get the Year They Will Graduate In
Print off the template for the front of the shirt. I have a bunch of templates you can download here. To calculate what year your child will be by graduation, use this calculator
Step 2: Prep the Shirt

Iron your shirt. It probably came packaged, so I ironed mine so it would be easier to transfer the template
Tape the template for the graduation year securely to a piece of cardboard, ensuring it’s centered and level. Place the cardboard box inside the shirt to provide a sturdy surface and prevent paint from bleeding through to the back. The cardboard can be any box. I used a granola bar box.
Step 3: Trace with Fabric Paint

Using fabric paint in your chosen colors, carefully trace the template onto the shirt. Be patient and steady with your strokes to ensure clean lines. Allow the paint to dry completely before moving on to the next step.

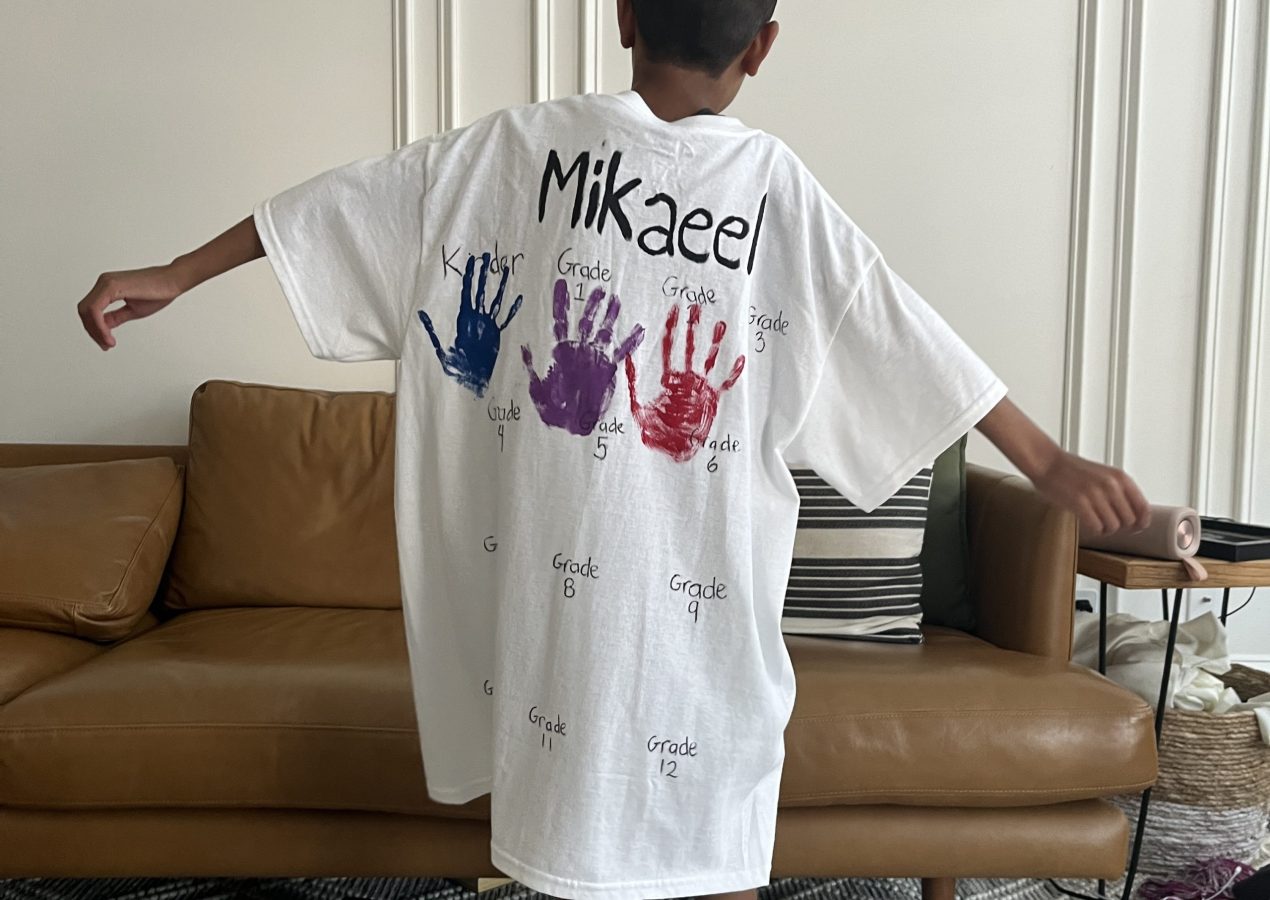
Step 4: Personalize the Back of the Graduation Shirt

After the front is dry, flip the shirt over.
I wanted to add my child’s name to the back, so I typed and printed those off. For reference, mine are in size 280 font. I used the same method of taping the name to a piece of cardboard and slide it ont he back of the shirt. I traced the name.
Use a permanent marker to write grade they are in on the back of the shirt. This step adds a personal touch and makes it easy to track your child’s progress over the years.

Step 5: Create Annual Handprints
Now comes the fun part! Each year, on the last day of school, have your child create a handprint using acrylic paint. Choose a color that contrasts with the shirt for better visibility.
I like to paint my kid’s hand. Use a lot of paint to get a good template. Place their handprint near the corresponding year on the front of the shirt. Allow the paint to dry completely. Make sure to press the hand firmly on the shirt, and all the sides of the fingers.
If the handprint has some gaps, you can fill them in with a paint brush, or leave it as is.


Final Thoughts
As the years pass, you’ll accumulate a beautiful collection of handprints, each representing a milestone in your child’s educational journey. This “Grow with My Graduation Shirt” will become a cherished keepsake filled with memories of growth, laughter, and achievement. It’s a unique way to celebrate your child’s educational milestones while creating lasting memories that both you and your child will treasure for years to come.
I can’t wait to have a graduation party for my kids with them wearing this very special keepsake! Happy crafting!

Download the templates for the front of the shirt here (all years are in this file). If you love this project, Pin it!

Leave a Reply