
This modern DIY barn door is a show stopper! It went viral on pintrest, tiktok and instagram! I have wanted to build a modern barn door somewhere in my home. In my basement I have only one door that leads to the bathroom. This was a perfect candidate as I would not have to compete or consider remodelling other doors. See the detailed plans for a step-by-step tutorial. I was so inspired after I DIYed this door that I also updated my pantry door with a more classic door pattern.

What you need for your modern barn door
- Painters tape
- Table saw
- Mitre saw
- Jigsaw
- A pin nailer. I used a Ryobi 23 gauge Pin nailer
- 1.5inch pin nails
- Level
- Two pieces of 4 x 4 hardboard in 1/4 inch thickness. If you can find a 4×8, snag that!
- primer. I use Sherwin-Williams wood and wall primer
- Paint. I used Sherwin-Williams urbane bronze 7048 in the Emerald line
- Paint brushes and small 2-3” rollers
Cut list
For the detailed cut list including measurements and angles of each piece, see the building plans
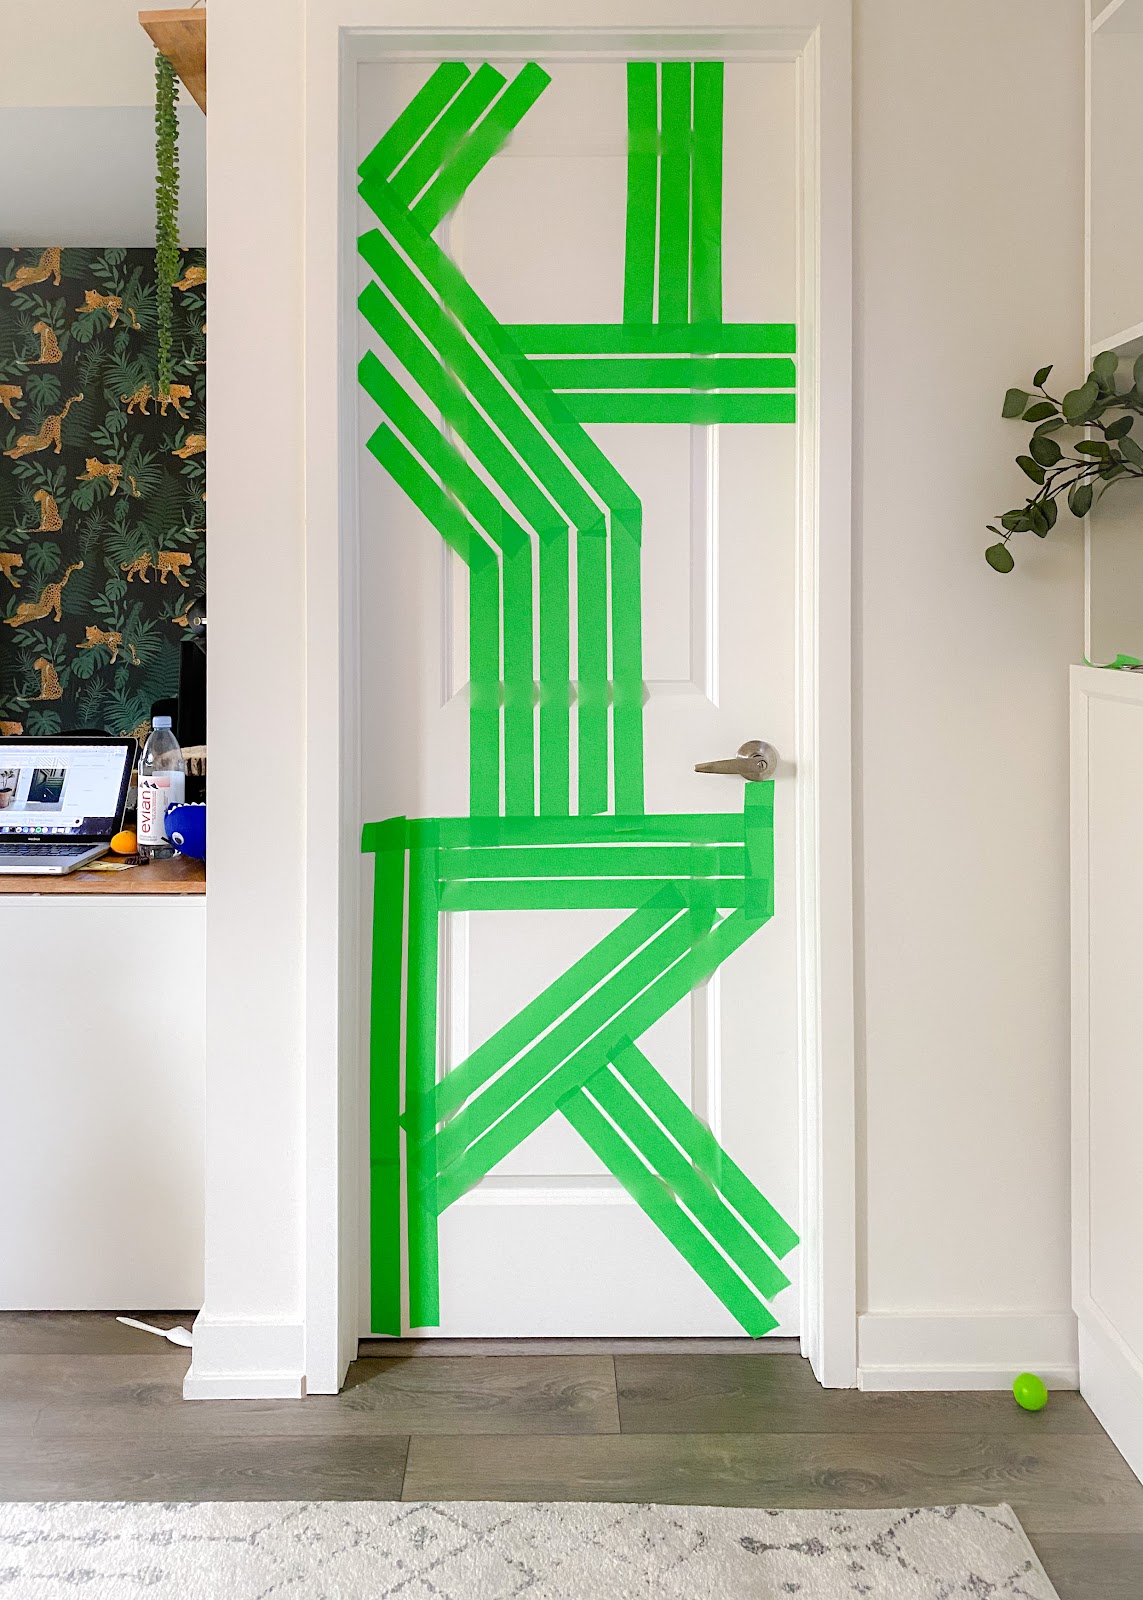
Step 1 – Visualized your DIY geometric door design
For a door like this, it’s really important to have a visual reference of your design one. Without one, it’s going to be impossible to attach the strips that will make up the design.
A good place to look for inspiration is for accent walls on Pintrest. If you love this exact door, check out my printable door guide.
After you’ve drawn the design on paper, tape out your design with inexpensive painters tape. I use the tape from the dollar store since I will peel it off. Adjust the tape until you are happy with the design. Then take a picture of your DIY Door Design. Trust me this is really important for you to help you visualize. If you like the design I picked, you can easily build this door with the building plans
Step 2 – Prepare your MDF Board
You’ll need to use your hardboard for the panel that will cover the door, as well as the strips for the DIY barn door design.
1 – Cut your hard board down to size. Unfortunately I had two pieces of 4 x 4. When measuring, take care along the edges of the door depending on which way your door opens. You’ll need to account for the thickness or the door trim. If you can get 1 piece of 8×4 ft, snag it!
2 – With the leftover cardboard, cut strips that are 1.75 inches wide using the table saw. You can use a circular saw, but it will take you a very long time. Many hardware stores will cut it for free or a nominal cost
Step 3 – Let’s get building your design
1 – Remove the handle on your door. Lean your board against the door and mark out a circle for the handle. Using a jigsaw cut the circle for the handle. If your door hinges creep on to the door, you may need to cut those out as well.

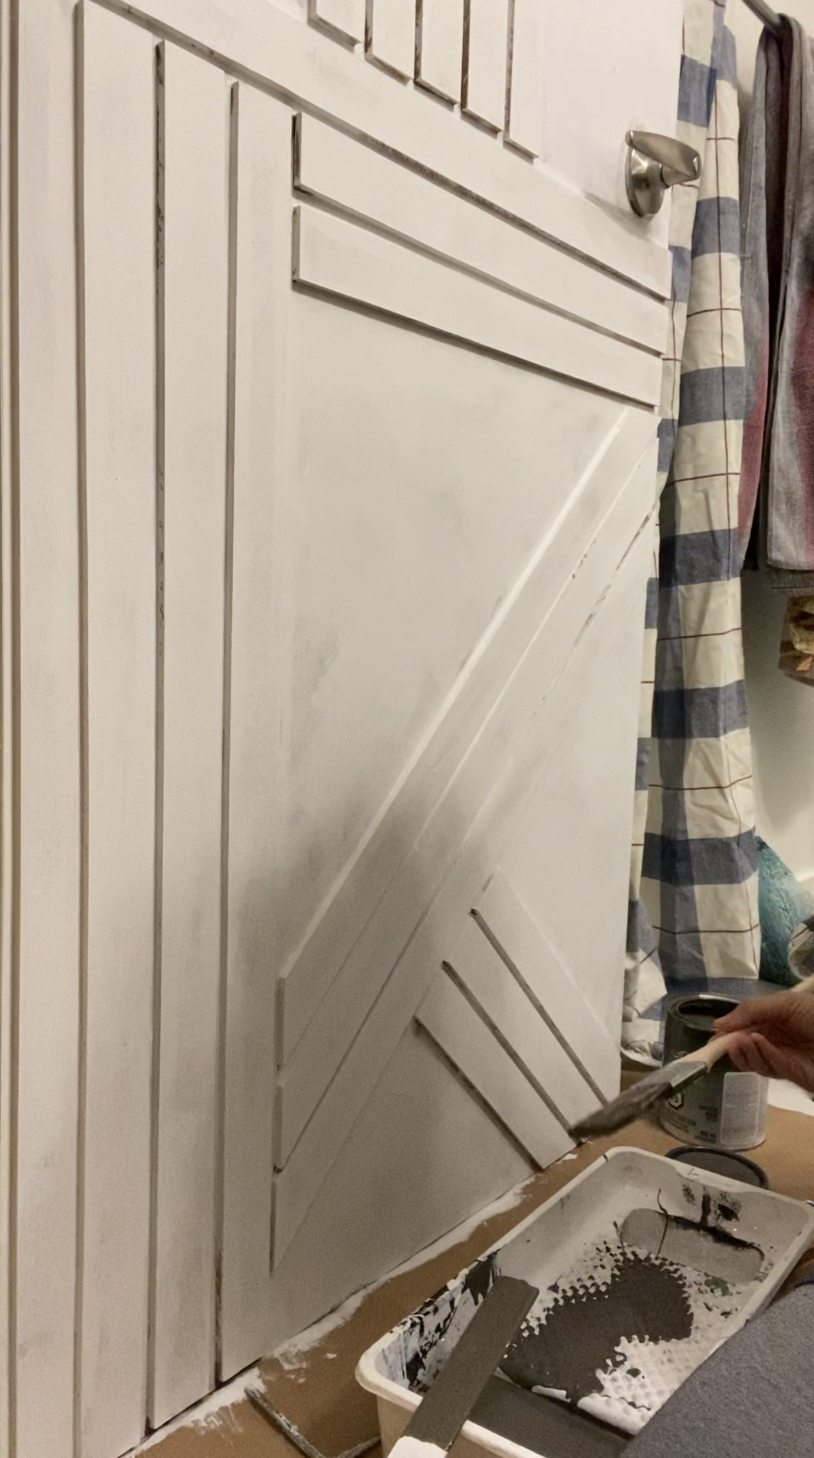
2 – Using the pin nailer, nail the boards onto the door. Account for the edges so your door opens and closes easily. I used a few books stacked at the bottom of the door to prop my door up.
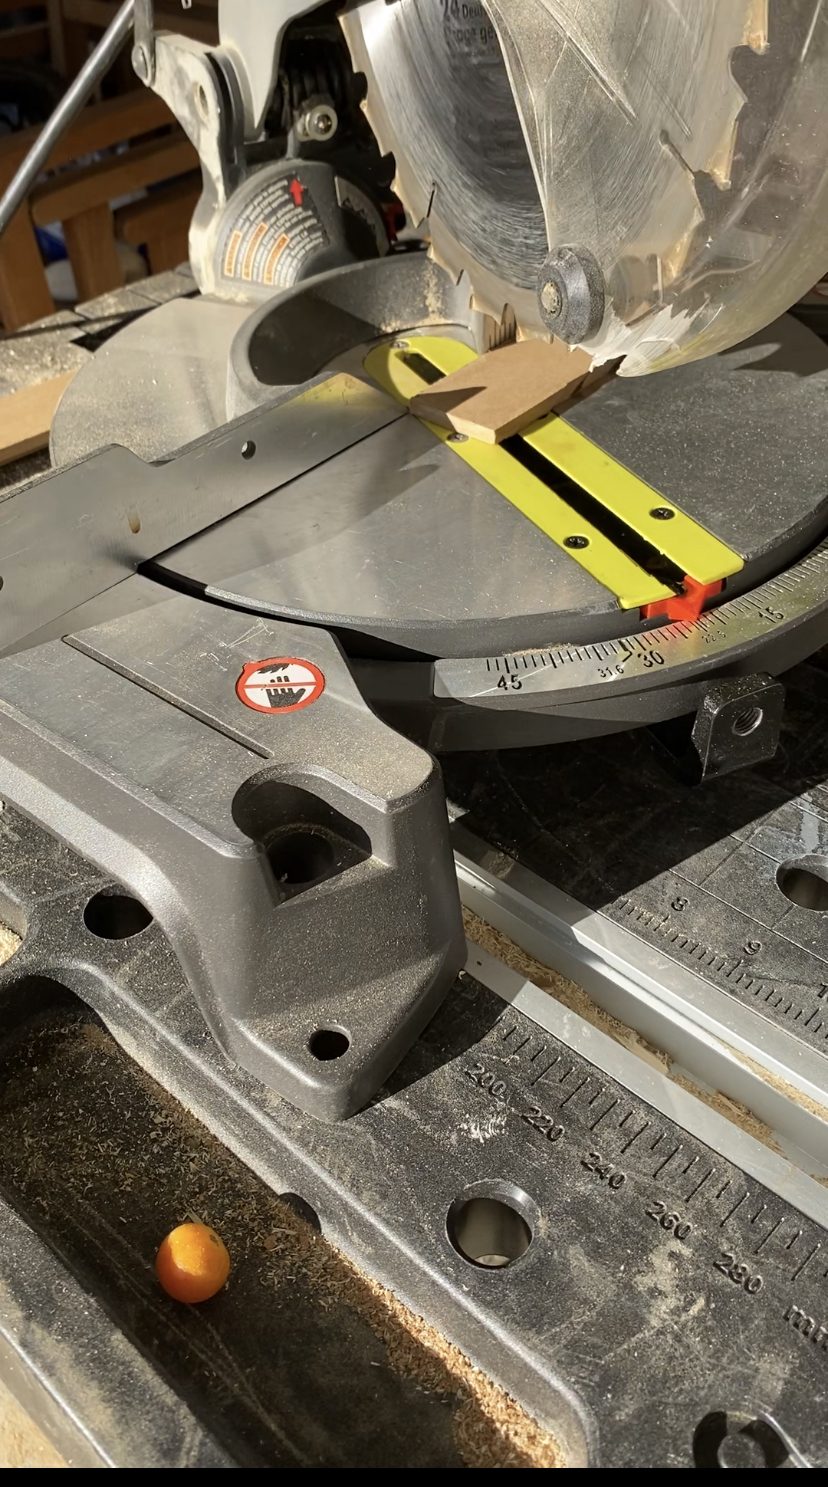
3 – Now the fun part start cutting pieces for your design. For the detailed cut list, see the building plans
4 – Use a piece of wood as your spacer between every single piece of molding. This will ensure that all your spaces are even. Mine was about ¼ inch thick. You will need to place the spacer between every board, before nailing it on.
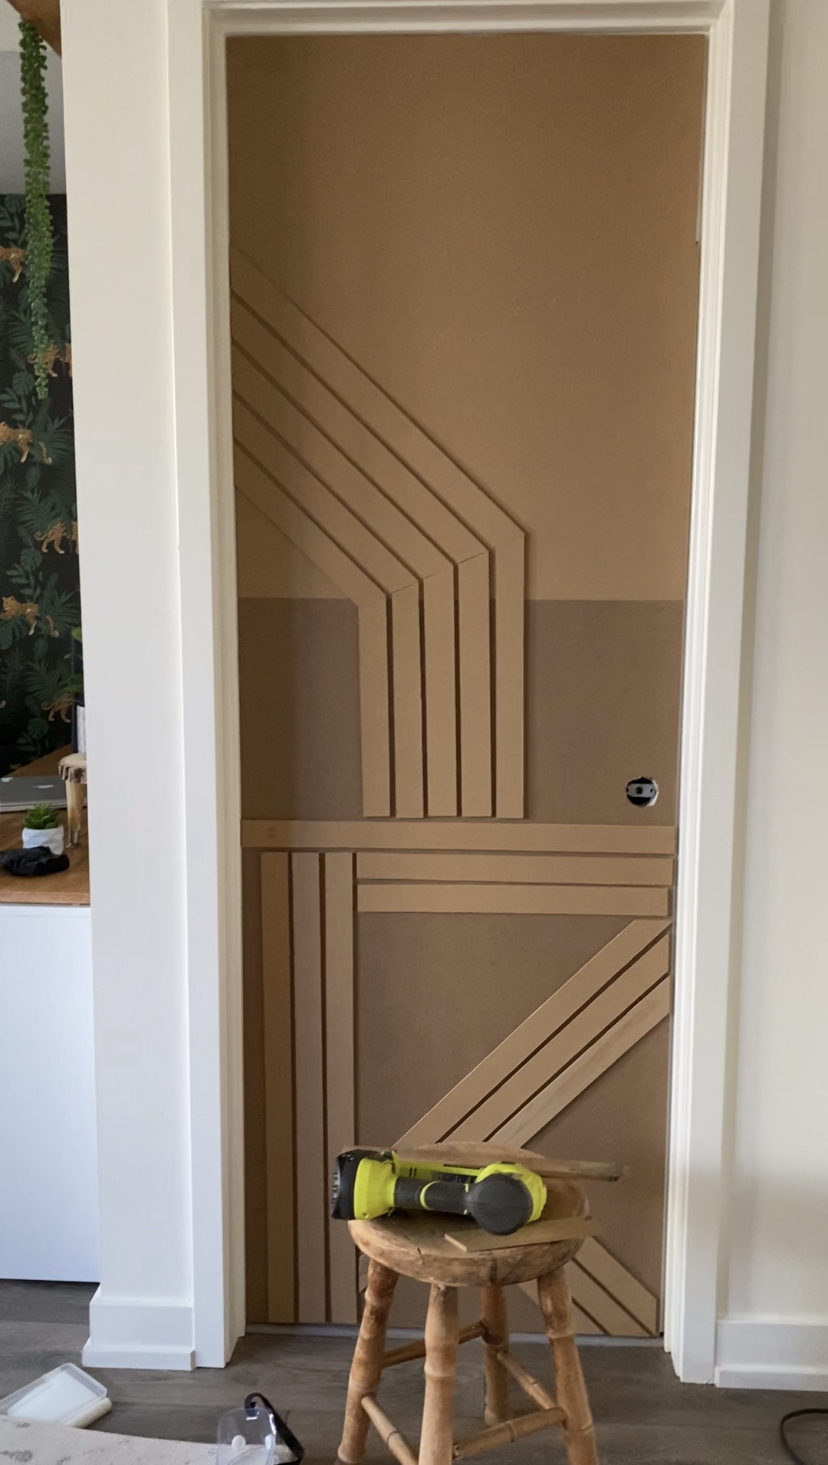
5 – You need to measure each piece cut it, and then nail it. You can find the full cut list in the building plans. With the cut list, you can cut all the pieces at once.
If you’re creating your own unique design, attach 1 piece, then measure the next piece, and cut it. Do not make all your cuts at once. I know this is tedious but the beauty is in the perfection. (I started with wood glue but realize this was unnecessary). This barn door is going to look perfect!
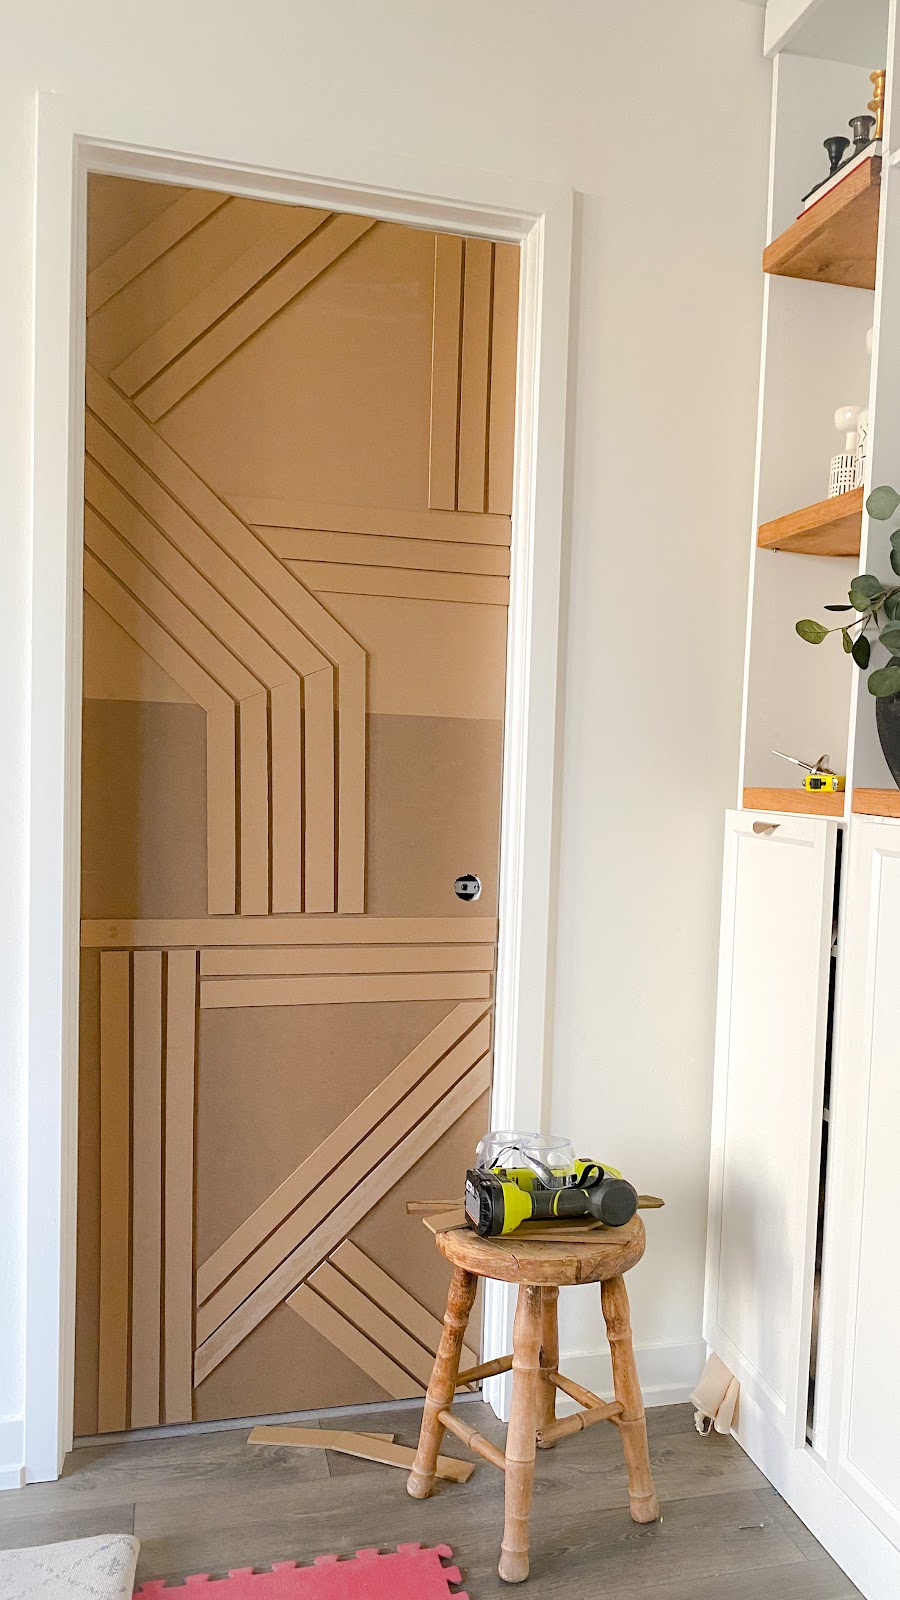
Step 4 – The finishing touches
1 – You’re almost to the finish line. Apply wood filler at any seam where you patched together 2 pieces of the hardboard as well as your flat panel. Use a criss / cross motion and don’t leave too much excess on the door. It can be really difficult to sand off. Try to get a clean seam. Use p220 sandpaper to smooth it out. A second coat may be necessary.
2 – Apply primer. I used Sherwin-Williams wood and wall primer
3 – Then, I used two coats of Urban Bronze 7048 by Sherwin-Williams for this DIY barn door. The colour is just gorgeous. It’s almost like a black, but it has beautiful undertones of brown which really warm up the color!
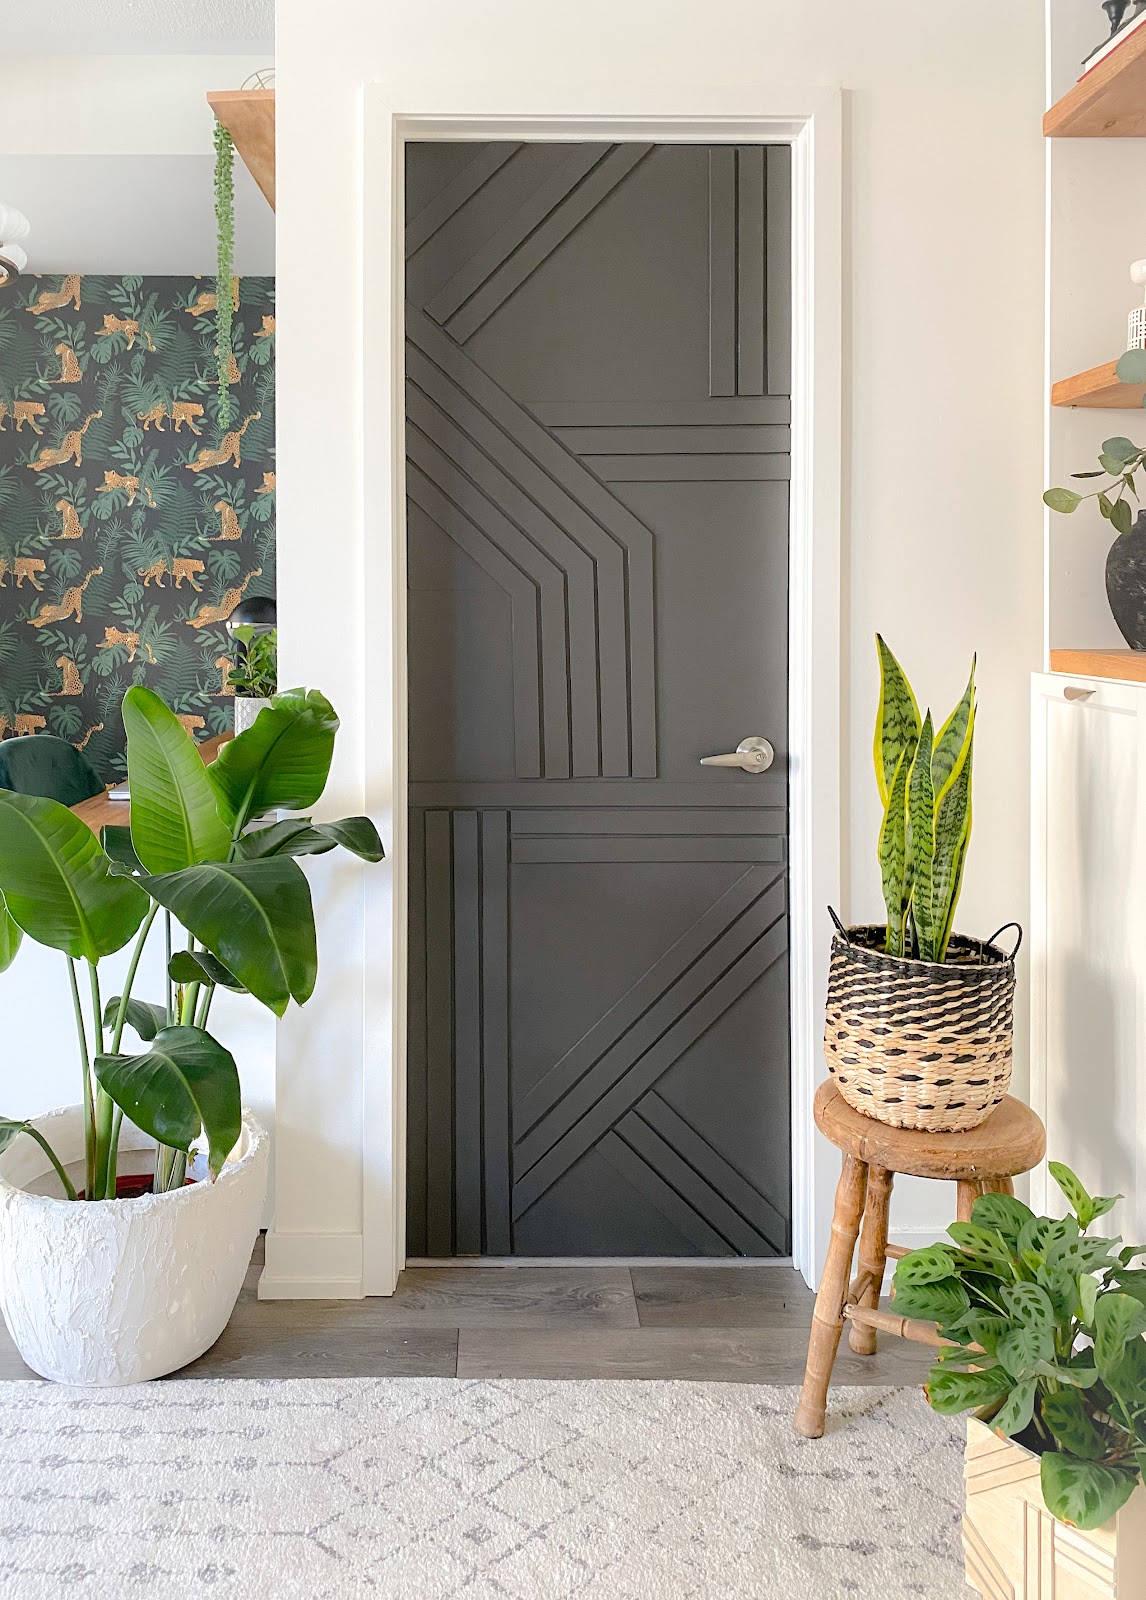
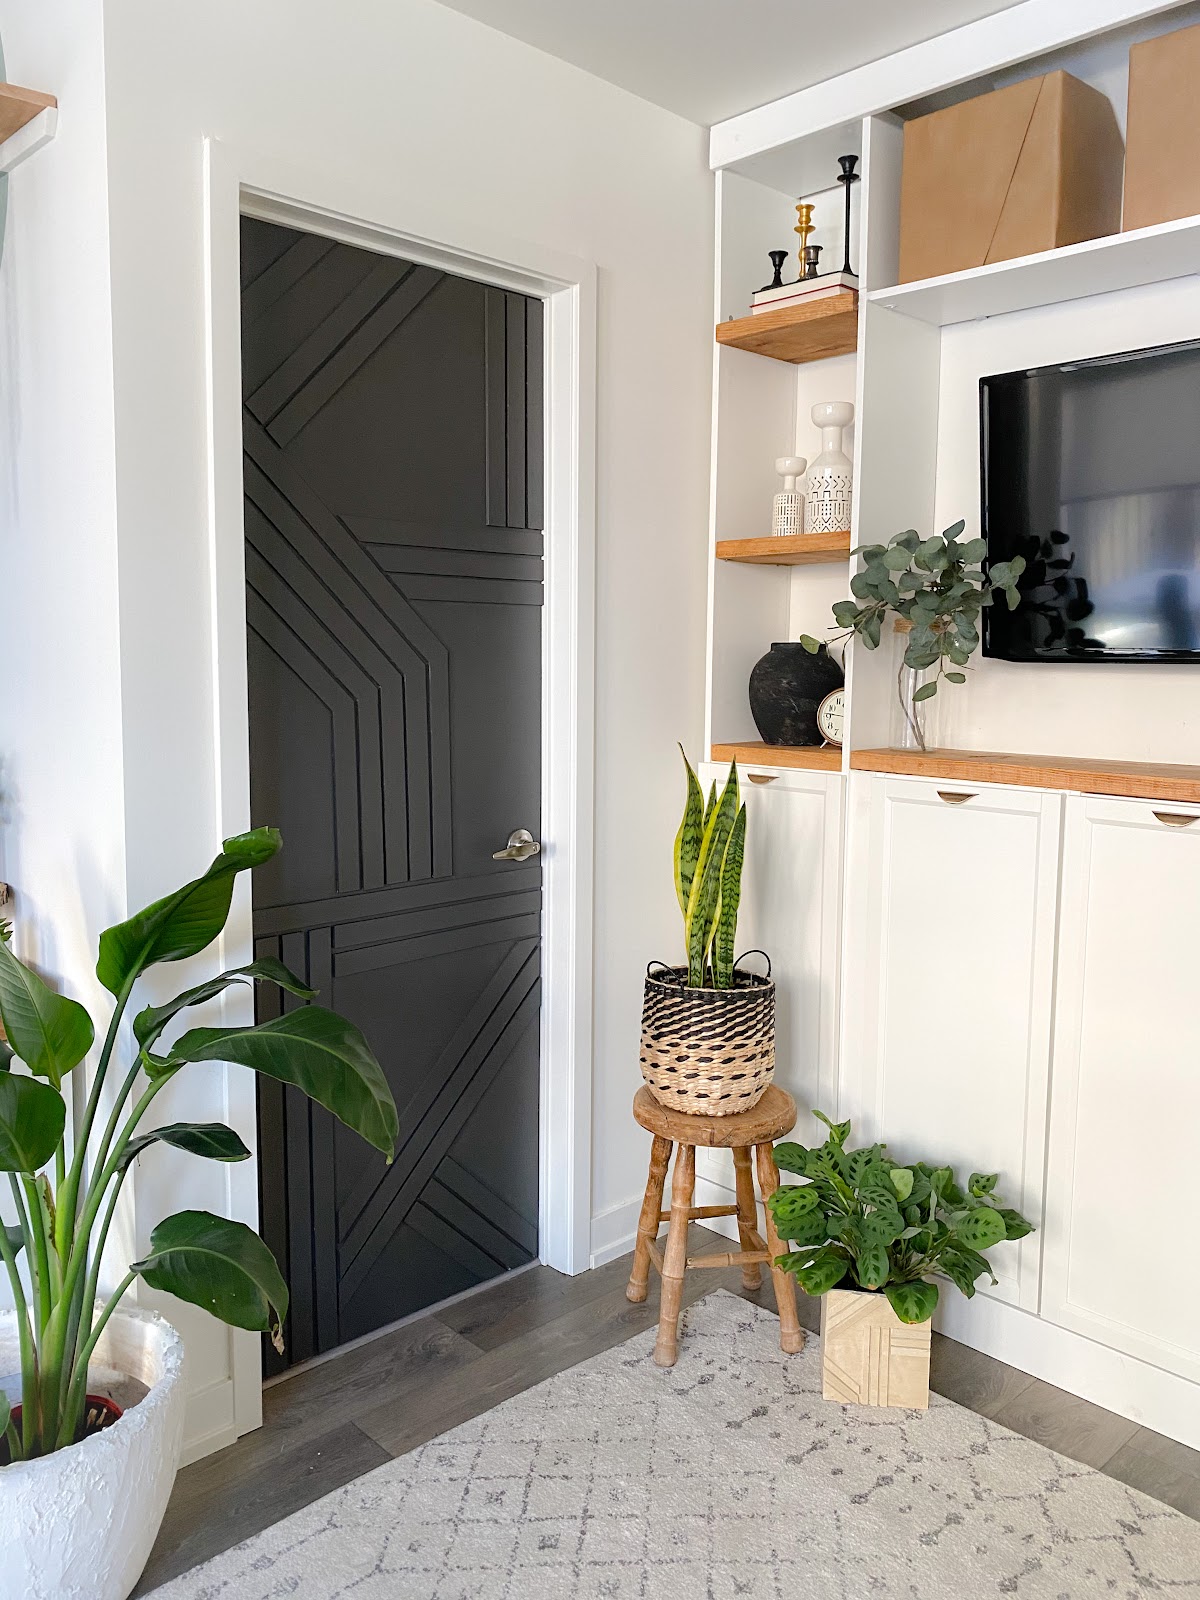
Update: I painted the trim around around the door and it made the door so much more substantial!! It’s exactly what what I need to make this look more complete!

Ready to start building this modern barn door? Purchase the detailed building plans here


I would love to know if you did this project. Follow me on Instagram @hanashappyhome, and share it with me!
Meyer Clark Studio
I will show this to my husband.
Natalija
This looks amazing! I will make an effort to do it
Thanks,
Hana’s Happy Home
I’m so happy!
Trina
Can you give more detail about accounting for the door trim and how that is done on the edges? I’d love to try this!
Hana’s Happy Home
I have a whole highlights on my Instagram that will help answer this question
Kids wall mural door - Hana's Happy Home | DIYer and Dreamer
[…] wall mural door is a twist on a regular door. Door design has become SO fun to me. Since I did my last door design, I was on the hunt for another design. This time, I did door + kids wall mural = DIY door mural. I […]
My Instagram Journey to 50k followers - Hana's Happy Home
[…] doll house from your own childhood so you could really connect with it. Another example would be my DIY modern barn door. I took two ideas: a door + an accent wall and try to form something […]
$40 budget door update - Hana's Happy Home
[…] update! I want to update all of them! Previously, I updated our basement door with a really cool geometric door design that went viral over the internet. I love the door and it’s a show stopper. Now it’s […]
6 Apartment Foyer Design Ideas that inspire a Grand Entrance - Sevenedges
[…] Image Source: @hanashappyhome […]
Jan
Looks great- I can see some gaps around the handle side of the door where it closes, is it hard to get even?
Hana’s Happy Home
Nope. Because the trim is cutout around the handle, it’s fine
Entryway Transformation With the Sherwin-Williams 2023 Color of the Year - Hana's Happy Home
[…] two years. You’ll see the color selection is always on point. In past years, I painted this modern door and this floral dresser in the Sherwin-Williams Color of the […]
Shaghig
If I have a flat door, with no indentations, can I skip the large pieces of hard board?
Hana
Yes for sure!