
This is not your typical rainbow wall painting mural! It’s a reinvented modern rainbow! I’ll show you how to paint a rainbow on a wall for your daughter! I have been working on a rainbow themed room for my friend’s 2 year old toddler girl. We started with a blank space. From the beginning, we knew we were going to do an accent wall. When we first started, my client wanted to add decals to the wall. Simple, and easy, but not very impactful. Plus, her daughter would grow out of it after a few years. After many discussions, I somehow convinced her to go a bit bolder (or maybe she decided on her own?!). Let’s walk through how to paint a rainbow wall mural!

I wanted to keep within the rainbow look and feel, but decided to turn a rainbow on it’s head (almost literally!) Enter: the reinvented rainbow. This geometric rainbow design is SO impactful. It’s fun. It’s exactly what a little girl needs in her bedroom! Plus, it’s so easy that any beginner can complete this diy rainbow wall painting mural. You need very little skill, just a lot of patience. It’s a perfect weekend DIY project!


Materials to paint a rainbow wall:
- Your choice of rainbow paint colors (I will share mine below)
- Measuring tape
- painters tape
- a yellow pencil
- paint brush
- drop cloth
- Frog Tape
Want to see this Rainbow Mural come to life? Check out my YouTube video below, and be sure to subscribe to my channel!
Step 1: How to pick colors for your rainbow wall painting
- I struggled for a long time on how to pick the colours. I knew I would integrate a few greens and pink from the ombre watermelon dresser, but I didn’t know how to pick the rest of the colours.
- At first, I tried to pick muted colours. While at the paint department of Home Depot, I sent my client a snap and said “I am going to go bold instead” and her response to the muted colours? “Those remind me of a hospital waiting room”.. and I couldn’t disagree.
- I picked a bunch of samples. Have you ever noticed that paint colours are arranged in a rainbow? Well, that makes it much easier. I then picked colours that were in the same vibrancy (ie they were all 2nd or 3rd in the sample). I went with a jewel tone. At Home Depot, you can get Behr sample size paint for $5. Well, I bought 11 and was on my way! For this design, you need an odd number of colours.


Step 2: How to tape your vertical stripes on the wall for your modern rainbow
1 – Make sure you use frog tape. Spend the extra $5 because it will make the cleanest lines.
Find the centre of your room.
2 – Using tape, mark how wide you think you want the design to go on the wall. Our wall was 135″, and we decided to leave 29″ on each side. So each stripe was 7″ (77″ wide divided by 11 colours). Adjust your measurements until the width of the stripe is a whole number (at first each stripe was going to be 6.8″ wide. Do you know how hard that would be to measure over and over!!!!??)
3 – Use a yellow pencil crayon and level and draw the all the vertical straight lines.

4 – Start taping. Your middle stripe should be 7″ wide without the tape. You can paint the entire stripe. Every other stripe should be a full 7″ from each inside edge of the tape. That means the 2 adjacent stripes will be <7″. We will fix those later. If this is confusing, reference this image below. (I will reference Column A and B later too)

5 – Tape up the baseboards so they don’t get paint on them.
Step 3: How to determine the height of each stripe

- See if there are any vertical markers in the room like the top of a door of window frame that you can align the top of the rainbow to. In this room, the top of the window aligned with the top of the doors 7ft. To carry consistency through the room, I used that as my tallest stripe. Each strip was 2″ shorter from that
- I measured the middle strip. I marked it and taped it. Then each subsequent stripe was 2″ shorter.

Step 4: How to paint a rainbow wall mural
1- In this room, the wall was already painted a fresh crisp white.
2- To start painting, I lined up all the paint samples under each stripe. I didn’t want to get confused with the order of the columns.
3- I painted the stripes. It’s not hard, but time consuming to paint them all as I hand painted them. The columns were too skinny to use a paint roller them. You can use any good quality brush. Some more pigmented colours will require 2-3 coats.


4 – Because of the way that the columns were taped up, when you peel the tape off, there will be gaps in Column B (referenced above). Now you have to paint the gaps in Column B (since they are not full sized). This is where I would do things a bit differently next time.I peeled off the tape and tried to free hand the gaps from the smaller columns. The combination of my perfectionism + not having a steady hand made me HATE the result.

After waiting 3-4 hours for the paint. to fully dry, peeled off the tape on Column A, one at a time. Move that tape over to the adjacent column B. Since Column B was smaller, you need to tape OVER the paint edge on column A.

Now you can paint all the column Bs. When the paint is dry, peel off the tape.
The Reveal: Reinvented Modern Rainbow Wall Mural!
After I did a few touch ups, I looked at it and was amazed by the result! Isn’t that rainbow painted wall so fun and beautiful! I feel like this is such a focal point that it doesn’t need any wall decor on this wall. Sometimes less is more in home decor. I think a rainbow arch is cute, but this is more modern and therefore it will transition really well with my friend’s daughter as she gets older. We balanced the space out with lots of other fun elements like a reading nook, craft corner and a lush and soft neutral toned rug!

Her reaction to the room was so heart warming. It really pulled at my heart string. I love doing kids room makeovers!


Most common questions about this rainbow mural
What colours did you use?
All the colours were from the Behr Marquee line in Satin from Home Depot. They are $5, so that’s a score! From right to left, they are
Diva Glam
Prarie Rose
Toucan
Squash Blossom
Custom colour mix: DL 9, TL 47, YL 46
Shanghai Jade
SolitaryTree
Yucatan
Perfect Sky
Unimaginable
I Heart Potion

How did you pick a design?
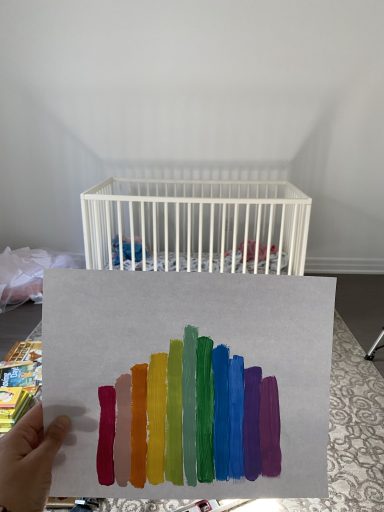
I looked around for a lot of inspiration. Then, when my kids were asleep, I got every single colour open and painted a bunch of designs and patterns on paper. I did a 3 before I decided on this colour pattern.

How long did this take you? (I mean, tape you haha)
I think you mean, how long did it tape me. Taping was the most time consuming:
– Pick out colours: 1 hour
– Measure and tape the wall: 2 hours
– Paint, touch ups, etc: 5 hours
I will honestly say that I am a perfectionist. So you may be able to do it faster than me.

What is the base colour of the wall?
I had to paint this room a bright white (Sherwin Williams Extra White in eggshell) so that the rainbow wall painting would pop.
Check out my rainbow girls room inspiration to see the 7 essentials we need to create for the room and follow along because there is a LOT more fun on the way.
Painting tips for beginners - Hana's Happy Home
[…] I love paint! It is the easiest way to make a big impact. You can use it to transform an entire room or an accent wall. It’s inexpensive and you don’t need a lot of skill. I’ve painted countless rooms and below is a collection of my top painting tips. You can do an entire room or a fun accent wall like my rainbow murall. […]
Kids Craft Table hack - Hana's Happy Home
[…] my client. There’s so many rainbow rooms that I drew inspiration for. I started with a fun rainbow mural, and now am moving on to the functional aspects of this space. With a little bit of time and elbow […]
DIY modern dollhouse of your dreams - Hana's Happy Home
[…] busy and away from screens. This wooden doll house would look beautiful in a girls bedroom with a rainbow mural and craft […]
10 Baby Girl Themes for Nursery - Hana's Happy Home
[…] can also choose a more modern take on a rainbow like this re-invented rainbow mural I painted. The best part is that you don’t need any power tools. It’s very budget […]