You can’t walk into any home decor store without finding textured art. There are so many beautiful pieces of art that looks really high-end. But here’s a secret – you can make these really easily at home and on a really small budget. Mine only cost me $20!!!
Don’t kid yourself into thinking that you need to be an artist to create this. You don’t! You probably have a lot of the materials at home too.
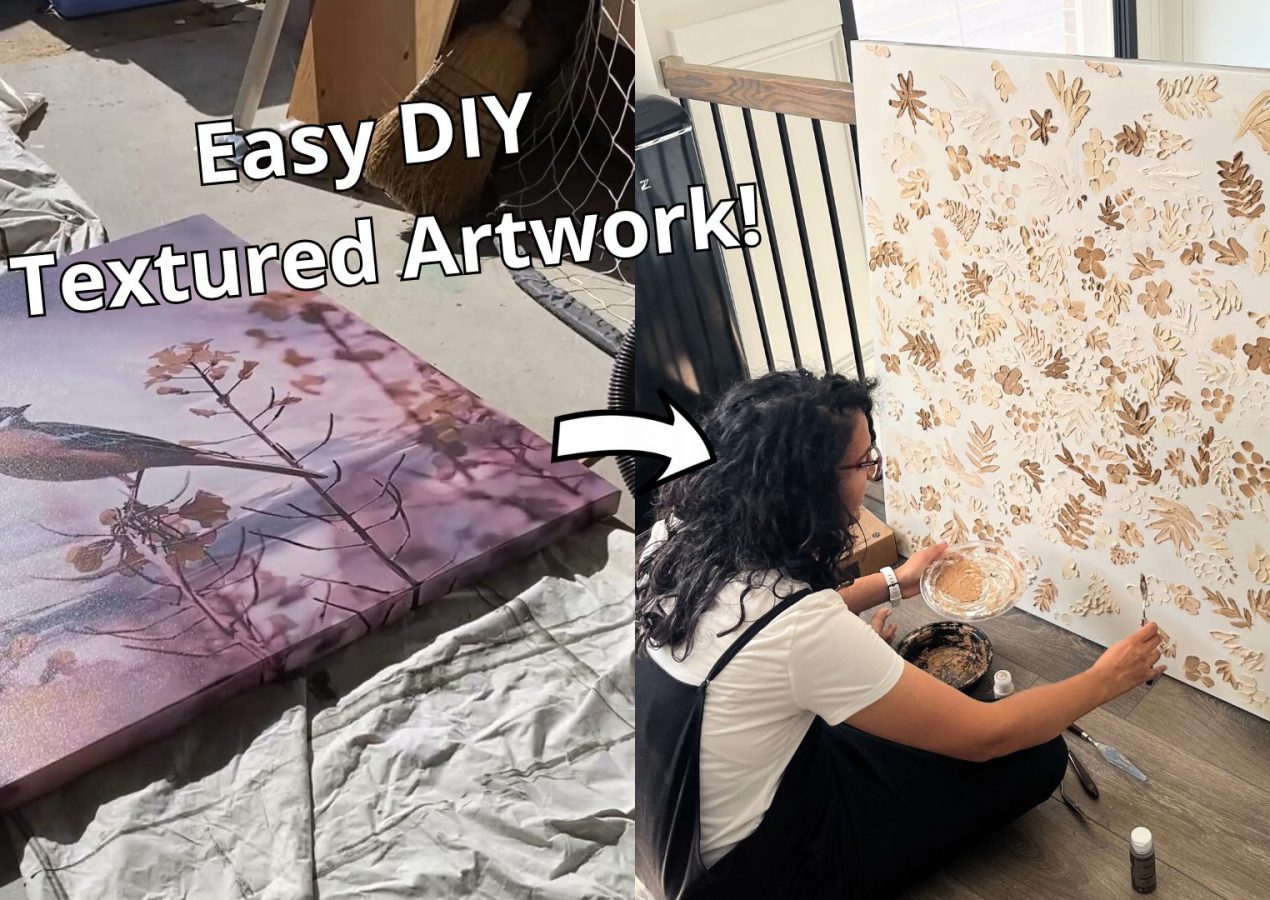
I had bought this bird painting about 10 years ago. It has been sitting in my parents basement for about seven years. It’s a large scale piece of canvas wrapped around a frame. It measures about 40 x 40”.

Since my parents never throw anything away, I knew I could use this to re-create a DIY textured art piece. This can be done with any store-bought canvas or thrift store artwork
What do you use for DIY Texture Art?
I used wall spackle because I had it leftover in my garage. Most of us have this from filling nail and screw holes. You can simply use that. You don’t need to buy joint compound or drywall mud. But, if you have those, you can use them too. I used about half of my large tub of sparkle for this project.
Materials
- Canvas
- Wall spackle (you can also use drywall mud, or joint compound)
- Leftover interior paint
- acrylic paint in the deepest paint color you will use (I bought dark brown)
- Putty knife
- Palette knives
- Plastic plate or canvas
- Drop cloth
Step 1 – Prepare your Canvas for Textured Art

I needed a blank background to work off of, so I started by painting over my bird print.
I didn’t want my canvas to be a stark white background, so I painted it a creamy white. I use the leftover interior paint to paint the entire canvas.

If you don’t have leftover paint, you can get $5 sample cans from Home Depot. I painted two coats for a good coverage. You don’t need to prime your canvas.
Step 2 – Practice your Technique

I wish I had practice my technique before I went to my canvas. I started directly on my canvas, and had to wipe off all of the spackle and start again
So learn from my mistakes and grab a piece of scrap cardboard.
Practice your technique with your palette knives and spackle. You’ll get the hang of which knives can make which type of shapes.
Here are some tips:
- You only need a little bit of the spackle mixture on your knife.
- Add more spackle to your knife after every single leaf or petal
- Sometimes holding the palette knife can be awkward depending on the angle. Try flipping your canvas, so it’s more comfortable for your hand.
- Try flicking your wrist when you lift off your palette knife to create texture
Palette Knives Cheat sheet

Here’s a cheat sheet for the different types of palette knife and what they create. There’s definitely more variations but this should get you started:
Step 3- Mix your First Color for your Textured Canvas
Using your putty knife, grab a blob of wall spackle and put on your pallet. Add a little bit of paint and mix it with your pallet knife. Start with the darkest color.
When you mix your compound, it should feel like frosting for a cake. Make sure it’s smooth and the colour is blended in.
I started with my darkest color, and then continuously added more spackle to that mixture to lighten the color and create more colors
Step 4- Create your DIY Textured art

Now you’re ready to start! Channel your inner artist. Put on some tunes, because this is such a therapeutic process.
Start by making flowers and leaves with your darkest colour and spread them throughout your canvas


Flip your canvas, so the pattern of the plants goes in different directions
Do not use thick layers of sparkle as this can crack. I kept my artwork with small, light petals.
Step 5- Add more colours to Your Textured Art

Since you already have the darkest colour created, add more sparkle to create the lighter colors. Keep alternating the types of plants that you are making.
It’s a good idea to step back and see what colours are missing from a specific section.
When I got near the end of my artwork, I used a lot of little dots to fill in the spaces.


Step 6- Build a Simple Frame
I added a simple frame made out of 1×2 pine. You can even get the hardware store to cut it for you if you don’t have a saw.
Sand down the wood, condition and stain it with your favourite wood stain or leave it natural. I opted for a dark walnut stain to make the artwork pop


Then, I nailed it with a nail gun, but you can use a hammer and nail, or even construction adhesive!

Step 7 – Enjoy your Artwork!
I’m so impressed that with just $20 I created this wall art! I saved money by using an old canvas and leftover spackle. I was able to create this beautiful textured art piece, and so can you! It looks like it belongs in a home decor store!


You can hang this over your bed, fireplace or in a hallway. It’s such a simple way to personalize your room. I hung it in my mom’s guest bedroom that I recently updated.

If you love this project, try it! Pin this for reference

Leave a Reply