Plumbing is a daunting task. But you can unclog a bathroom sink on your own! This solution address the root cause of the clog. My kids bathroom has a clogged sink. When they are washing their face, or brushing their teeth, the excess water fills up in the sink and DOES NOT DRAIN! I mean it does, but it’s a slow drain. It’s really gross! It takes 10-15 to drain and your left with.. uh, I would rather not say!

Luckily, my dad taught me how to unclog a bathroom sink. So don’t call a professional plumber yet. There are a few simple things you can try for this drain clog. This is something anyone can do, no big tools needed. Like me, you’ve probably already tried different methods: a baking sods / vinegar, hot water, a toilet plunger, and a chemical drain cleaner. None of those DIY solutions address the root cause. So if you have stubborn clogs, the best solution is to to clear the P-Trap and the Sink Drain. When I posted this to my Instagram and TikTok, they went viral. I’ve helped so many people with their bathroom sink clog.
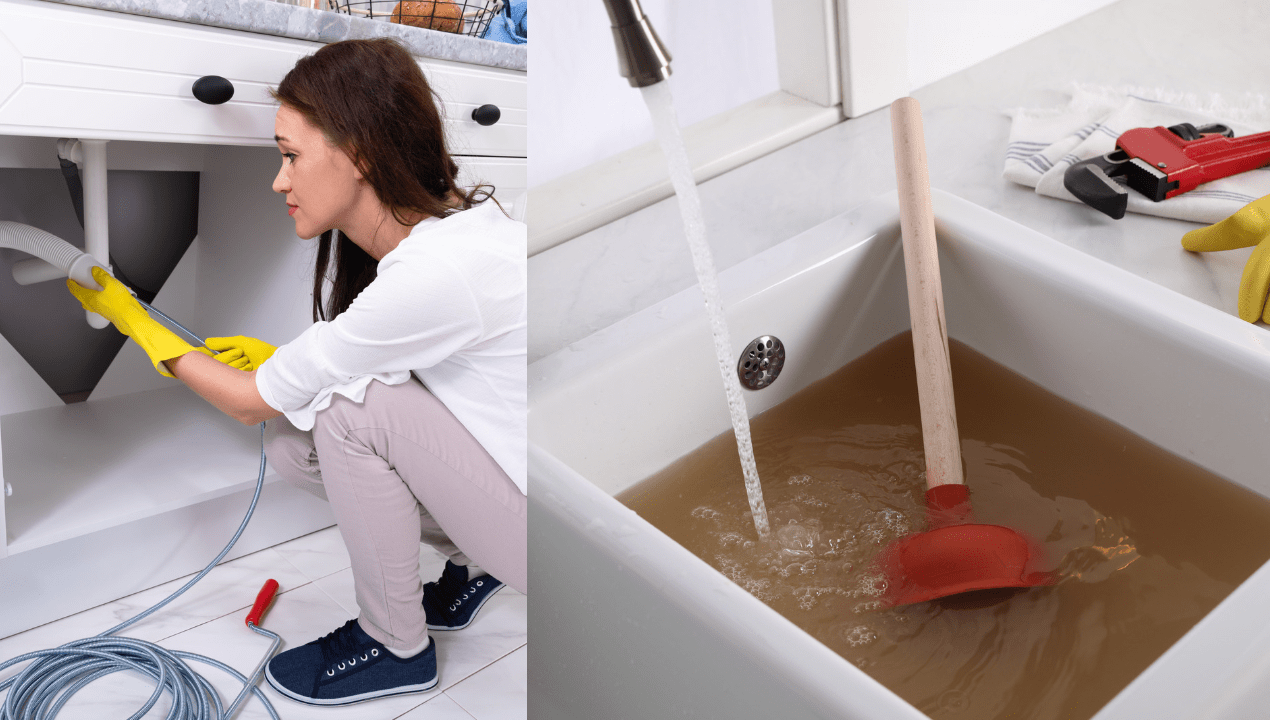
If you prefer to watch videos, check out this video tutorial
What you need to unclog a bathroom sink
- Bucket
- Rags (that you can throw away)
- Large and small wrench
- Drain snake (optional)
- Gloves
- Old toothbrush
Set up your bathroom sink:
Step 1 – Remove everything below the sink
The first step is to remove everything from below the bathroom cabinet. You need this area cleared as you’ll be getting into the pipes.
Step 2 – Identify the plumbing that you will be tackling
Let’s take a look at the plumbing. The first thing we will tackle is the sink stopper. This is the stopper that prevents large objects from falling into your drain pipe when you wash your hands. We need to access the pivot rod to remove the sink stopper.
The second spot we will clean is the P-Trap. You should see a U shaped curved pipe. This is called a P-Trap. If you look at the shape, the bottom of the “U” prevents dirt/gunk to flow deeper into your plumbing.

Step 3 – Set up to unclog your sink
You need a bucket that will fit under the P-Trap. When you open up the plumbing, water and dirt will flow out. You need the bucket to catch the water to prevent any water damage to your cabinet. Also place your extra/old rags under the sink in case there is any drips from the drain pipe. Put on your gloves.
Part 1 – Clean the Bathroom Sink Stopper
Note: This works for a pop-up stopper
The Sink stopper prevents a lot of the big gunk from glowing into the sink. But did you know that a lot of gunk gets caught there as well? I was SHOCKED at home much accumulated in the 5 years since we bought our home.
Step 1 – Remove the pivot rod
Look under the sink. Towards the back, you will find a vertical pipe. Attached to that pipe are 2 metal rods. Locate the pivot bar. This is the horizontal bar. It is attached to the vertical pipe. In some sinks, you may need to pinch a spring to open this up. In my sink, there is a nut that I had to unscrew. Either way, open this up. If it’s really tight, grab a wrench to open it. I managed to unscrew mine easily by hand. There was some black water and gunk that same out, so be sure your bucket is under the sink! Remove the pivot bar and place these parts in a bowl so they don’t get lost.


Step 2 – Remove the Sink Stopper
Wearing your gloves, remove the sink stopper. As you pull it out, there will be gunk attached to the stopper. Put this in a bowl/bucket to clean. Wipe this with your toothbrush and paper towels. Make sure the grime does not go down the drain again!


Step 3 – Clean the top of the pipe
Now here comes the gross part, but you really have to do this. I promise it will be quick. And remember, you’re wearing gloves (I forgot and then was too far in to g o get gloves). Reach inside the pipe and feel around for any accumulation of gunk. If you’re not brave enough, you could use a fork or drain snake or something small like that. I WAS SHOCKED. It was almost like a solid cylinder of grime. Throw this away in the garbage.

Step 4 – Clean the bathroom sink drain pipe
Using your old toothbrush, reach as far down as you can, and clean the pipe. As your toothbrush accumulates gunk, wipe it with a paper towel or rag. Do not let it go down the sink. Remember, that’s what is causing the sink clog.

Step 5 – Clean the pipe where the pivot rod connects
This may be difficult depending on the angle of the drain pipe, but try to clean the little opening where the pivot rod/ball connects. You can use your toothbrush or fingers (wearing gloves!)
Step 6 – Reassemble the sink stopper and the pivot rod
Place the sink stopper back in the drain. Make sure the loop is facing the back is the sink so the pivot rod catches on it. Head below the sink and reattach the pivot rod by screwing on the nut. Ensure the pivot rod catches on the sink stopper. So you may have to jiggle the rod, or hold the sink stopper slightly above the sink so it catches properly. In my case, I have to hold the sink stopper 2 cm above the sink drain so the pieces can fit together properly.

Make sure the hole on the sink stopper is facing the back of the sink

You may need to hold the stopper up slightly to engage the pivot rod

Re-attach the pivot rod
Step 7 – Watch your water drain quickly from the sink
Here is the most exciting part. YOU DID THAT. You made the water flow! High Five!

Part 2- Clear the blockage in the P-Trap
Even if cleaning the sink stopper solves the problem, I recommend cleaning the P-Trap. Why? You’ve already cleared the cabinet, got the bucket and in the plumbing groove. Cleaning the 2 parts go hand in hand!

Step 1- Loosen the Slip Nut Joints
There are 2 plastic slip nut joints connected to the P-Trap (trust me, I had no idea what they were called. I had to look them up!). One of the slip nuts leads to the drain pipe, and the other leads the wall/floor plumbing. Loosen these 2 nuts. If they can’t be opened by hand, use a large wrench
Step 2 – Remove the P-Trap
When you remove the P-Trap, there will most likely be water and debris, so make sure the bucket is positioned right under that stop. Place the P-Trap in the bucket. Clean the debris that is inside the drain pipe.


I was grossed out by this black water!
Step 3 – Clean the pipes
Clean both the drain pipe and pipe that leads to the wall/floor using your toothbrush
Step 4 – Re-attach the P-Trap
Place the P-Trap back in position and reattach it by screwing the nuts back on. Tighten but do not over tighten. Run the water and check to make sure there are no leaks from either the P-Trap or the pivot rod. I prefer to dispose of the dirty water in a corner in my garden. I get nervous it might clog the toilet. Never dispose of it down the sink. It might clog again.
Step 5 – Feel proud that you used these simple solutions to clear the sink!!!
I’m so proud of you! You did it! If you didn’t get the sink unclogged after those DIY methods, it means the clog is somewhere deeper like between the floor. You’ll have to call a professional plumber.

Preventing a future clogged bathroom sink
Now that you’ve cleared the bathroom clogs, here are some ways you can prevent sink clogs in the future
- Prevent any hair from going down the sink. Always ensure hair ends up in the garbage. Hair clogs the sink. ALWAYS!
- Make sure your kids do not throw any wrappers, toys, household items etc into the sink
- Incorporate regular sink cleaning into your routine. Use an inexpensive plumbing snake to fish out any hair. Then, rinse with a homemade drain cleaner: a cup of vinegar with baking soda (this forms a fun chemical reaction for the kids to see too!). I do not recommend using chemical cleaners, carbonic acid or boiling water as it can damage the pipes.
- it’s normal to accumulate dirt/ grime. I don’t think there’s much you can do to prevent this. I mean, this is where we wash our hands!
Hopefully these tips helped! Now you know how to unclog your bathroom sink. If they didn’t, it’s best to call a plumbing expert. If this worked, make sure to pin and share with your friends. You can always find me on Instagram for more budget projects and homeowner tips.
Leave a Reply