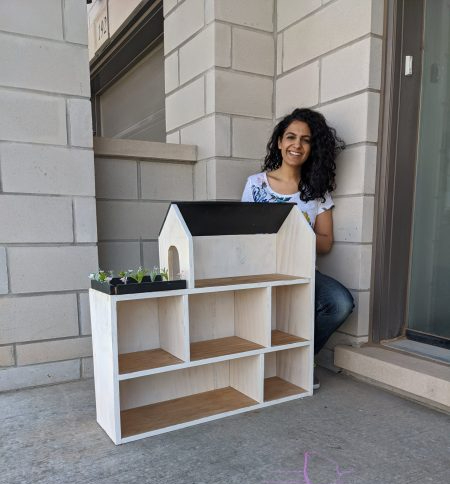
Growing up I dreamed of the day my parents would buy me a doll house. Not just any doll house, I loved modern homes since I was a kid. I wanted a DIY Modern Doll House. It never happened so here is my DIY modern doll house. For a few years, I’ve been wanting to build a doll house for my nieces. I decided now is the right time, especially since my sister-in-law is at home with both of them (age 2 and 4) and working full time (Thanks COVID!). I wanted to help her keep them busy and away from screens. This wooden doll house would look beautiful in a girls bedroom with a rainbow mural and craft corner.
If you shop for wooden doll houses online, they range in the hundreds of dollars. The price of this is under $50, not including your time which is “free” because it’s made with love.. right?
Looking for the complete cut list and step-by-step tutorial? Get the DIY Doll house plans. With these plans, any beginner can build this dream doll house.
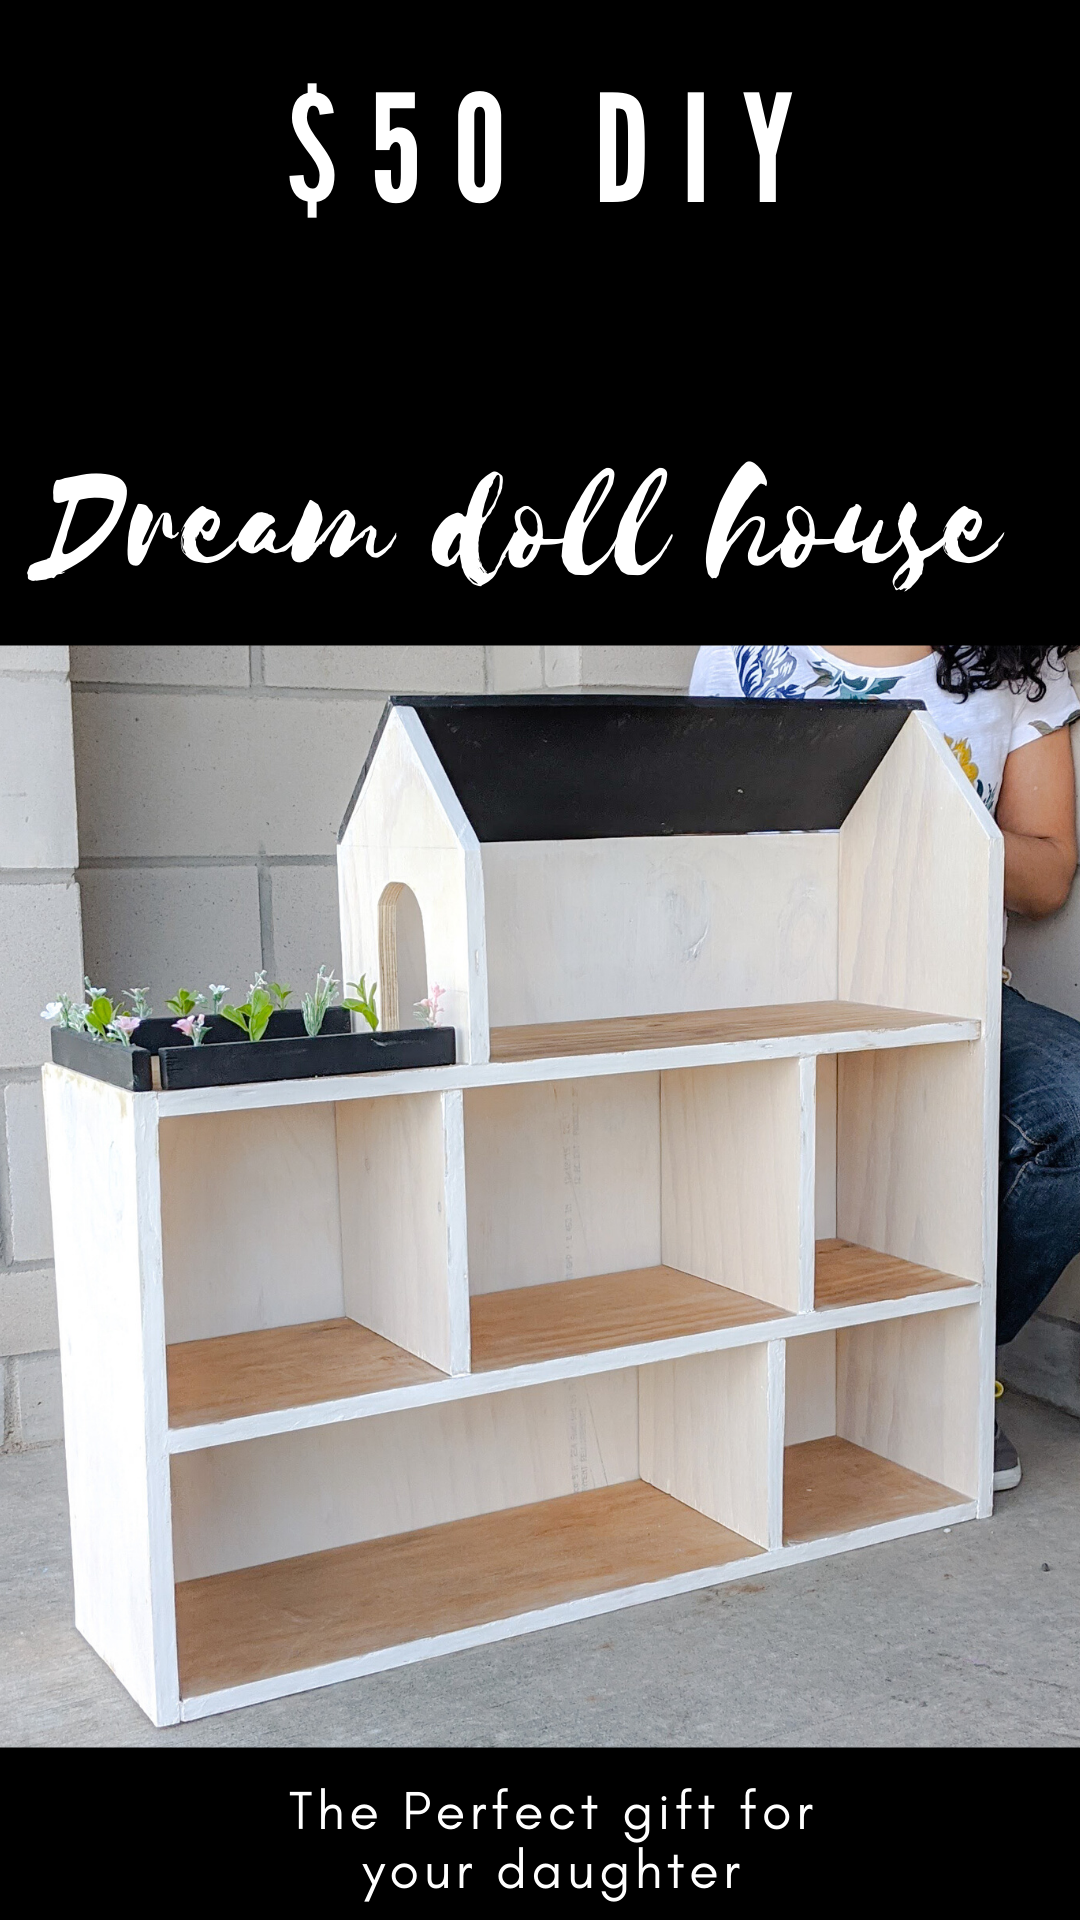
What you need for a DIY Modern Doll House
- Tools:
- Sander with the 220 grit sandpaper
- Circular saw
- Materials
- 1 sheet of 1/2 or 3/4 inch plywood
- Get the complete doll house cut list
- 1 1/4 inch brad nails
- Scrap 2x4s
- 1x1s
- clamps
- 8ft long board (I’ll show you a hack if you don’t have one!)
- Primer. I used Zinsser
- Paint of your choice. I used Sherwin Williams Tricorn Black and High Reflective White
- Stain. I used Minwax Early American
- 1 sheet of 1/2 or 3/4 inch plywood
Let’s start building our DIY Modern Doll House
Step 1 – cut all your boards
- Cut the following boards: Floorboards, room dividers, and sides of the house from the printable doll house plans
– I placed 2x4s on the floor, then my my plywood board on top.
– To get a super straight cut, I used leftover trim and clamped it to my board, 1 inch over from where I wanted to cut. This is really important as the blade is 1inch off the edge of the saw guide
– Use the circular saw to make a clean straight cut for the boards
– Use the mitre saw to cut the boards to the appropriate length
Step 2 – Paint and stain the floors and walls
- Before staining the floor boards of the doll house, use wood conditioner on the floor. Then, stain the floorboards. The wood conditioner will ensure the stain goes on much more evenly.
- Prime & paint the room dividers. You can stain and paint after the doll house is complete as well, but it’s a lot easier to paint before the pieces are assembled. If you assemble first, you will have to use painters tape to prevent bleeding on the different sections (ie you don’t want stain to get on the walls)

Step 3 – Start Assembling the Doll House
- Nail the room dividers to the floor boards
- Before you nail them, mark a line on the top and bottom of the floor board so you know where the room divider will be nailed. (Trust me, don’t skip this step or you will get nails that are in the wrong spot and difficult to remove) Don’t place the room dividers directly on top of each other, it will be very hard to assemble. Make sure the room dividers are staggered on each floor by 1 inch
- Nail the room divider on the BOTTOM side of the floor board. That means flipping the floor board upside down, and then nailing on the line you drew
- Nail all the room dividers on each floor
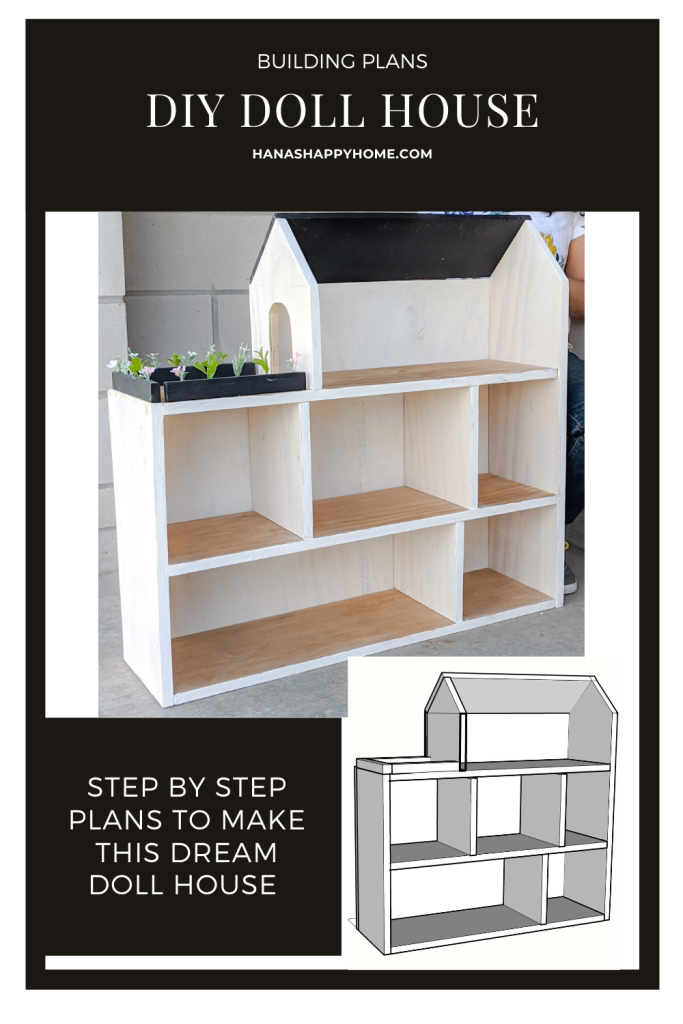
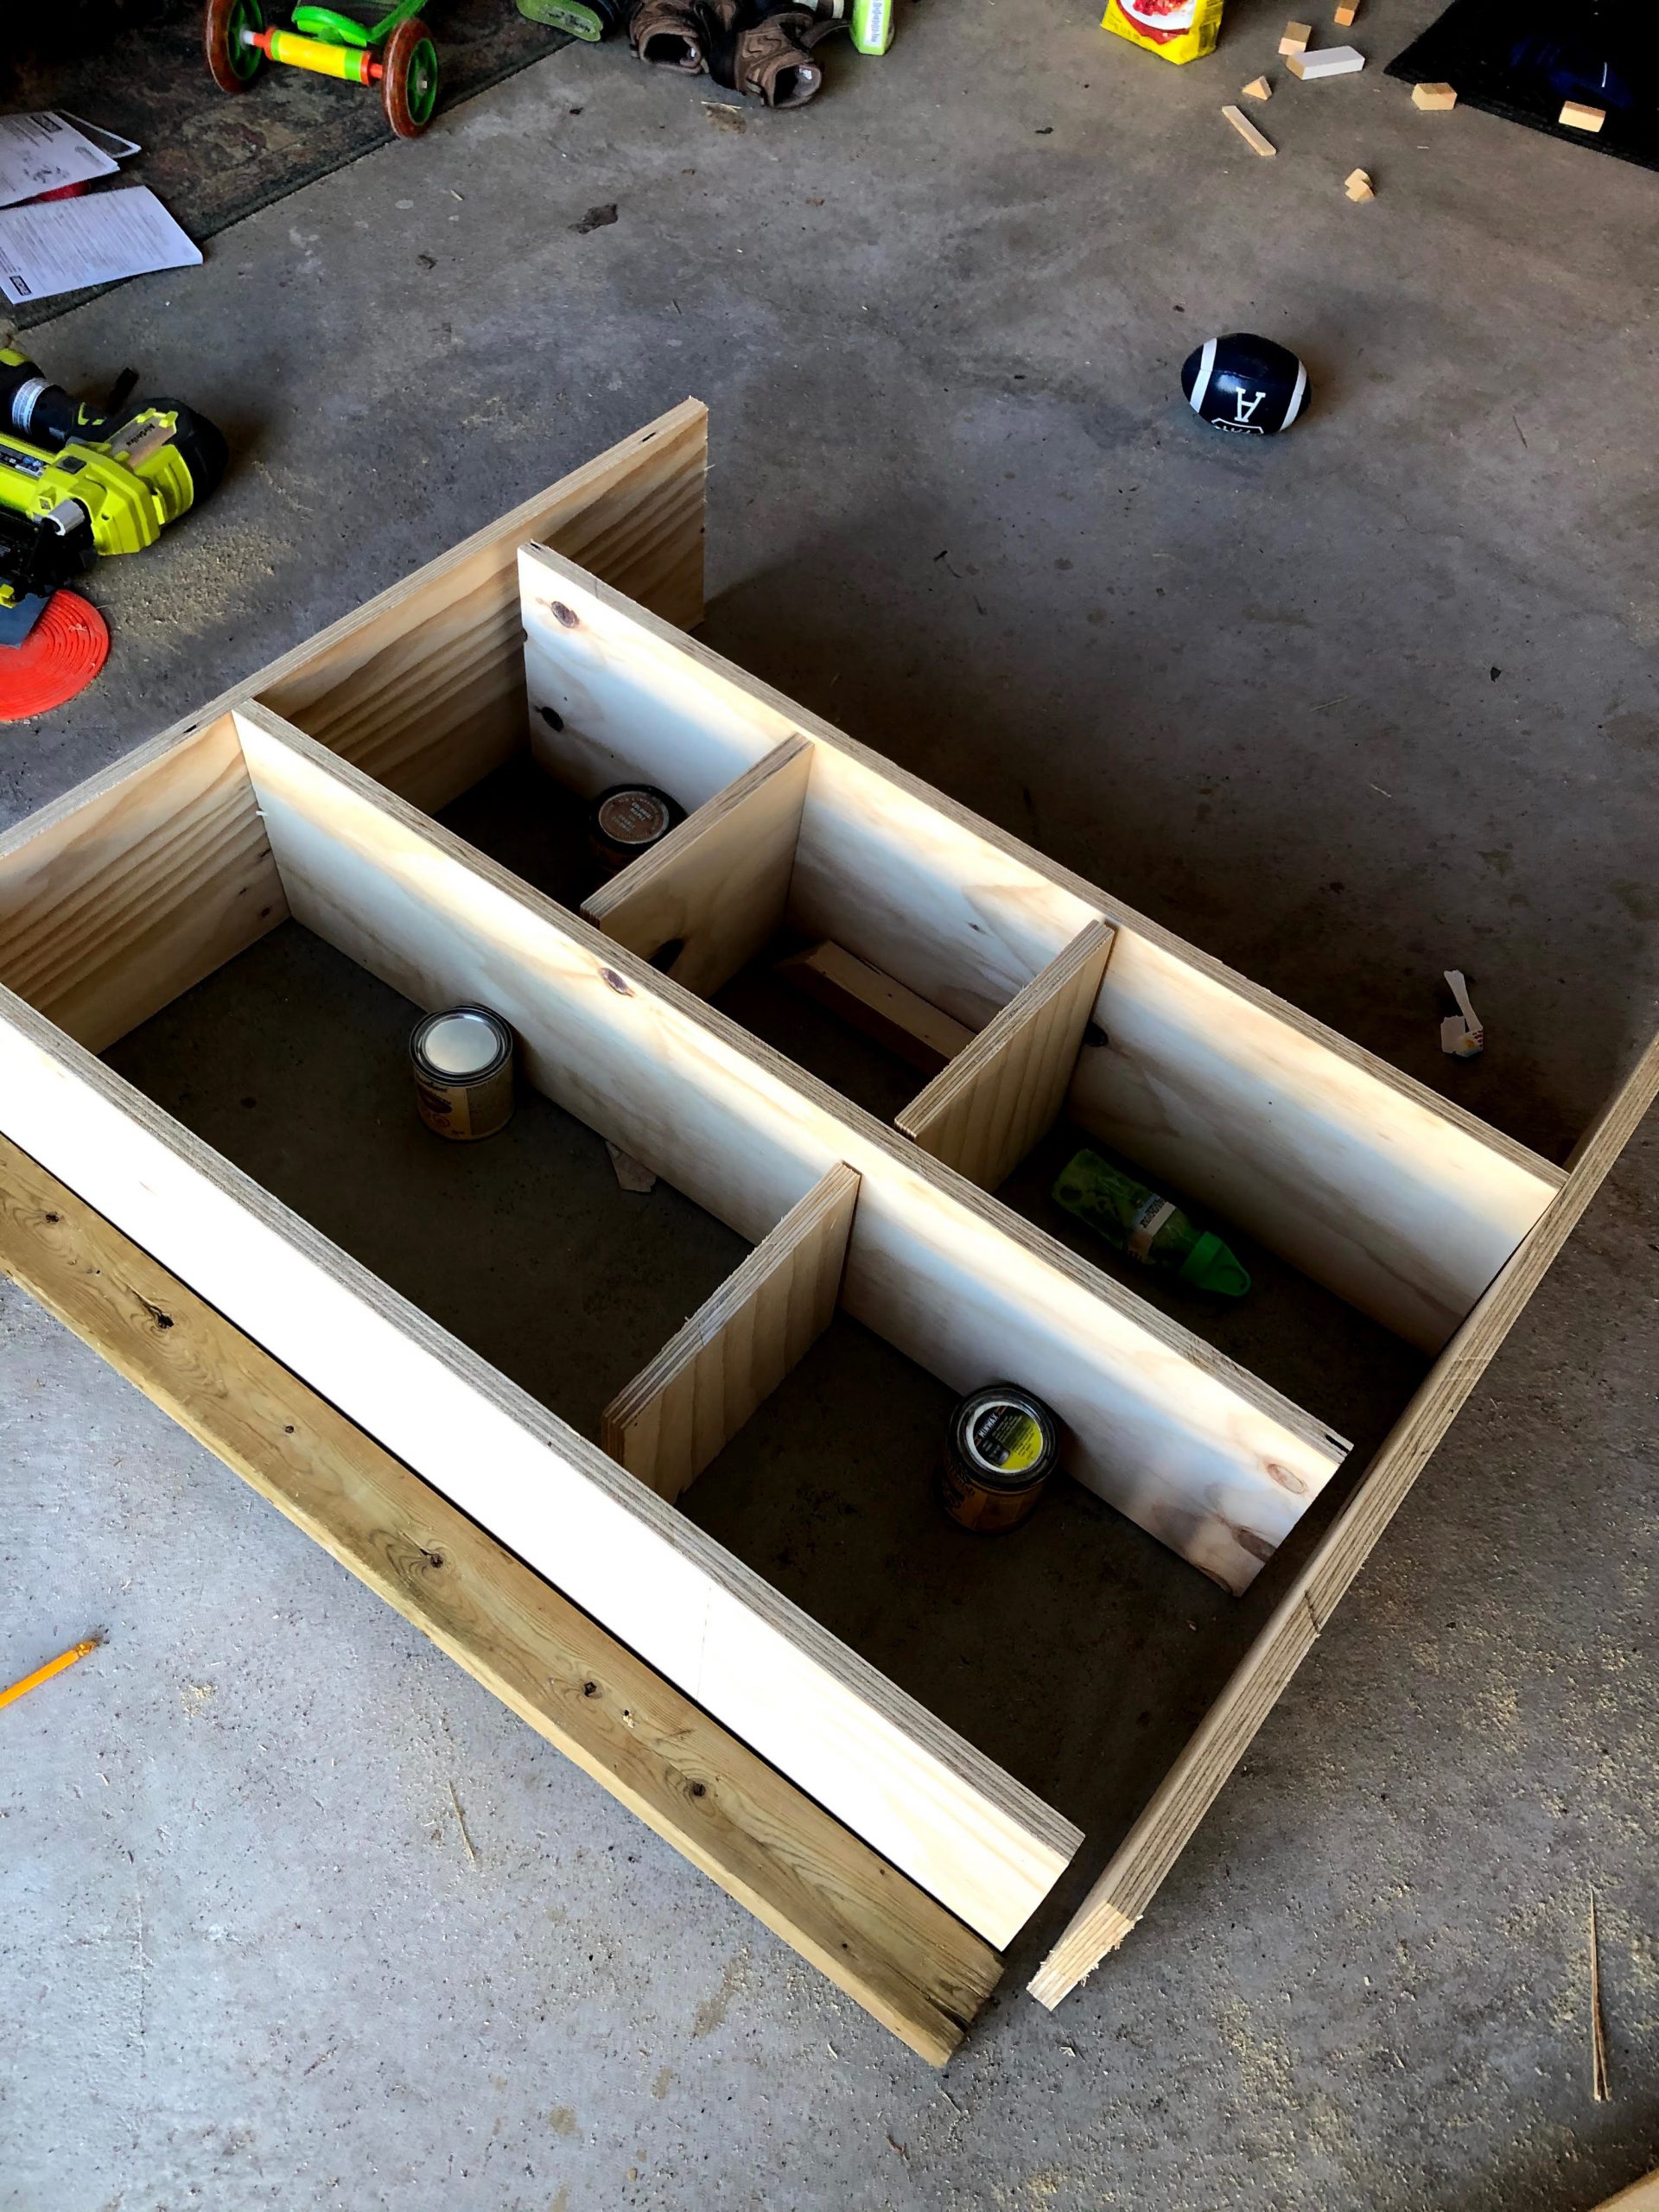
Step 3- Create the top floor with arch door and rooftop patio
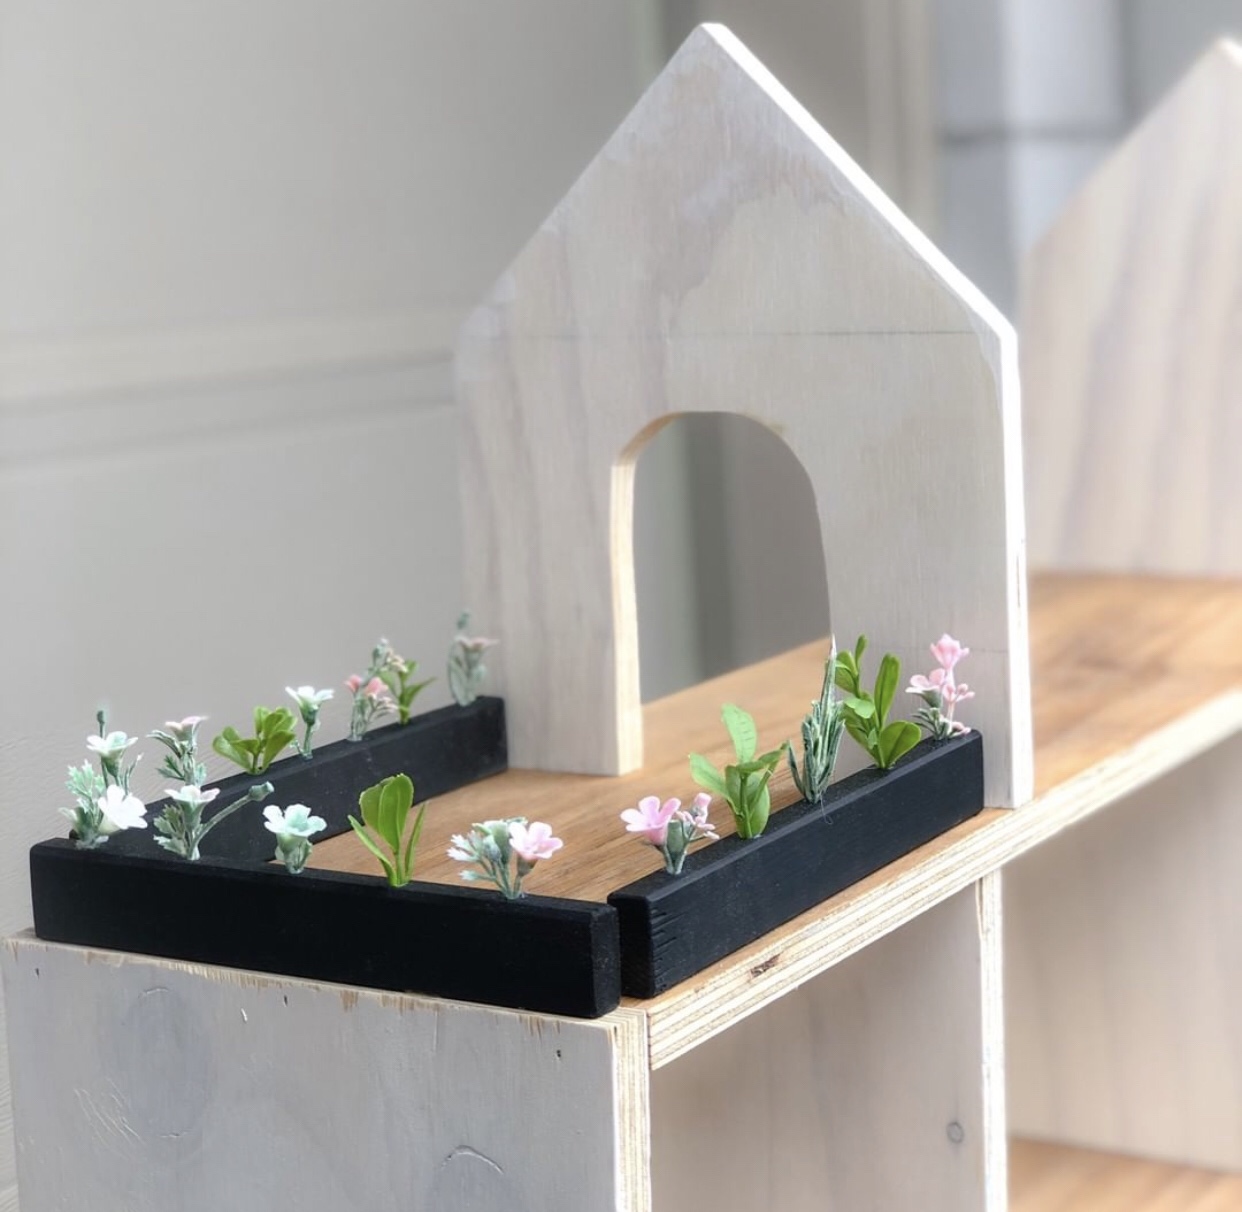
- To make the patio planters, you can use any thin scrap wood.

- I drilled holes with a 1/4 in drill bit. Spray painted it black and then I hot glued faux flowers


- To attach it, I simply used wood glue.
- For the arch door, take one of your room dividers and draw a 90* angle at the top. Use a speed square.

- Set your mitre saw to 45* and cut the triangle shape
- Use a jigsaw to make the arch shape. Make sure to use a fine tooth blade. The fine tooth blade allows you to make a curve much easier than the large tooth jigsaw blade.

- Cut another roof shape using the speed square on the long side of the house

Step 5- Assemble the DIY Modern doll house
- Now it’s time to build the DIY modern doll house. Start by adding the second floor and nailing on top of the first of the floor
- Attach the sides to the base and second floor

- Attach the 3rd (top level) to the second floor and sides
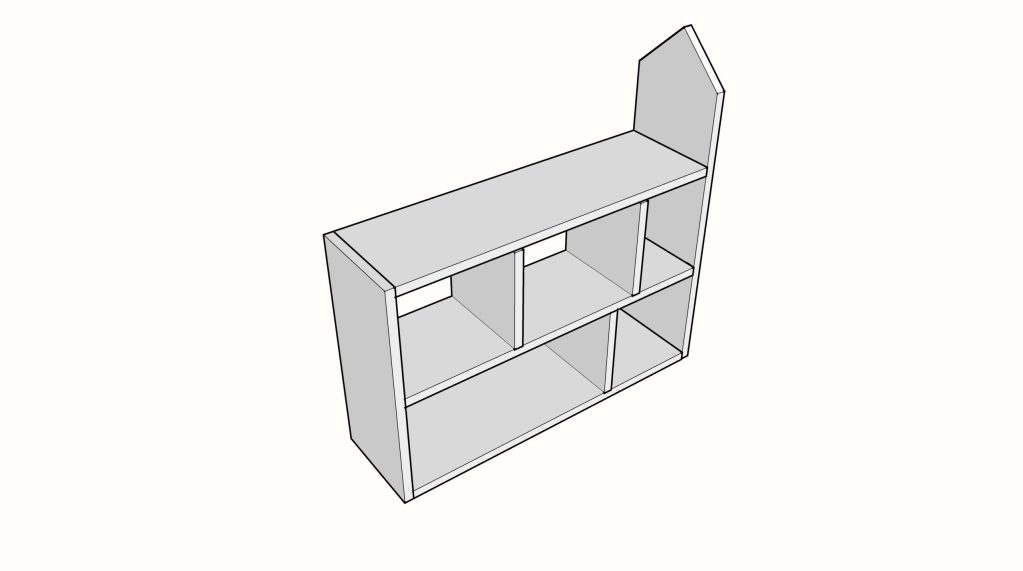
Step 6 – Attach the roof and backing of the DIY Modern Doll House
- You should have a full house except for the backing and roof.
- Cut the roof, measuring the distance between the two triangular walls. Make sure to cut the bottom long side on a 45* beveled so it makes up nicely with the back of the house. Paint it black. Nail it to the angled roof
- Lay the house down on 1/2 inch plywood and trace the shape. Cut it out. Cut the top angle beveled at 45* where it meets the roof
- Nail to the back of the doll house (or do this after you wallpaper and paint the walls of the rooms)

Finish touches
You need to fill, sand and paint the outer sides. You can also use your imagination to create furniture, wall treatments and flooring in the house.
For the detailed building guide including all the pieces and measurements, check out the DIY Doll House plans
If you build this house, be sure to share with me on instagram.



Pingback: My Instagram Journey to 50k followers - Hana's Happy Home
Pingback: 30 Stunning DIY Dollhouse Projects You Have To Try! - Mia's DIY Projects
Beste, ik ga via uw uitleg en voorbeelden ook zo’n prachtig huis proberen bouwen. Ik heb al een barbie popenhuis die men papa gemaakt heeft , maar heb ook door de jaren vintage meukeltjes verzameld en die wil ik een huisje geven , deze aangevuld met de vele mooie andere meubeltjes die ook ik ga trachten te maken. bedankt om me op weg te zetten , U bent een zeer creatieve inspiratie voor mij, vele groetjes Chantal
Hi Chantal! I had to translate this from Dutch: Dear, I will also try to build such a beautiful house through your explanation and examples. I already have a barbie dollhouse that my dad made, but I have also collected vintage furniture over the years and I want to give it a house, supplemented with the many beautiful other pieces of furniture that I will also try to make. thanks for getting me started, you are a very creative inspiration for me, many greetings Chantal
Thanks so much!! I can’t wait for you to create this!
One of the pictures looks like you painted the back of the house black, but the final pictures don’t show that. I think the final with the back the same as the walls looks great.
What did you do the the front edge of the plywood to make it smooth and acceptable? Could you glue a laminate on the front edge? Did you compound it or put some kind of layer on it that could be sanded and then painted?
Thank you,
Roger
Hi Roger – you can get edge banding and iron it on. I just used wood filler, and sanded it smooth
Finally finishing up the dollhouse! Question: no glue for the room dividers, just brad nails? I ask as I am concerned about nailing down from an upper level to a lower level divider as it will put a small hole in my nice stained polyurthane floors. Could glue eliminate that need. Also are those nails really necessary given the floors are attached by all the nails from the sides.
Nails on the sides are fine as they can be filled, touched up/painted, but not the stained floors.
Thank you!!
Struggling with final step (more details in contact email from main page. When one cuts a 45 degree angle on the roof the short side needs to be 6″ to match the roof line of the side piece. However, the cut list shows the roof to be cut to 6″. When the 45 degree angles is added the short side is less than 6″ and doesn’t match the roof line of the side piece – too short. Am I missing something or does the roof piece have to be longer than 6″ to start?
thank you,
Roger