I love hacking IKEA furniture. It’s probably one of my favourite things to do. I’ve hacked this scallop kids table, and this watermelon ombre dresser! The furniture at IKEA is so versatile that you can literally do anything with it. 3 years ago we bought an IKEA mydal bunkbed for the boys. Well no one has slept in that room for even one night since all 3 years. Now that my boys are 6 and almost 3, we decided that they should move into their own room. So I wanted to make this room exciting and fun for them.


Goals for the IKEA Mydal Bunk Bed Hack
- Transform the bunkbed and make it into something more stable. The IKEA bunkbed is meant for thinner foam mattresses. We had spring coil Posturepedic mattresses. It is really important to me that the kids get good back support so we opted for these mattresses that aren’t really recommended for this frame. Because of that, the frame is not that stable with the mattresses in. I need to transform the bed to make it more stable
- Add storage into the space. Currently the kids don’t even play in here because there’s nowhere for them to store their toys. Along the process to transform the space I made use of this really awkward nook by creating a built-in.
- Make it beautiful and give it that wow factor!
Tools and Materials
- Beadboard
- Primer
- Paint
- 3 pieces of 1×2 Pine (for the railing)
- 2 pieces 1×6 pine (for the steps)
- stain
How to: IKEA Mydal bunk bed hack
If you prefer to watch videos, here is a deep dive of how I Hacked this IKEA Mydal Bunk Bed
The first thing I did was reconfigure the Mydal bunk bed. I removed the posts for the ladder and the top front piece. This transformed the shape of the bed. Then I added 2×4’s to thicken up the vertical posts. Then I beautified the bunk bed. I did this by adding pieces of primed MDF to the existing vertical boards. I used 1×3 and 1×4 primed wood.
I got really lucky and found some scrap beadboard at the hardware store that they were going to throw away. It was leftover remnants from someone else’s project and I scooped it up. I added those as my horizontals that would enclose the mattress. This way you can’t see the mattress from the side of the bed.

Note: Be sure to ask your hardware store if you can use the scraps. Some will give for free, or at a discount, but some may not let you take it home.

After all the wood was secured I caulked and filled any nail holes and then I painted it this beautiful shade of Pewter Green by Sherwin Williams. Luckily I had this paint left over from my hallway board and batten. There is no incremental cost associated with it

Making the ladder was probably the most tricky part. The rugs are 18” across and have a 9” gap between rungs. I started by framing the ladder using a 2×4. I connected it to the bunk bed frame that was already there. Then I disguised the 2×4 using the pieces of pine I used for the rungs. I started at the bottom and placed the vertical posts on each side, then nailed them to the 2×4 frame. Then I placed a horizontal rung across. Then I continued my way up, nailing each piece to the frame as I went.

To get this gorgeous stain colour, I used a combination of Early American and 2 coats of Weathered Oak on top. Always be sure to sand and condition your wood before staining.


Adding Storage in an awkward nook: The built-in
I hated this awkward nook. I never understood why the builder added it in. But then, I found out that an IKEA Billy Bookcase was almost a perfect fit, and it was MEANT TO BE!
1 – create a base using scrap 2x4s. I wanted to elevate this off the ground so I used scrap 2×4’s and mending plates to create a base. It’s not pretty, but it works!
2- There is a gap on each side, so I cut scrap 2x4s and attached them to the sides of the Billy Bookcase. I screwed them from the inside. Then I cut long pieces of MDF and secure to the 2x4s to make it look truly like a building. I used this antique gold handle on the cabinet

I made the floating shelves from 1×2 Pine braces and birch 1/4” plywood for the tops and faces
For the counter, I got so lucky! I covered scrap wood with marble contact paper that I found at Dollarama for only $1.25!!!

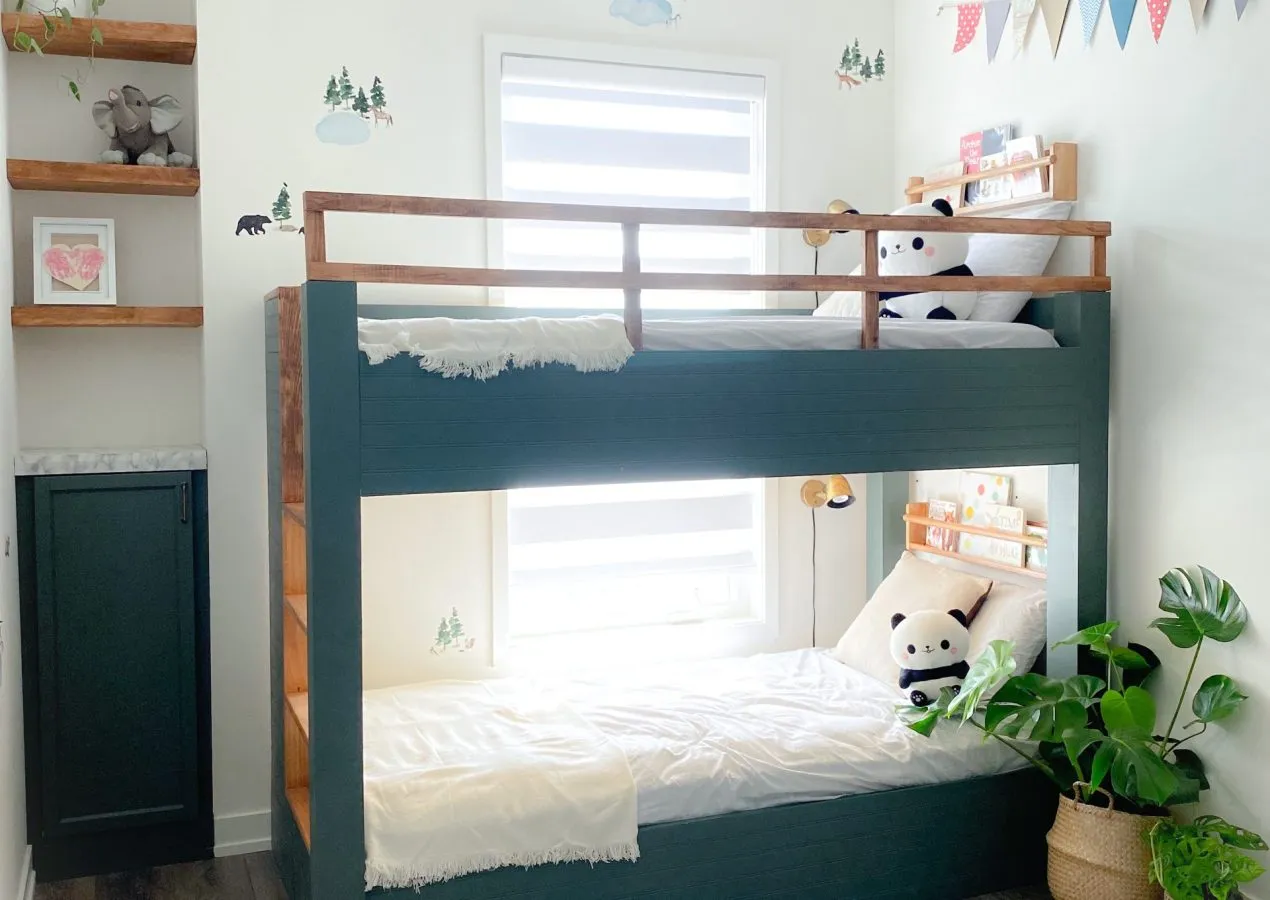
I love this space and so do my kids. I think it’s going to be the perfect space for them to grow into for many years! They have already been so eager to sleep here! To see a step by step tutorial, check out my instagram.
I debated for a long time if I should remove the decals from The Lovey Wall Co. I considered adding green shiplap to elevate the space. In the end I’m glad I left the decals because they are so cute and make it a kids room! I used 2 packs in this space and they’ve held up for 3 years!

DIY Wood Water Table From Scrap Wood - Hana's Happy Home
[…] fun to make. Every time I see my kids using my projects, it makes me so happy! I’ve hacked an IKEA bunk bed, upcycled an IKEA Kids table, and made a scrap wood growth […]
Amanda
How did you change the placement of the ladder? I didn’t see an explanation about that. Did you cut it off?
Hana’s Happy Home
Hi Amanda. It’s kind of hard to explain but I have a YouTube video linked in this post. It goes into detail about how I built this and moved the ladder
Cool Bunk Bed Ideas for Small Rooms – Home Improvement
[…] Source | Hana’s Happy Home […]
DIY Master Bedroom Accent Wall - Hana's Happy Home
[…] (just in case he rolled off!). I just had a mattress on the floor. We finally moved him to the bunk bed, and now it’s time to reclaim this space! My master bedroom is a smaller room, as I live in a […]
Christie
Cute! My girls just moved Internet and also have a bunk bed. Where are the sconces and little book shelves from?
Hana
All from IKEA! I used rub n buff on the scones as they were originally black.
Planlarıyla birlikte 10'dan fazla muhteşem DIY ranza fikri – My Blog
[…] Hana'nın teknik olarak bir planı yok ama ayrıntılı talimatlar var bu görünümün nasıl arşivleneceği […]
10+ amazing DIY bunk bed ideas with plans - Fashion Center
[…] Hana technically doesn't have a plan, but There are detailed instructions about how to archive this […]
10+ idées de lits superposés de bricolage incroyables avec des plans – my favorite jobs
[…] bien, Hana techniquement n'a pas de plan, mais elle a des instructions détaillées sur la façon d'archiver ce […]