All kids need a little table for their colouring, playdough and crafts. My own kids have spent hours on their kids craft table. This table has been in my client’s family passed down to the their third child. It was in good shape, but has colouring and stickers all over it.
I’m doing a rainbow room for my client. There’s so many rainbow rooms that I drew inspiration for. I started with a fun rainbow mural, and now am moving on to the functional aspects of this space. With a little bit of time and elbow grease, I made my own version of this adorable set from IKEA. Scroll to the end for FAQ about this project.

How to paint a kids craft table
Step 1: sand your table and chair. This table happened to be pine wood and I wanted to expose that. So I sanded it down using p60 grit. I actually used 2 sanders to speed up the process. It still took about 3 hours. After the stain was off, I finished off with p200 grit to even out any roughness. Below is the table and chair I started with (albeit, it had endured a lot of wear and tear)

Step 2: Clean well with a paper towel and then a tact cloth
Step 3: tape any areas that you want to paint so the wood remains free of paint. I taped off where the dipped legs would end, as well as under the base of the table and chair
Step 4: prime the areas where you will be painting. For this I used “wood and wall primer” by Sherwin Williams.
Step 5: time for paint. I painted the table too and legs. I had to use 2-4 coats depending on the pigment of the colour

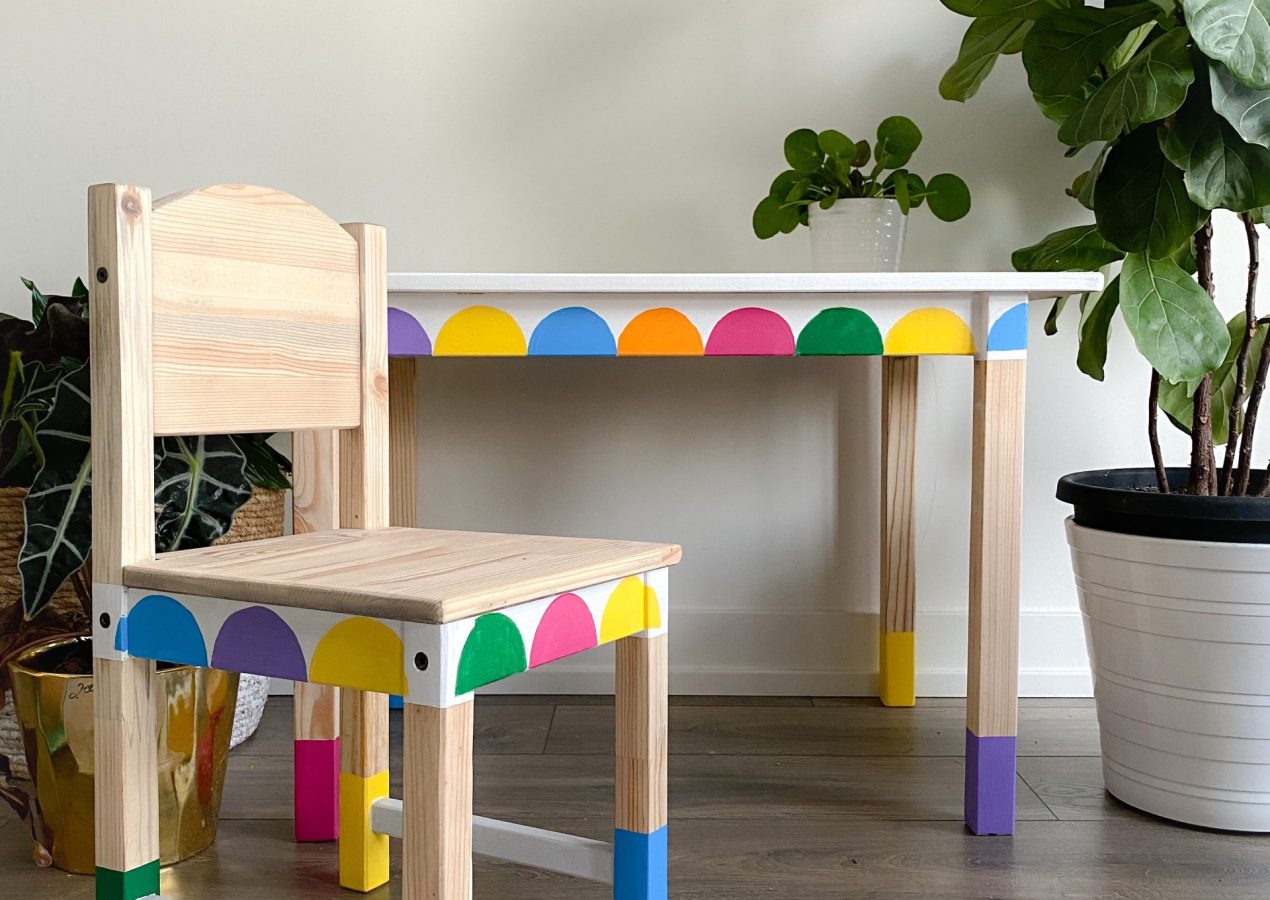
Step 6: how to paint the scallop detail for this kids craft table:
- Find a circle that would be size of the scallops you want. Trace and cut out the circle. Mine was 3”.
- Fold the circle in half. You have your scallop
- Find the middle point of the area you are painting. Fold your scallop once more so it’s folded into quarters. Now line up the quarter with the middle point and draw a Half scallop.
- Unfold so it’s back to a semi-circle. Now trace all the rest of your scallops.
- Paint it carefully using a craft brush with soft bristles.
Step 7: seal your new table and chairs using polyurethane. Follow the instructions and be sure to wear gloves!

See how I set up the scallop table and chairs in this craft corner and gallery wall.
Kids craft table FAQ
- Which table and chairs did you start with?
My client had an old IKEA Sundvik table and chairs that had stickers and crayons all over it. - Can I use this method on any table and chairs?
No, this will only work for furniture that is made from wood. Other IKEA pieces are made from laminate. Those will not sand down to wood. However, those can be primed and painted to a different colour using a similar method to the above. - What colours did you use for the rainbow scallop?
All the colours were from the Behr Marquee line in Satin from Home Depot. They are $5, so that’s a score! They are:
Diva Glam
Toucan
Squash Blossom
Solitary Tree
Yucatan
I Heart Potion - How much did the upgrade cost?
Since we had the kids craft table and chair, the only cost was the paint and polyurethane (Under $40) - I’ve never picked up a tool, can I do this project?
Yes!! This is the perfect beginner project because all your need is a sander!

Be sure to follow me on Instagram as I compete this rainbow room!

IKEA Bunk bed makeover - Hana's Happy Home
[…] hacking IKEA furniture. It’s probably one of my favourite things to do. I’ve hacked this scallop kids table, and this watermelon ombre dresser! The furniture at IKEA is so versatile that you can literally do […]
DIY Dresser Makeover for a Nursery - Hana's Happy Home
[…] laminate wood finish, I saw potential in it. I’ve painted so many furniture pieces like my kids scallop table and chairs, and an ombre dresser. Painting furniture is so fun and easy! This DIY Dresser Makeover consists of […]
IKEA PAX Wardrobe Hacks - Hana's Happy Home
[…] at a fraction of the cost. I have used IKEA products for so many great hacks including this kids craft table and chairs, an ombre dresser and my Billy Bookcase Entertainment centre we are getting so close to finishing […]
IKEA PAX Wardrobe Hacks - Hana's Happy Home
[…] at a fraction of the cost. I have used IKEA products for so many great hacks including this kids craft table and chairs, an ombre dresser and my Billy Bookcase Entertainment centre. I will be working on my own IKEA PAX […]